使用工具版本
默认已经安装 node.js 和 git。
1 | git version: git version 2.27.0.windows.1 |
git 客户端与 github 建立 SSH 连接
1 | Please make sure you have the correct access rights and the repository exists. |
当 git 客户端出现以上提示时,说明 SSH 连接过期,需要重新建立连接。参考如下方式:
- 先查看下 name 和 email
1 | # 查看user的name和email |
删除 .ssh 文件夹下的 known_hosts,路径为:
C:\Users\{$userrname}\.sshgit bash 输入命令
1 | $ ssh-keygen -t rsa -C {$youremail} |
一直按回车,等结束后,.ssh 文件夹下会生成两个文件:id_rsa 和 id_rsa.pub,将 id_rsa.pub 的内容全部复制。
登录个人 github 账户,进入 Settings → SSH and GPG keys,点击 New SSH key,将复制的内容粘贴到 Key 里,点击 Add SSH key。
git bash 输入命令
1 | $ ssh -T git@github.com |
在弹出的确定对话框输入:yes。
hexo 安装
在 git bash 中依次输入以下命令:
1 | $ npm install hexo-cli -g |
命令执行完成后,会在 F:\ 目录下,多一个 blog 文件夹。
修改 _config.yml 文件
修改 blog 根目录下的 _config.yml 文件,将 deploy 节点修改为如下内容:
1 | deploy: |
说明:_config.yml 文件的配置均为 [key: value] 形式,value 前面必须要有一个空格。
然后在 git bash 中输入以下命令,发布博客:
1 | $ hexo deploy |
访问自己的博客
博客地址:https://{$yourname}.github.io/
写一个自己的博客
hexo 的项目结构是在网站根目录的 source\_posts 目录下存放你的博客文档,以 .md 文档格式存储,默认已存在一个 hello-world.md 文章。
- 新建文章
1 | $ hexo new <title> |
会在 blog 的 source\_posts 目录下,新建一个名叫 <title>.md 文章,如:
1 | INFO Validating config |
之后,在文章中添加自己的内容即可,建议使用 Typora 编辑,其语法参考:如何使用 markdown?
- 发布文章
1 | $ hexo clean # 清楚缓存 |
至此,你的第一个自己的博客发布完成。
说明:以上 hexo 的命令,都要在 F:\blog 目录下执行。
修改博客的 themes
如果想修改自己博客的 themes,可以下载好想要的,然后拷贝到 blog 的 themes 目录下,然后修改 _config.yml 文件,将 theme 节点的值,修改为你下载好的 themes 的名称,如:
1 | theme: next |
之后,再按照你下载的 themes 的使用说明,做相应修改即可。
参考:NexT 的使用
NexT 中 tags 的使用
- 修改 NexT 目录下的 _config.yml 文件,取消 menu 菜单下 tags 字段的注释
1 | menu: |
- 在 blog 根目录的 source 目录下,新建 tags 目录
1 | $ hexo new page "tags" |
- 修改 tags 目录下的 index.md 文件
1 | title: tags |
NexT 中添加字数统计、阅读时长
- 安装 hexo-symbols-count-time 插件
1 | $ npm install hexo-symbols-count-time |
或者
1 | $ yarn add hexo-symbols-count-time |
- hexo 配置,根目录下的 _config.yaml 文件,添加 symbols_count_time 节点
1 | # Post wordcount display settings |
- NexT 配置,themes 目录下的 _config.yml 文件,symbols_count_time 节点
1 | # Post wordcount display settings |
Next 中添加访客统计、访问次数统计、文章阅读次数统计
- 打开 next 主题配置文件 \themes\next\_config.yml,搜索 busuanzi_count,把 enable 设置为 true。
1 | # Show Views / Visitors of the website / page with busuanzi. |
- 同样是在 next 主题配置文件 \themes\next\_config.yml 下,搜索 footer,在它底下添加 counter,设值为 true。
1 | footer: |
- 来到 themes\next\layout\_partials,找到 footer.swig 文件,打开编辑,在底下添加代码。
1 | {% if theme.footer.counter %} |
- 站点访客数、访问次数显示在网址底部,文章阅读次数在文章开头。
在博客中添加图片
md 文件中插入图片的语法为:![]()。
其中,方括号是图片描述,圆括号是图片路径。一般来说有三种图片路径,分别是相对路径,绝对路径和网络路径。
相对而言,使用相对路径会更加方便,设置如下:
- 安装 hexo-renderer-marked 插件
1 | $ npm install hexo-renderer-marked |
- 修改根目录下的 _config.yaml 配置
将:
1 | post_asset_folder: false |
修改为:
1 | post_asset_folder: true |
- 设置 Typora
点击文件 → 偏好设置,设置如下: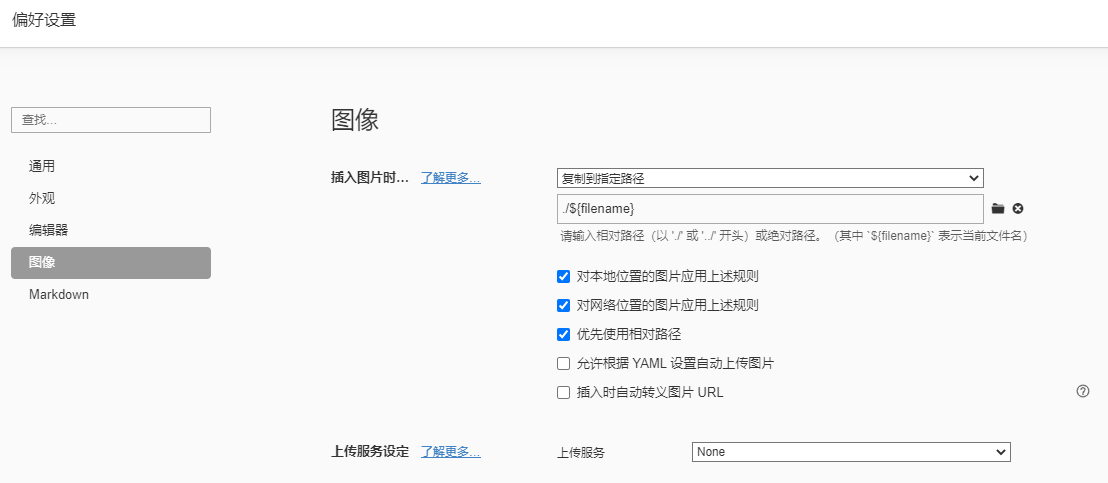
这样,在粘贴图片到文件中时,会自动将图片复制到 source\_posts 目录下,与 .md 文件同名的目录中。
之后,在将博客发布时,会自动上传到文章所生成的静态网页同级目录之下。