JDBC 概述
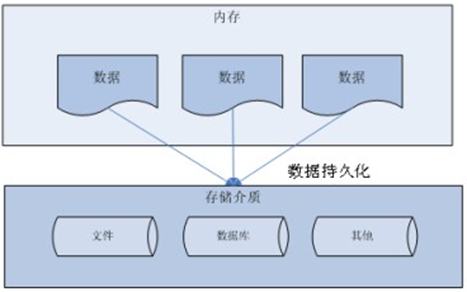
数据的持久化
持久化 (persistence):把数据保存到可掉电式存储设备中以供之后使用。大多数情况下,特别是企业级应用,数据持久化意味着将内存中的数据保存到硬盘上加以 “固化”,而持久化的实现过程大多通过各种关系数据库来完成。
持久化的主要应用是将内存中的数据存储在关系型数据库中,当然也可以存储在磁盘文件、XML 数据文件中。
Java 中的数据存储技术
在 Java 中,数据库存取技术可分为如下几类:
JDBC 直接访问数据库。
JDO (Java Data Object ) 技术。
第三方 O/R 工具,如 Hibernate,Mybatis 等。
JDBC 是 Java 访问数据库的基石,JDO、Hibernate、MyBatis 等只是更好的封装了 JDBC。
JDBC 介绍
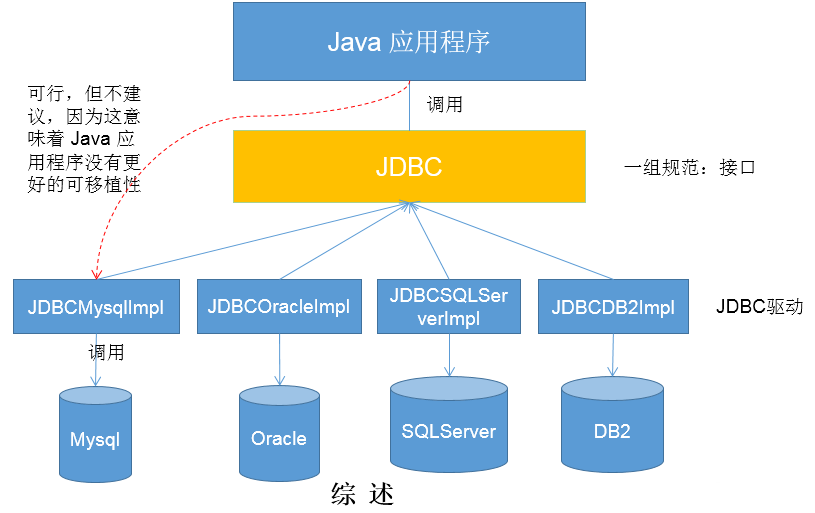
- JDBC (Java Database Connectivity) 是一个独立于特定数据库管理系统、通用的 SQL 数据库存取和操作的公共接口 (一组 API),定义了用来访问数据库的标准 Java 类库,然后
java.sql和javax.sql这些 Java 的 API,可以使用这些类库以一种标准的方法、方便地访问数据库资源。 - JDBC 为访问不同的数据库提供了一种统一的途径,为开发者屏蔽了一些细节问题。
- JDBC 的目标是使 Java 程序员使用 JDBC 可以连接任何提供了 JDBC 驱动程序的数据库系统,这样就使得程序员无需对特定的数据库系统的特点有过多的了解,从而大大简化和加快了开发过程。
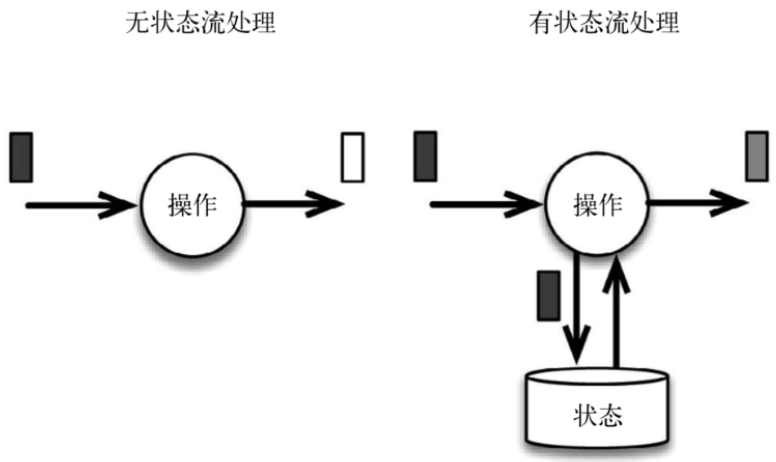
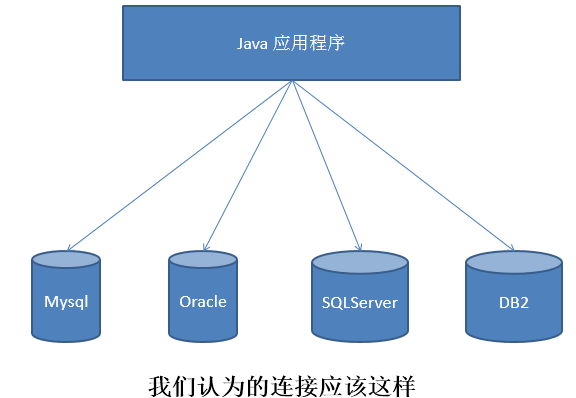
- 如果没有 JDBC,那么 Java 程序访问数据库时是这样的:
- 有了 JDBC,Java 程序访问数据库时是这样的:
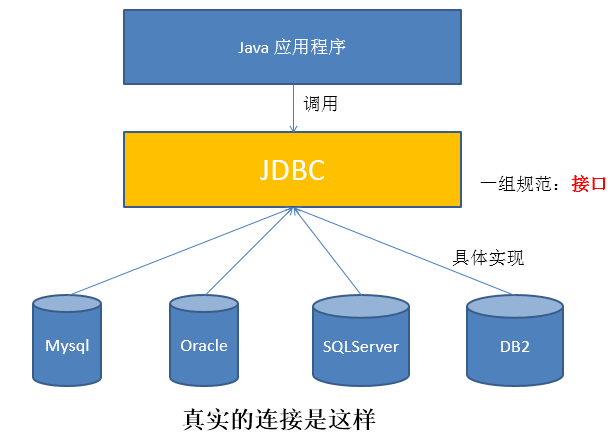
- 总结如下:
JDBC 体系结构
- JDBC 接口 (API) 包括两个层次:
- 面向应用的 API:Java API,抽象接口,供应用程序开发人员使用 (连接数据库,执行 SQL 语句,获得结果)。
- 面向数据库的 API:Java Driver API,供开发商开发数据库驱动程序用。
面向接口编程:
JDBC 是 sun 公司提供一套用于数据库操作的接口,Java 程序员只需要面向这套接口编程即可。
不同的数据库厂商,需要针对这套接口,提供不同实现。不同的实现的集合,即为不同数据库的驱动。
JDBC 程序编写步骤

ODBC (Open Database Connectivity,开放式数据库连接),是微软在 Windows 平台下推出的。使用者在程序中只需要调用 ODBC API,由 ODBC 驱动程序将调用转换成为对特定的数据库的调用请求。
获取数据库连接
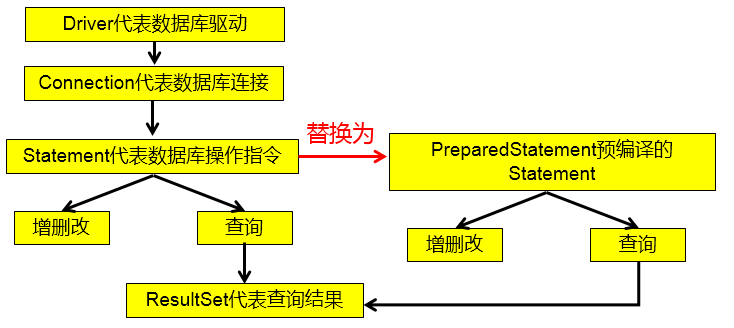
要素一:Driver 驱动
java.sql.Driver接口是所有 JDBC 驱动程序需要实现的接口。这个接口是提供给数据库厂商使用的,不同数据库厂商提供不同的实现。在程序中不需要直接去访问实现了 Driver 接口的类,而是由驱动程序管理器类 (
java.sql.DriverManager) 去调用这些 Driver 实现。第一步:Maven 添加驱动依赖。
MySQL:
1
2
3
4
5<dependency>
<groupId>mysql</groupId>
<artifactId>mysql-connector-java</artifactId>
<version>8.0.25</version>
</dependency>PostgreSQL:
1
2
3
4
5<dependency>
<groupId>org.postgresql</groupId>
<artifactId>postgresql</artifactId>
<version>42.2.10</version>
</dependency>
第二步:加载驱动。加载 JDBC 驱动需调用 Class 类的静态方法
forName(),并向其传递要加载的 JDBC 驱动的类名。MySQL:
1
Class.forName("com.mysql.cj.jdbc.Driver");
com.mysql.jdbc.Driver已被舍弃。PostgreSQL:
1
Class.forName("org.postgresql.Driver");
第三步:注册驱动。DriverManager 类是驱动程序管理器类,负责管理驱动程序。
DriverManager 类使用
registerDriver()注册驱动。通常不用显式调用 DriverManager 类的
registerDriver()来注册驱动程序类的实例,因为 Driver 接口的驱动程序类 (即实现类) 都包含了一个静态代码块,在这个静态代码块中,会调用 DriverManager 类 的registerDriver()来注册自身的一个实例。下图是 MySQL 的 Driver 实现类的源码:1
2
3
4
5
6
7
8
9
10
11
12
13
14
15
16
17package com.mysql.cj.jdbc;
import java.sql.DriverManager;
import java.sql.SQLException;
public class Driver extends NonRegisteringDriver implements java.sql.Driver {
public Driver() throws SQLException {
}
static {
try {
DriverManager.registerDriver(new Driver());
} catch (SQLException var1) {
throw new RuntimeException("Can't register driver!");
}
}
}
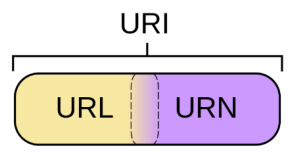
要素二:URL
JDBC URL 用于标识一个被注册的驱动程序,驱动程序管理器通过这个 URL 选择正确的驱动程序,从而建立到数据库的连接。
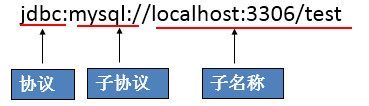
JDBC URL 的标准由三部分组成,各部分间用冒号分隔。
- 格式:协议:子协议:子名称
- 协议:JDBC URL 中的协议总是 jdbc。
- 子协议:子协议用于标识一个数据库驱动程序。
- 子名称:一种标识数据库的方法。子名称可以依不同的子协议而变化,用子名称的目的是为定位数据库提供足够的信息。包含主机名 (对应服务端的 ip 地址),端口号和数据库名。
举例:
几种常用数据库的 JDBC URL
MySQL 的连接 URL 的编写方式:
- jdbc:mysql://主机名称:mysql服务端口号/数据库名称?参数=值&参数=值
- jdbc:mysql://localhost:3306/atguigu
- jdbc:mysql://localhost:3306/atguigu?useUnicode=true&characterEncoding=utf8
- 如果 JDBC 程序与服务器端的字符集不一致,会导致乱码,此时,可以通过参数指定服务器端的字符集。
- jdbc:mysql://localhost:3306/atguigu?user=root&password=123456
- jdbc:mysql://主机名称:mysql服务端口号/数据库名称?参数=值&参数=值
Oracle 9i 的连接 URL 的编写方式:
- jdbc:oracle:thin:@主机名称:oracle服务端口号:数据库名称
- jdbc:oracle:thin:@localhost:1521:atguigu
- jdbc:oracle:thin:@主机名称:oracle服务端口号:数据库名称
SQLServer 的连接 URL 的编写方式:
jdbc:sqlserver://主机名称:sqlserver服务端口号:DatabaseName=数据库名称
- jdbc:sqlserver://localhost:1433:DatabaseName=atguigu
要素三:用户名和密码
- user 和 password,可以用
属性名=属性值的方式告诉数据库。 - 可以调用 DriverManager 类的
getConnection()方法建立到数据库的连接。
数据库连接方式举例
连接方式一
1
2
3
4
5
6
7
8
9
10
11
12
13
14
15
16
17
18
19
20
21public void testConnection1() {
try {
// 1.提供java.sql.Driver接口实现类的对象
Driver driver = null;
driver = new com.mysql.cj.jdbc.Driver();
// 2.提供url,指明具体操作的数据
String url = "jdbc:mysql://localhost:3306/test";
// 3.提供Properties的对象,指明用户名和密码
Properties info = new Properties();
info.setProperty("user", "root");
info.setProperty("password", "abc123");
// 4.调用driver的connect(),获取连接
Connection connection = driver.connect(url, info);
System.out.println(connection);
} catch (SQLException e) {
e.printStackTrace();
}
}说明:上述代码中显式出现了第三方数据库的 API。
连接方式二
1
2
3
4
5
6
7
8
9
10
11
12
13
14
15
16
17
18
19
20
21
22public void testConnection2() {
try {
// 1.实例化Driver
String className = "com.mysql.cj.jdbc.Driver";
Class<?> clazz = Class.forName(className);
Driver driver = (Driver) clazz.newInstance();
// 2.提供url,指明具体操作的数据
String url = "jdbc:mysql://localhost:3306/test";
// 3.提供Properties的对象,指明用户名和密码
Properties info = new Properties();
info.setProperty("user", "root");
info.setProperty("password", "abc123");
// 4.调用driver的connect(),获取连接
Connection connection = driver.connect(url, info);
System.out.println(connection);
} catch (Exception e) {
e.printStackTrace();
}
}说明:相较于方式一,这里使用反射实例化 Driver,不在代码中体现第三方数据库的 API,体现了面向接口编程思想。
连接方式三
1
2
3
4
5
6
7
8
9
10
11
12
13
14
15
16
17
18
19
20
21
22public void testConnection3() {
try {
// 1.数据库连接的4个基本要素:
String url = "jdbc:mysql://localhost:3306/test";
String user = "root";
String password = "abc123";
String driverName = "com.mysql.cj.jdbc.Driver";
// 2.实例化Driver
Class<?> clazz = Class.forName(driverName);
Driver driver = (Driver) clazz.newInstance();
// 3.注册驱动
DriverManager.registerDriver(driver);
// 4.获取连接
Connection connection = DriverManager.getConnection(url, user, password);
System.out.println(connection);
} catch (Exception e) {
e.printStackTrace();
}
}说明:使用 DriverManager 实现数据库的连接。体会获取连接必要的 4 个基本要素。
连接方式四
1
2
3
4
5
6
7
8
9
10
11
12
13
14
15
16
17
18
19
20
21
22
23
24
25
26
27
28
29
30
31
32public void testConnection4() {
try {
// 1.数据库连接的4个基本要素:
String url = "jdbc:mysql://localhost:3306/test";
String user = "root";
String password = "abc123";
String driverName = "com.mysql.cj.jdbc.Driver";
// 2.加载驱动(实例化Driver和注册驱动)
Class.forName(driverName);
// Driver driver = (Driver) clazz.newInstance();
// 3.注册驱动
// DriverManager.registerDriver(driver);
/*
可以注释掉上述代码的原因,是因为在mysql的Driver类中声明有(其他数据库的Driver类有类似代码):
static {
try {
DriverManager.registerDriver(new Driver());
} catch (SQLException var1) {
throw new RuntimeException("Can't register driver!");
}
}
*/
// 4.获取连接
Connection connection = DriverManager.getConnection(url, user, password);
System.out.println(connection);
} catch (Exception e) {
e.printStackTrace();
}
}说明:不必显式的注册驱动。因为在 DriverManager 的源码中已经存在静态代码块,实现了驱动的注册。
连接方式五 (最终版)
1
2
3
4
5
6
7
8
9
10
11
12
13
14
15
16
17
18
19
20
public void testConnection5() throws Exception {
// 1.加载配置文件
InputStream is = ConnectionTest.class.getClassLoader().getResourceAsStream("jdbc.properties");
Properties pros = new Properties();
pros.load(is);
// 2.读取配置信息
String user = pros.getProperty("user");
String password = pros.getProperty("password");
String url = pros.getProperty("url");
String driverClass = pros.getProperty("driverClass");
// 3.加载驱动
Class.forName(driverClass);
// 4.获取连接
Connection connection = DriverManager.getConnection(url,user,password);
System.out.println(connection);
}配置文件 jdbc.properties 内容如下:
1
2
3
4user=root
password=abc123
url=jdbc:mysql://localhost:3306/test
driverClass=com.mysql.cj.jdbc.Driver说明:使用配置文件的方式保存配置信息,在代码中加载配置文件。
使用配置文件的好处:
- 实现了代码和数据的分离,如果需要修改配置信息,直接在配置文件中修改,不需要深入代码。
- 如果修改了配置信息,省去重新编译、打包的过程。
使用 PreparedStatement 实现 CRUD 操作
Java 操作和访问数据库
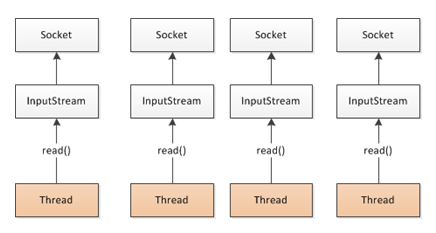
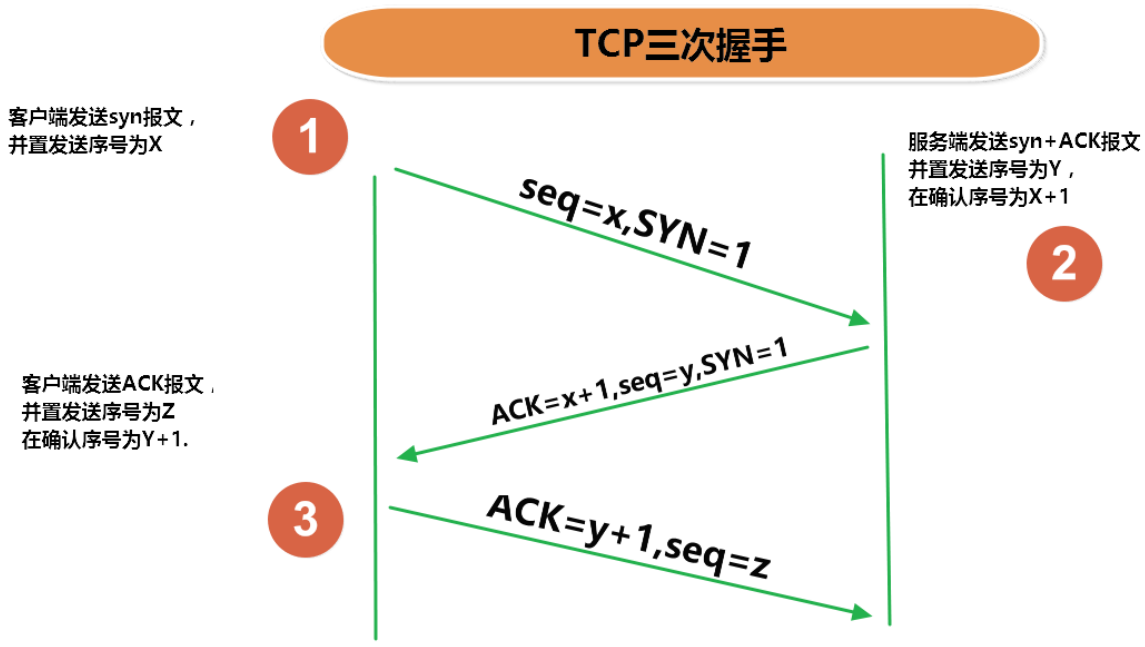
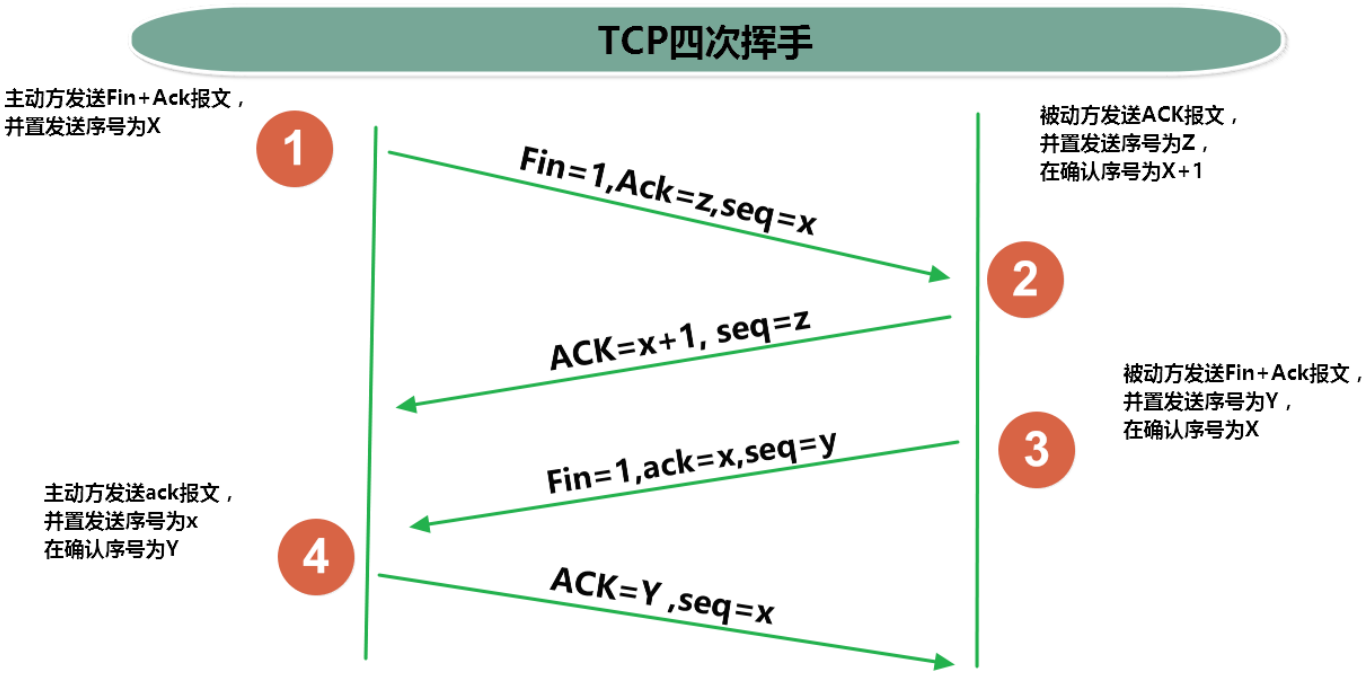
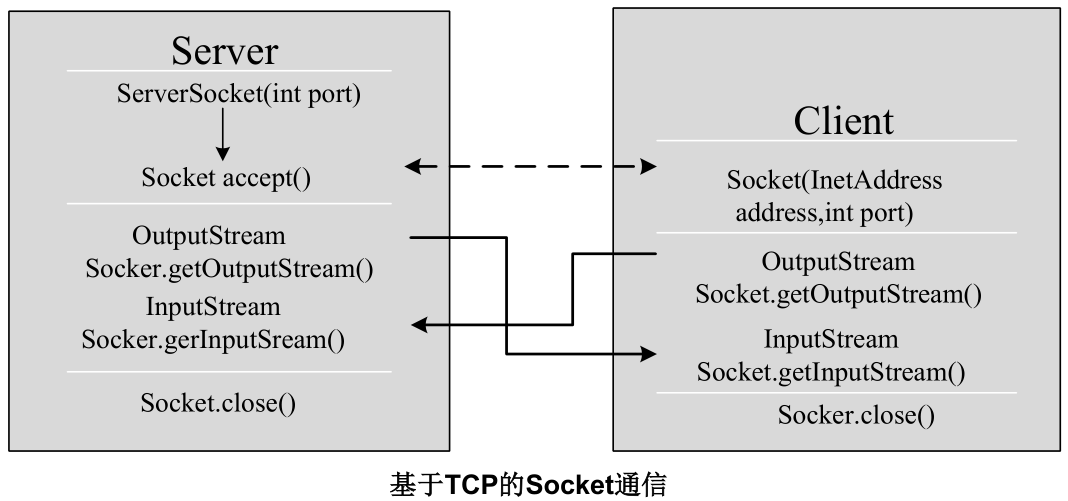
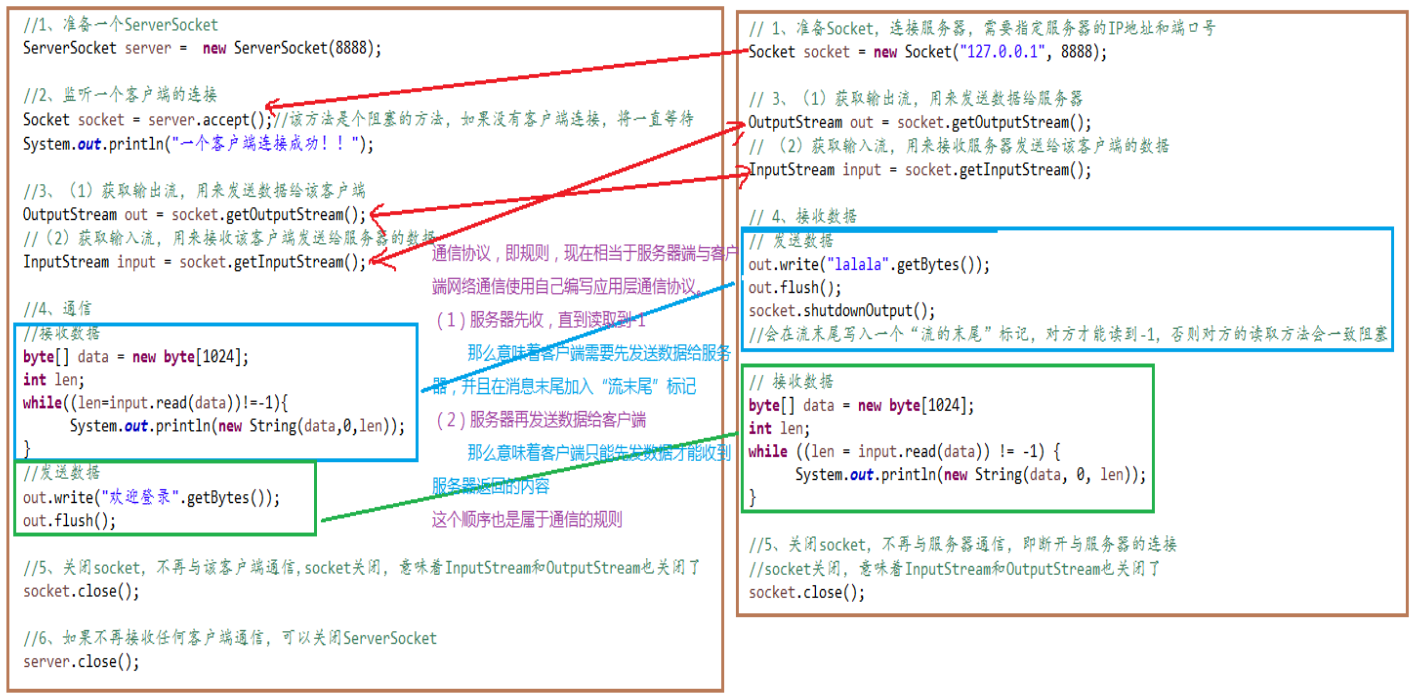
数据库连接被用于向数据库服务器发送命令和 SQL 语句,并接受数据库服务器返回的结果。其实一个数据库连接就是一个 Socket 连接。
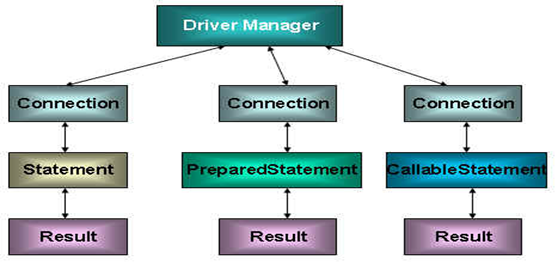
在
java.sql包中有 3 个接口分别定义了对数据库的调用的不同方式:- Statement:用于执行静态 SQL 语句并返回它所生成结果的对象。
- PrepatedStatement:SQL 语句被预编译并存储在此对象中,可以使用此对象多次高效地执行该语句。
- CallableStatement:用于执行 SQL 存储过程。
Java 与 SQL 对应数据类型转换表
| Java 类型 | SQL 类型 |
|---|---|
| boolean | BIT |
| byte | TINYINT |
| short | SMALLINT |
| int | INTEGER |
| long | BIGINT |
| String | CHAR,VARCHAR,LONGVARCHAR |
| byte array | BINARY , VAR BINARY |
| java.sql.Date | DATE |
| java.sql.Time | TIME |
| java.sql.Timestamp | TIMESTAMP |
使用 Statement 操作数据表的弊端
通过调用 Connection 对象的
createStatement()创建该对象。该对象用于执行静态的 SQL 语句,并且返回执行结果。Statement 接口中定义了下列方法用于执行 SQL 语句:
1
2
3
4
5// 执行更新操作INSERT、UPDATE、DELETE
int executeUpdate(String sql) throws SQLException;
// 执行查询操作SELECT
ResultSet executeQuery(String sql) throws SQLException;但是,使用 Statement 操作数据表存在弊端:
- 问题一:存在拼串操作,繁琐。
- 问题二:存在 SQL 注入问题。
SQL 注入是利用某些系统没有对用户输入的数据进行充分的检查,而在用户输入的数据中注入非法的 SQL 语句段或命令,如:
SELECT user, password FROM user_table WHERE user='a' OR 1 = ' AND password = ' OR '1' = '1'),从而利用系统的 SQL 引擎完成恶意行为的做法。对于 Java 而言,要防范 SQL 注入,只要用 PreparedStatement (从 Statement 扩展而来) 取代 Statement 就可以了。
代码演示:
1
2
3
4
5
6
7
8
9
10
11
12
13
14
15
16
17
18
19
20
21
22
23
24
25
26
27
28
29
30
31
32
33
34
35
36
37
38
39
40
41
42
43
44
45
46
47
48
49
50
51
52
53
54
55
56
57
58
59
60
61
62
63
64
65
66
67
68
69
70
71
72
73
74
75
76
77
78
79
80
81
82
83
84
85
86
87
88
89
90
91
92
93
94
95
96
97
98
99
100
101
102
103
104
105public class StatementTest {
// 使用Statement实现对数据表的查询操作
public static <T> T get(String sql, Class<T> clazz) {
Connection connection = null;
Statement statement = null;
ResultSet resultSet = null;
try {
// 1.加载配置文件
InputStream is = StatementTest.class.getClassLoader().getResourceAsStream("jdbc.properties");
Properties properties = new Properties();
properties.load(is);
// 2.读取配置信息
String user = properties.getProperty("user");
String password = properties.getProperty("password");
String url = properties.getProperty("url");
String driverClass = properties.getProperty("driverClass");
// 3.加载驱动
Class.forName(driverClass);
// 4.获取连接
connection = DriverManager.getConnection(url, user, password);
statement = connection.createStatement();
resultSet = statement.executeQuery(sql);
// 获取结果集的元数据
ResultSetMetaData resultSetMetaData = resultSet.getMetaData();
// 获取结果集的列数
int columnCount = resultSetMetaData.getColumnCount();
if (resultSet.next()) {
T t = clazz.newInstance();
for (int i = 0; i < columnCount; i++) {
// 1.获取列的名称
// String columnName = resultSetMetaData.getColumnName(i+1);
// 1.获取列的别名
String columnName = resultSetMetaData.getColumnLabel(i + 1);
// 2. 根据列名获取对应数据表中的数据
Object columnVal = resultSet.getObject(columnName);
// 3. 将数据表中得到的数据,封装进对象
Field field = clazz.getDeclaredField(columnName);
field.setAccessible(true);
field.set(t, columnVal);
}
return t;
}
} catch (Exception e) {
e.printStackTrace();
} finally {
// 关闭资源
if (resultSet != null) {
try {
resultSet.close();
} catch (SQLException e) {
e.printStackTrace();
}
}
if (statement != null) {
try {
statement.close();
} catch (SQLException e) {
e.printStackTrace();
}
}
if (connection != null) {
try {
connection.close();
} catch (SQLException e) {
e.printStackTrace();
}
}
}
return null;
}
public static void main(String[] args) {
// 使用Statement的弊端:需要拼写sql语句,并且存在SQL注入的问题
// 如何避免出现sql注入:只要用 PreparedStatement(从Statement扩展而来) 取代 Statement
Scanner scanner = new Scanner(System.in);
System.out.print("请输入用户名:");
String user = scanner.nextLine();
System.out.print("请输入密码:");
String password = scanner.nextLine();
// SELECT user,password FROM user_table WHERE user = '1' or ' AND password = '=1 or '1' = '1'
String sql = "SELECT user,password FROM user_table WHERE user = '" + user + "' AND password = '" + password + "'";
User returnUser = get(sql, User.class);
if (returnUser != null) {
System.out.println("登录成功");
} else {
System.out.println("用户名不存在或密码错误");
}
}
}改进:
PreparedStatement的使用
PreparedStatement介绍
通过调用 Connection 对象的
preparedStatement(String sql)获取 PreparedStatement 对象。PreparedStatement 接口是 Statement 的子接口,它表示一条预编译过的 SQL 语句。
PreparedStatement 对象所代表的 SQL 语句中的参数用问号 (?) 来表示,调用 PreparedStatement 对象的
setXxx()(Xxx 表示数据类型) 来设置这些参数。setXxx()有两个参数,第一个参数是要设置的 SQL 语句中的问号参数的索引 (从 1 开始),第二个是设置的 SQL 语句中的该索引位置对应参数的值。
PreparedStatement 与 Statement 的对比
- 代码的可读性和可维护性。
- PreparedStatement 通过预编译,可以防止 SQL 注入 (占位符的位置只是参数,SQL 的语意,在预编译时已经完成)。
- PreparedStatement 可以操作 Blob 的数据,而 Statement 做不到。
- PreparedStatement 能最大可能提高性能:
- DBServer 会对预编译语句提供性能优化。因为预编译语句有可能被重复调用,所以语句在被 DBServer 的编译器编译后的执行代码被缓存下来,那么下次调用时只要是相同的预编译语句就不需要编译,只要将参数直接传入编译过的语句执行代码中就会得到执行。
- 在 Statement 语句中,即使是相同操作,但因为数据内容不一样,所以整个语句本身不能匹配,没有缓存语句的意义。事实是没有数据库会对普通语句编译后的执行代码缓存。这样,每执行一次都要对传入的语句编译一次。
- 对于新的 SQL 语句,需要经过语法检查,语义检查,翻译成二进制命令等操作,PreparedStatement 的语句是预编译的,会被缓存,就不再需要经过前面的那几个操作,从而提高效率。
使用 PreparedStatement 实现增、删、改操作
常规:
1
2
3
4
5
6
7
8
9
10
11
12
13
14
15
16
17
18
19
20
21
22
23
24
25
26
27
28
29
30
31
32
33
34
35
36
37
38
39
40
41
42
43
44
45
46
47
48
49
50
51
52
53
54
55
56
57
58
59
60
61public class PreparedStatementUpdateTest {
// 向customers表中添加一条记录
public static void testInsert() {
Connection connection = null;
PreparedStatement preparedStatement = null;
try {
// 1.读取配置文件中的4个基本信息
InputStream is = ClassLoader.getSystemClassLoader().getResourceAsStream("jdbc.properties");
Properties properties = new Properties();
properties.load(is);
String user = properties.getProperty("user");
String password = properties.getProperty("password");
String url = properties.getProperty("url");
String driverClass = properties.getProperty("driverClass");
// 2.加载驱动
Class.forName(driverClass);
// 3.获取连接
connection = DriverManager.getConnection(url, user, password);
// 4.预编译sql语句,返回PreparedStatement的实例
String sql = "insert into customers(name, email, birth) values(?, ?, ?)";// ?: 占位符
preparedStatement = connection.prepareStatement(sql);
// 5.填充占位符
preparedStatement.setString(1, "哪吒");
preparedStatement.setString(2, "nezha@gmail.com");
SimpleDateFormat sdf = new SimpleDateFormat("yyyy-MM-dd");
java.util.Date date = sdf.parse("1000-01-01");
preparedStatement.setDate(3, new Date(date.getTime()));// java.util.Date与java.sql.Date转换
// 6.执行操作
preparedStatement.execute();
} catch (Exception e) {
e.printStackTrace();
} finally {
// 7.资源的关闭
try {
if (preparedStatement != null) {
preparedStatement.close();
}
} catch (SQLException e) {
e.printStackTrace();
}
try {
if (connection != null) {
connection.close();
}
} catch (SQLException e) {
e.printStackTrace();
}
}
}
public static void main(String[] args) {
testInsert();
}
}通用:
1
2
3
4
5
6
7
8
9
10
11
12
13
14
15
16
17
18
19
20
21
22
23
24
25
26
27
28
29
30
31
32
33
34
35
36
37
38
39
40
41
42
43
44
45
46
47
48
49
50
51
52
53
54
55
56
57
58
59
60
61
62
63
64
65public class JDBCUtils {
// 使用throws抛出异常,在真正用到Connection的地方,统一使用try/catch,防止获取连接时出现异常,导致Connection为空但代码继续执行
public static Connection getConnection() throws Exception {
// 1.读取配置文件中的4个基本信息
InputStream is = ClassLoader.getSystemClassLoader().getResourceAsStream("jdbc.properties");
Properties properties = new Properties();
properties.load(is);
String user = properties.getProperty("user");
String password = properties.getProperty("password");
String url = properties.getProperty("url");
String driverClass = properties.getProperty("driverClass");
// 2.加载驱动
Class.forName(driverClass);
// 3.获取连接
Connection connection = DriverManager.getConnection(url, user, password);
return connection;
}
public static void closeResource(Connection connection, Statement statement) {
if (statement != null) {
try {
statement.close();
} catch (SQLException e) {
e.printStackTrace();
}
}
if (connection != null) {
try {
connection.close();
} catch (SQLException e) {
e.printStackTrace();
}
}
}
public static void closeResource(Connection connection, Statement statement, ResultSet resultSet) {
if (resultSet != null) {
try {
resultSet.close();
} catch (SQLException e) {
e.printStackTrace();
}
}
if (statement != null) {
try {
statement.close();
} catch (SQLException e) {
e.printStackTrace();
}
}
if (connection != null) {
try {
connection.close();
} catch (SQLException e) {
e.printStackTrace();
}
}
}
}1
2
3
4
5
6
7
8
9
10
11
12
13
14
15
16
17
18
19
20
21
22
23
24
25
26
27
28
29
30
31
32
33
34
35
36
37
38
39
40
41
42
43
44
45
46public class PreparedStatementUpdateTest {
// 通用的增删改操作
public static void update(String sql, Object... args) {// sql中占位符的个数与可变形参的长度相同!
Connection connection = null;
PreparedStatement preparedStatement = null;
try {
// 1.获取数据库的连接
connection = JDBCUtils.getConnection();
// 2.预编译sql语句,返回PreparedStatement的实例
preparedStatement = connection.prepareStatement(sql);
// 3.填充占位符
for (int i = 0; i < args.length; i++) {
preparedStatement.setObject(i + 1, args[i]);
}
// 4.执行
/*
* 方式一,preparedStatement.execute():
* 如果执行的是查询操作,有返回结果,则此方法返回true;
* 如果执行的是增、删、改操作,没有返回结果,则此方法返回false。
*/
// preparedStatement.execute();
/*
* 方式二,preparedStatement.executeUpdate():
* 返回sql语句执行过后,对数据库影响的行数,可以根据返回值,判断增、删、查操作的结果
*/
preparedStatement.executeUpdate();
} catch (Exception e) {
e.printStackTrace();
} finally {
// 5.资源的关闭
JDBCUtils.closeResource(connection, preparedStatement);
}
}
public static void main(String[] args) {
// String sql = "delete from customers where id = ?";
// update(sql,3);
// order是数据库关键字,作为表名,为防止错误,添加``符号
String sql = "update `order` set order_name = ? where order_id = ?";
update(sql, "DD", "2");
}
}
使用 PreparedStatement 实现查询操作
常规:
1
2
3
4
5
6
7
8
9
10
11
12
13
14
15
16
17
18
19
20
21
22
23
24
25
26
27
28
29
30
31
32
33
34
35
36
37
38
39
40
41
42
43
44
45
46
47
48
49
50
51
52
53
54
55
56
57
58
59
60
61
62/*
* ORM编程思想---Object Relational Mapping
* 一个数据表对应一个Java类
* 表中的一条记录对应Java类的一个对象
* 表中的一个字段对应Java类的一个属性
*/
public class Customer {
private int id;
private String name;
private String email;
private Date birth;// java.sql.Date
public Customer() {
}
public Customer(int id, String name, String email, Date birth) {
this.id = id;
this.name = name;
this.email = email;
this.birth = birth;
}
public int getId() {
return id;
}
public void setId(int id) {
this.id = id;
}
public String getName() {
return name;
}
public void setName(String name) {
this.name = name;
}
public String getEmail() {
return email;
}
public void setEmail(String email) {
this.email = email;
}
public Date getBirth() {
return birth;
}
public void setBirth(Date birth) {
this.birth = birth;
}
public String toString() {
return "Customer [id=" + id + ", name=" + name + ", email=" + email + ", birth=" + birth + "]";
}
}1
2
3
4
5
6
7
8
9
10
11
12
13
14
15
16
17
18
19
20
21
22
23
24
25
26
27
28
29
30
31
32
33
34
35
36
37
38
39
40
41
42
43
44
45
46
47
48
49
50/**
* 针对于customers表的查询操作
*/
public class CustomerForQuery {
public static void testQuery1() {
Connection connection = null;
PreparedStatement preparedStatement = null;
ResultSet resultSet = null;
try {
connection = JDBCUtils.getConnection();
String sql = "select id, name, email, birth from customers where id = ?";
preparedStatement = connection.prepareStatement(sql);
preparedStatement.setObject(1, 1);
// 执行,并返回结果集
resultSet = preparedStatement.executeQuery();
// 处理结果集
// next():判断结果集的下一条是否有数据,如果有数据返回true,并且指针下移;
// 如果没有数据返回false,指针不会下移。
if (resultSet.next()) {
// 获取当前这条数据的各个字段值
int id = resultSet.getInt(1);
String name = resultSet.getString(2);
String email = resultSet.getString(3);
Date birth = resultSet.getDate(4);
// 方式一:
// System.out.println("id = " + id + ",name = " + name + ",email = " + email + ",birth = " + birth);
// 方式二:
// Object[] data = new Object[]{id, name, email, birth};
// 方式三:将数据封装为一个对象(推荐)
Customer customer = new Customer(id, name, email, birth);
System.out.println(customer);
}
} catch (Exception e) {
e.printStackTrace();
} finally {
// 关闭资源
JDBCUtils.closeResource(connection, preparedStatement, resultSet);
}
}
public static void main(String[] args) {
testQuery1();
}
}通用:
类的属性和表的字段相同:
1
2
3
4
5
6
7
8
9
10
11
12
13
14
15
16
17
18
19
20
21
22
23
24
25
26
27
28
29
30
31
32
33
34
35
36
37
38
39
40
41
42
43
44
45
46
47
48
49
50
51
52
53
54
55
56
57
58
59
60
61
62/**
* 针对于customers表的查询操作
*/
public class CustomerForQuery {
/**
* 针对customers表的通用的查询操作
*/
public static Customer queryForCustomers(String sql, Object... args) {
Connection connection = null;
PreparedStatement preparedStatement = null;
ResultSet resultSet = null;
try {
connection = JDBCUtils.getConnection();
preparedStatement = connection.prepareStatement(sql);
for (int i = 0; i < args.length; i++) {
preparedStatement.setObject(i + 1, args[i]);
}
resultSet = preparedStatement.executeQuery();
// 获取结果集的元数据:ResultSetMetaData
ResultSetMetaData resultSetMetaData = resultSet.getMetaData();
// 通过ResultSetMetaData获取结果集中的列数
int columnCount = resultSetMetaData.getColumnCount();
// 只返回一条数据q2w
if (resultSet.next()) {
Customer customer = new Customer();
// 处理结果集一行数据中的每一个列
for (int i = 0; i < columnCount; i++) {
// 获取列值
Object columnValue = resultSet.getObject(i + 1);
// 获取每个列的列名
// String columnName = resultSetMetaData.getColumnName(i + 1);
String columnLabel = resultSetMetaData.getColumnLabel(i + 1);
// 通过反射:给customer对象指定的columnName属性,赋值为columnValue
Field field = Customer.class.getDeclaredField(columnLabel);
field.setAccessible(true);
field.set(customer, columnValue);
}
return customer;
}
} catch (Exception e) {
e.printStackTrace();
} finally {
JDBCUtils.closeResource(connection, preparedStatement, resultSet);
}
return null;
}
public static void main(String[] args) {
String sql = "select id, name, email, birth from customers where id = ?";
Customer customer = queryForCustomers(sql, 13);
System.out.println(customer);
sql = "select id, name, email, birth from customers where id = ? and name = ?";
Customer customer1 = queryForCustomers(sql, 10, "杰杰");
System.out.println(customer1);
}
}类的属性和表的字段不同:
1
2
3
4
5
6
7
8
9
10
11
12
13
14
15
16
17
18
19
20
21
22
23
24
25
26
27
28
29
30
31
32
33
34
35
36
37
38
39
40
41
42
43
44
45
46
47public class Order {
private int orderId;
private String orderName;
private Date orderDate;// java.sql.Date
public Order() {
super();
}
public Order(int orderId, String orderName, Date orderDate) {
super();
this.orderId = orderId;
this.orderName = orderName;
this.orderDate = orderDate;
}
public int getOrderId() {
return orderId;
}
public void setOrderId(int orderId) {
this.orderId = orderId;
}
public String getOrderName() {
return orderName;
}
public void setOrderName(String orderName) {
this.orderName = orderName;
}
public Date getOrderDate() {
return orderDate;
}
public void setOrderDate(Date orderDate) {
this.orderDate = orderDate;
}
public String toString() {
return "Order [orderId=" + orderId + ", orderName=" + orderName + ", orderDate=" + orderDate + "]";
}
}1
2
3
4
5
6
7
8
9
10
11
12
13
14
15
16
17
18
19
20
21
22
23
24
25
26
27
28
29
30
31
32
33
34
35
36
37
38
39
40
41
42
43
44
45
46
47
48
49
50
51
52
53
54
55
56
57
58
59
60
61
62
63
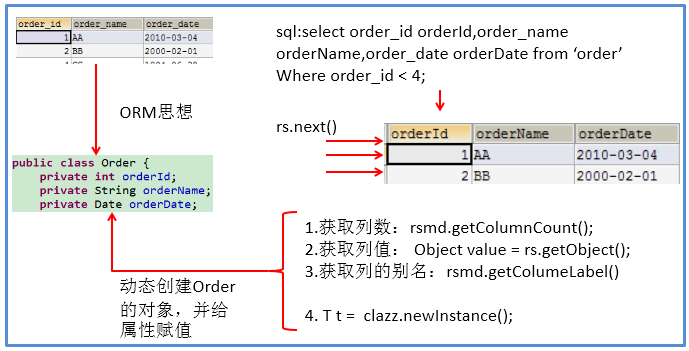
64/**
* 针对order表的通用的查询操作
*/
public class OrderForQuery {
/*
* 针对于表的字段名与类的属性名不相同的情况:
* 1.在声明sql时,使用类的属性名来命名字段的别名
* 2.使用ResultSetMetaData时,需要使用getColumnLabel()来替换getColumnName()获取列的别名
* 说明:如果sql中没有给字段起别名,getColumnLabel()获取的就是列名
*/
/**
* 针对于order表的通用的查询操作
*/
public static Order orderForQuery(String sql, Object... args) {
Connection connection = null;
PreparedStatement preparedStatement = null;
ResultSet resultSet = null;
try {
connection = JDBCUtils.getConnection();
preparedStatement = connection.prepareStatement(sql);
for (int i = 0; i < args.length; i++) {
preparedStatement.setObject(i + 1, args[i]);
}
// 执行,获取结果集
resultSet = preparedStatement.executeQuery();
// 获取结果集的元数据
ResultSetMetaData resultSetMetaData = resultSet.getMetaData();
// 获取列数
int columnCount = resultSetMetaData.getColumnCount();
if (resultSet.next()) {
Order order = new Order();
for (int i = 0; i < columnCount; i++) {
// 获取每个列的列值
Object columnValue = resultSet.getObject(i + 1);
// 通过ResultSetMetaData
// 获取列的列名:getColumnName()---不推荐使用
// 获取列的别名:getColumnLabel()
// String columnName = resultSetMetaData.getColumnName(i + 1);
String columnLabel = resultSetMetaData.getColumnLabel(i + 1);
// 通过反射,将对象指定名columnName的属性赋值为指定的值columnValue
Field field = Order.class.getDeclaredField(columnLabel);
field.setAccessible(true);
field.set(order, columnValue);
}
return order;
}
} catch (Exception e) {
e.printStackTrace();
} finally {
JDBCUtils.closeResource(connection, preparedStatement, resultSet);
}
return null;
}
public static void main(String[] args) {
String sql = "select order_id orderId, order_name orderName, order_date orderDate from `order` where order_id = ?";
Order order = orderForQuery(sql, 1);
System.out.println(order);
}
}不同表:
1
2
3
4
5
6
7
8
9
10
11
12
13
14
15
16
17
18
19
20
21
22
23
24
25
26
27
28
29
30
31
32
33
34
35
36
37
38
39
40
41
42
43
44
45
46
47
48
49
50
51
52
53
54
55
56
57
58
59
60
61
62
63
64
65
66
67
68
69
70
71
72
73
74
75
76
77
78
79
80
81
82
83
84
85
86
87
88
89
90
91
92
93
94
95
96
97
98
99
100
101
102
103
104
105
106
107
108public class PreparedStatementQueryTest {
// 返回一个
public static <T> T getInstance(Class<T> clazz, String sql, Object... args) {
Connection connection = null;
PreparedStatement preparedStatement = null;
ResultSet resultSet = null;
try {
connection = JDBCUtils.getConnection();
preparedStatement = connection.prepareStatement(sql);
for (int i = 0; i < args.length; i++) {
preparedStatement.setObject(i + 1, args[i]);
}
resultSet = preparedStatement.executeQuery();
// 获取结果集的元数据
ResultSetMetaData resultSetMetaData = resultSet.getMetaData();
// 通过ResultSetMetaData获取结果集中的列数
int columnCount = resultSetMetaData.getColumnCount();
if (resultSet.next()) {
T t = clazz.newInstance();
// 处理结果集一行数据中的每一个列
for (int i = 0; i < columnCount; i++) {
// 获取列值
Object columnValue = resultSet.getObject(i + 1);
// 获取每个列的别名
String columnLabel = resultSetMetaData.getColumnLabel(i + 1);
// 通过反射,给t对象指定的columnName属性,赋值为columnValue
Field field = clazz.getDeclaredField(columnLabel);
field.setAccessible(true);
field.set(t, columnValue);
}
return t;
}
} catch (Exception e) {
e.printStackTrace();
} finally {
JDBCUtils.closeResource(connection, preparedStatement, resultSet);
}
return null;
}
// 返回一个集合
public static <T> List<T> getForList(Class<T> clazz, String sql, Object... args) {
Connection connection = null;
PreparedStatement preparedStatement = null;
ResultSet resultSet = null;
try {
connection = JDBCUtils.getConnection();
preparedStatement = connection.prepareStatement(sql);
for (int i = 0; i < args.length; i++) {
preparedStatement.setObject(i + 1, args[i]);
}
resultSet = preparedStatement.executeQuery();
// 获取结果集的元数据
ResultSetMetaData resultSetMetaData = resultSet.getMetaData();
// 通过ResultSetMetaData获取结果集中的列数
int columnCount = resultSetMetaData.getColumnCount();
// 创建集合对象
List<T> list = new ArrayList<>();
while (resultSet.next()) {
T t = clazz.newInstance();
// 处理结果集一行数据中的每一个列: 给t对象指定的属性赋值
for (int i = 0; i < columnCount; i++) {
// 获取列值
Object columnValue = resultSet.getObject(i + 1);
// 获取每个列的别名
String columnLabel = resultSetMetaData.getColumnLabel(i + 1);
// 给t对象指定的columnName属性,赋值为columnValue:通过反射
Field field = clazz.getDeclaredField(columnLabel);
field.setAccessible(true);
field.set(t, columnValue);
}
list.add(t);
}
return list;
} catch (Exception e) {
e.printStackTrace();
} finally {
JDBCUtils.closeResource(connection, preparedStatement, resultSet);
}
return null;
}
public static void main(String[] args) {
String sql = "select id, name, email, birth from customers where id = ?";
Customer customer = getInstance(Customer.class, sql, 12);
System.out.println(customer);
String sql1 = "select order_id orderId, order_name orderName from `order` where order_id = ?";
Order order = getInstance(Order.class, sql1, 1);
System.out.println(order);
String sql2 = "select id, name, email, birth from customers where id < ?";
List<Customer> list = getForList(Customer.class, sql2, 12);
list.forEach(System.out::println);
String sql3 = "select order_id orderId, order_name orderName from `order`";
List<Order> orderList = getForList(Order.class, sql3);
orderList.forEach(System.out::println);
}
}
ResultSet 与 ResultSetMetaData 的说明
ResultSet
查询数据库时,需要调用 PreparedStatement 的
executeQuery(),查询结果是一个 ResultSet 对象。ResultSet 对象以逻辑表格的形式封装了执行数据库操作的结果集,ResultSet 接口由数据库厂商提供实现。
ResultSet 返回的实际上就是一张数据表。有一个指针指向数据表的第一条记录的前面。
ResultSet 对象维护了一个指向当前数据行的游标,初始的时候,游标在第一行之前,可以通过 ResultSet 对象的
next()移动到下一行。调用next()时会检测下一行是否有效,若有效,该方法返回 true,且指针下移。相当于 Iterator 对象的hasNext()和next()两个方法的结合体。
当指针指向一行时,可以通过调用
getXxx(int index)或getXxx(int columnName)获取每一列的值。- 例如:
getInt(1),getString("name")。 - 注意:Java 与数据库交互涉及到的相关 Java API 中的索引都从 1 开始。
- 例如:
ResultSetMetaData
ResultSetMetaData 是描述 ResultSet 的元数据,可用于获取 ResultSet 对象中列的类型和属性信息。
通过 ResultSet 的
getMetaData()获取 ResultSetMetaData。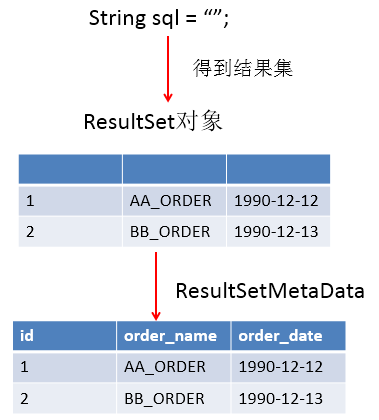
常用方法:
getColumnCount():返回当前 ResultSet 对象中的列数。getColumnName(int column):获取指定列的名称,不推荐使用。getColumnLabel(int column):获取指定列的别名,如果没有别名,则返回该列的名称。getColumnTypeName(int column):检索指定列的数据库特定的类型名称。getColumnDisplaySize(int column):指示指定列的最大标准宽度,以字符为单位。isNullable(int column):指示指定列中的值是否可以为 null。isAutoIncrement(int column):指示是否自动为指定列进行编号,这样这些列仍然是只读的。
资源的释放
- 释放 ResultSet,Statement,Connection。
- 数据库连接 (Connection) 是非常稀有的资源,用完后必须马上释放,如果 Connection 不能及时正确的关闭将导致系统宕机。Connection 的使用原则是尽量晚创建,尽量早的释放。
- 应该在 finally 中关闭,保证及时其他代码出现异常,资源也一定能被关闭。
JDBC API 使用小结
两种思想:
面向接口编程的思想
ORM 思想 (Object Relational Mapping)
- 一个数据表对应一个 Java 类。
- 表中的一条记录对应 Java 类的一个对象。
- 表中的一个字段对应 Java 类的一个属性。
SQL 应结合列名和表的属性名来写,必要时需要起别名。
两种技术:
- JDBC 结果集的元数据 ResultSetMetaData。
- 获取列数:
getColumnCount() - 获取列的别名:
getColumnLabel()
- 获取列数:
- 通过反射,创建指定类的对象,获取指定的属性并赋值。
- JDBC 结果集的元数据 ResultSetMetaData。
操作 BLOB 类型字段
MySQL BLOB 类型
MySQL 中,BLOB 是一个二进制大型对象,是一个可以存储大量数据的容器,它能容纳不同大小的数据。
插入 BLOB 类型的数据必须使用 PreparedStatement,因为 BLOB 类型的数据无法使用字符串拼接来写。
MySQL 的四种 BLOB 类型 (除了在存储的最大信息量上不同外,它们是等同的):
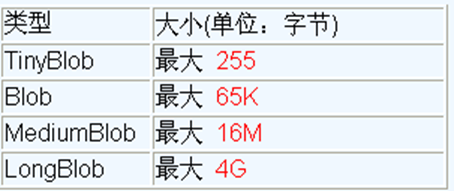
实际使用中根据需要存入的数据大小定义不同的 BLOB 类型。
需要注意的是:如果存储的文件过大,数据库的性能会下降。
如果在指定了相关的 BLOB 类型以后,还报错:
xxx too large,原因是文件大小超过默认存储。1
com.mysql.cj.jdbc.exceptions.PacketTooBigException: Packet for query is too large (6,218,041 > 4,194,304). You can change this value on the server by setting the 'max_allowed_packet' variable.
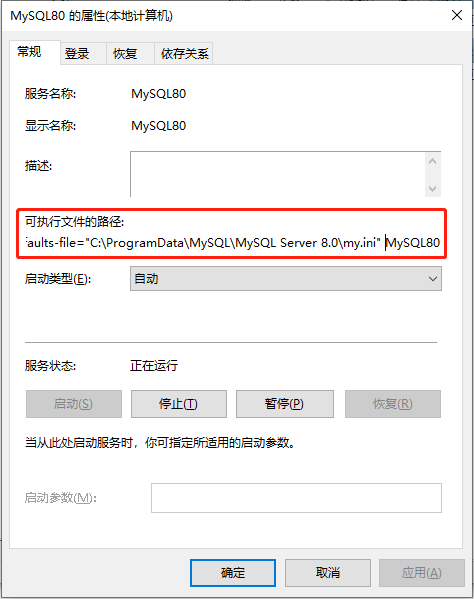
在 MySQL 的安装目录下,查找 my.ini 文件,并添加如下的配置参数: max_allowed_packet=16M,设置存储大小。注意:修改了 my.ini 文件之后,需要重新启动 MySQL 服务。
1
max_allowed_packet=16M
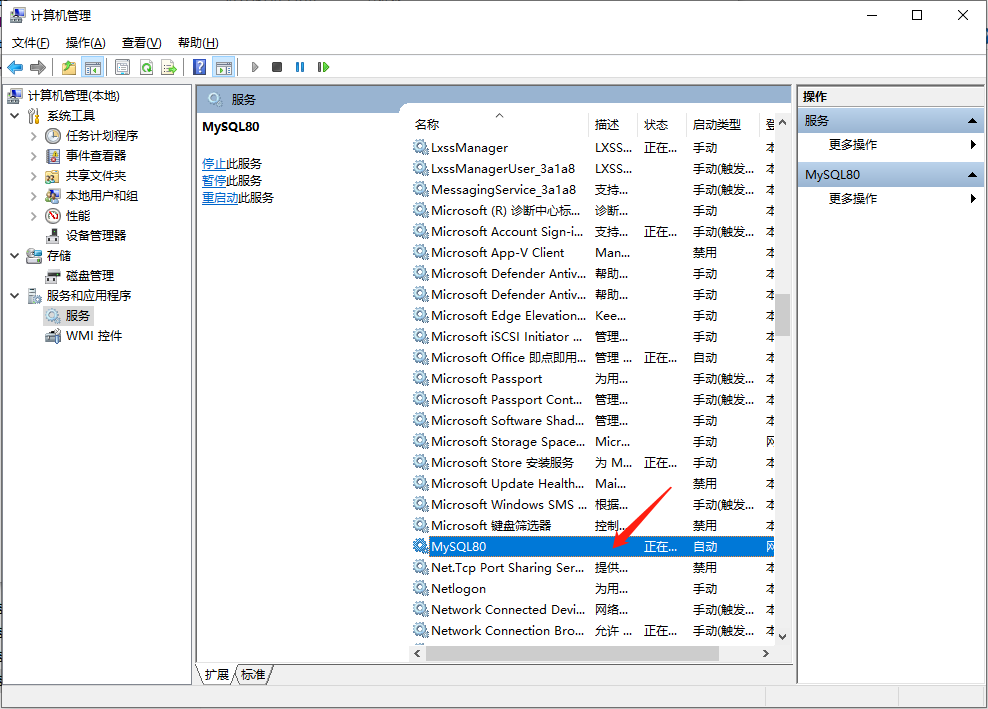
Windows 系统下,在服务中,右键点击属性,可以查找到 my.ini 文件的位置:
在 cmd 中,也可以查看 max_allowed_packet 配置:
1
2
3
4
5
6
7
8
9
10
11
12
13
14
15
16
17
18
19
20
21
22
23
24
25C:\Users\XiSun>mysql -u root -p
Enter password: ***************
Welcome to the MySQL monitor. Commands end with ; or \g.
Your MySQL connection id is 8
Server version: 8.0.25 MySQL Community Server - GPL
Copyright (c) 2000, 2021, Oracle and/or its affiliates.
Oracle is a registered trademark of Oracle Corporation and/or its
affiliates. Other names may be trademarks of their respective
owners.
Type 'help;' or '\h' for help. Type '\c' to clear the current input statement.
mysql> show VARIABLES like '%max_allowed_packet%';
+---------------------------+------------+
| Variable_name | Value |
+---------------------------+------------+
| max_allowed_packet | 16777216 |
| mysqlx_max_allowed_packet | 67108864 |
| slave_max_allowed_packet | 1073741824 |
+---------------------------+------------+
3 rows in set, 1 warning (0.01 sec)
mysql>设置:
set global max_allowed_packet = 2*1024*1024*10;退出 MySQL:
quit重启:
service mysqld restart
数据表中插入 BLOB 类型字段
1 | public class BlobTest { |
数据表中修改 BLOB 类型字段
1 | public class BlobTest { |
数据表中读取 BLOB 类型字段
1 | public class BlobTest { |
批量处理
批量执行 SQL 语句
- 当需要成批插入或者更新记录时,可以采用 JDBC 的批量更新机制,这一机制允许多条语句一次性提交给数据库批量处理。通常情况下比单独提交处理更有效率
JDBC 的批量处理语句包括下面三个方法:
addBatch(String):添加需要批量处理的 SQL 语句或是参数。executeBatch():执行批量处理语句。clearBatch():清空缓存的数据。
通常我们会遇到两种批量执行 SQL 语句的情况:
- 多条 SQL 语句的批量处理。
- 一条 SQL 语句的批量传参。
高效的批量插入
- 举例:向数据表中插入 20000 条数据。
数据库中提供一个 goods 表作为测试。创建如下:
1
2
3
4CREATE TABLE goods(
id INT PRIMARY KEY AUTO_INCREMENT,
NAME VARCHAR(20)
);1
2
3
4
5# 查询goods表总条目数
SELECT COUNT(*) FROM goods;
# 清空goods表
TRUNCATE TABLE goods;
实现层次一
1 | /* |
实现层次二
1 | /* |
实现层次三
1 | /* |
url 格式:
url=jdbc:mysql://localhost:3306/test?rewriteBatchedStatements=true
实现层次四
1 | /* |
每次向数据库 commit 操作时,也会耗时,可以等全部数据处理完后,再统一 commit。
数据库事务
数据库事务介绍
- 事务:一组逻辑操作单元,使数据从一种状态变换到另一种状态。
- 一组逻辑操作单元:指一个或多个 DML 操作。
- 事务处理 (事务操作):保证所有事务都作为一个工作单元来执行,即使出现了故障,都不能改变这种执行方式。当在一个事务中执行多个操作时,要么所有的事务都被提交 (commit),那么这些修改就永久地保存下来;要么数据库管理系统将放弃所作的所有修改,整个事务回滚 (rollback) 到最初状态。
- 为确保数据库中数据的一致性,数据的操纵应当是离散的成组的逻辑单元:当它全部完成时,数据的一致性可以保持,而当这个单元中的一部分操作失败,整个事务应全部视为错误,所有从起始点以后的操作应全部回退到开始状态。
JDBC 事务处理
数据一旦提交 (commit),就不可回滚。
数据什么时候会提交:
- DDL 操作,一旦执行,都会自动提交。注意:
set autocommit = false对 DDL 操作无效。- DDL:CREATE、ALTER、DROP、TRUNCATE、COMMENT、RENAME。
- DML 操作,默认情况下,一旦执行,就会自动提交。可以通过
set autocommit = false的方式取消 DML 操作的自动提交。- DML:SELECT、INSERT、UPDATE、DELETE、MERGE、CALL、EXPLAIN PLAN、LOCK TABLE。
- 当一个连接对象被创建时,默认情况下是自动提交事务:每次执行一个 SQL 语句时,如果执行成功,就会向数据库自动提交,而不能回滚。
- 关闭数据库连接时,数据也会自动的提交。如果多个操作,每个操作使用的是自己单独的连接,则无法保证事务。即同一个事务的多个操作必须在同一个连接下。
- DDL 操作,一旦执行,都会自动提交。注意:
JDBC 程序中为了让多个 SQL 语句作为一个事务执行:
第一步:调用 Connection 对象的 **
setAutoCommit(false);**,取消自动提交事务;第二步:在所有的 SQL 语句都成功执行后,调用 **
commit();**,提交事务;第三步:当出现异常时,调用 **
rollback();**,回滚事务。当一个事务操作结束之后,若此时 Connection 没有被关闭,还可能被重复使用,则应该调用 Connection 的
setAutoCommit(true),恢复其自动提交状态 。尤其是在使用数据库连接池技术时,在执行close()关闭资源之前,建议恢复自动提交状态。
案例:用户 AA 向用户 BB 转账 100。
未考虑事务的情况:
1
2
3
4
5
6
7
8
9
10
11
12
13
14
15
16
17
18
19
20
21
22
23
24
25
26
27
28
29
30
31
32
33
34
35
36
37
38
39
40
41
42
43
44
45
46
47
48public class TransactionTest {
/*
* 针对于数据表user_table来说:
* AA用户给BB用户转账100
*
* update user_table set balance = balance - 100 where user = 'AA';
* update user_table set balance = balance + 100 where user = 'BB';
*/
// 通用的增删改操作---version 1.0
// ******************未考虑数据库事务情况下的转账操作**************************
public static int update(String sql, Object... args) {
Connection connection = null;
PreparedStatement preparedStatement = null;
try {
// 1.获取数据库的连接
connection = JDBCUtils.getConnection();
// 2.预编译sql语句,返回PreparedStatement的实例
preparedStatement = connection.prepareStatement(sql);
// 3.填充占位符
for (int i = 0; i < args.length; i++) {
preparedStatement.setObject(i + 1, args[i]);
}
// 4.执行
return preparedStatement.executeUpdate();
} catch (Exception e) {
e.printStackTrace();
} finally {
// 5.资源的关闭
JDBCUtils.closeResource(connection, preparedStatement);
}
return 0;
}
public static void main(String[] args) {
String sql1 = "update user_table set balance = balance - 100 where user = ?";
update(sql1, "AA");
// 模拟网络异常
System.out.println(10 / 0);
String sql2 = "update user_table set balance = balance + 100 where user = ?";
update(sql2, "BB");
System.out.println("转账成功");
}
}上述代码,当出现网络异常时,AA 用户资产会少 100,但 BB 用户资产不会变化,转账过程发生错误。
考虑事务的情况:
1
2
3
4
5
6
7
8
9
10
11
12
13
14
15
16
17
18
19
20
21
22
23
24
25
26
27
28
29
30
31
32
33
34
35
36
37
38
39
40
41
42
43
44
45
46
47
48
49
50
51
52
53
54
55
56
57
58
59
60
61
62
63
64
65
66
67
68
69
70
71
72
73
74
75
76
77
78
79
80
81
82
83
84
85
86
87
88
89
90
91
92
93
94
95
96
97
98
99
100
101
102
103
104
105/*
* 1.什么叫数据库事务?
* 事务:一组逻辑操作单元,使数据从一种状态变换到另一种状态。
* > 一组逻辑操作单元:一个或多个DML操作。
*
* 2.事务处理的原则:保证所有事务都作为一个工作单元来执行,即使出现了故障,都不能改变这种执行方式。
* 当在一个事务中执行多个操作时,要么所有的事务都被提交(commit),那么这些修改就永久地保存
* 下来;要么数据库管理系统将放弃所作的所有修改,整个事务回滚(rollback)到最初状态。
*
* 3.数据一旦提交,就不可回滚
*
* 4.哪些操作会导致数据的自动提交?
* >DDL操作一旦执行,都会自动提交。
* >set autocommit = false 对DDL操作失效
* >DML默认情况下,一旦执行,就会自动提交。
* >我们可以通过set autocommit = false的方式取消DML操作的自动提交。
* >默认在关闭连接时,会自动的提交数据
*/
public class TransactionTest {
/*
* 针对于数据表user_table来说:
* AA用户给BB用户转账100
*
* update user_table set balance = balance - 100 where user = 'AA';
* update user_table set balance = balance + 100 where user = 'BB';
*/
// 通用的增删改操作---version 2.0(考虑事务)
public static int update(Connection conn, String sql, Object... args) {
PreparedStatement ps = null;
try {
// 1.预编译sql语句,返回PreparedStatement的实例
ps = conn.prepareStatement(sql);
// 2.填充占位符
for (int i = 0; i < args.length; i++) {
ps.setObject(i + 1, args[i]);
}
// 3.执行
return ps.executeUpdate();
} catch (Exception e) {
e.printStackTrace();
} finally {
// 4.资源的关闭
if (ps != null) {
try {
ps.close();
} catch (SQLException throwables) {
throwables.printStackTrace();
}
}
}
return 0;
}
public static void main(String[] args) {
// ********************考虑数据库事务后的转账操作*********************
Connection connection = null;
try {
connection = JDBCUtils.getConnection();
System.out.println(connection.getAutoCommit());// 默认为true
// 1.取消数据的自动提交
connection.setAutoCommit(false);
String sql1 = "update user_table set balance = balance - 100 where user = ?";
update(connection, sql1, "AA");
// 模拟网络异常
System.out.println(10 / 0);
String sql2 = "update user_table set balance = balance + 100 where user = ?";
update(connection, sql2, "BB");
System.out.println("转账成功");
// 2.提交数据
connection.commit();
} catch (Exception e) {
e.printStackTrace();
// 3.回滚数据
if (connection != null) {
try {
connection.rollback();
} catch (SQLException e1) {
e1.printStackTrace();
}
}
} finally {
if (connection != null) {
// 关闭之前修改其为自动提交数据,主要针对于使用数据库连接池的使用
try {
connection.setAutoCommit(true);
} catch (SQLException e) {
e.printStackTrace();
}
try {
connection.close();
} catch (SQLException throwables) {
throwables.printStackTrace();
}
}
}
}
}上述代码,是一个完整的事务操作,AA 和 BB 用户,要么资产都发生变化,要么资产都不发生变化。
事务的 ACID 属性
原子性 (Atomicity)
- 原子性是指事务是一个不可分割的工作单位,事务中的操作要么都发生,要么都不发生。
一致性 (Consistency)
- 事务必须使数据库从一个一致性状态变换到另外一个一致性状态。
隔离性 (Isolation)
事务的隔离性是指一个事务的执行不能被其他事务干扰,即一个事务内部的操作及使用的数据对并发的其他事务是隔离的,并发执行的各个事务之间不能互相干扰。
参考多线程对共享数据的处理。
持久性 (Durability)
- 持久性是指一个事务一旦被提交,它对数据库中数据的改变就是永久性的,接下来的其他操作和数据库故障不应该对其有任何影响。
数据库的并发问题
对于同时运行的多个事务,当这些事务访问数据库中相同的数据时,如果没有采取必要的隔离机制,就会导致各种并发问题:
- 脏读:对于两个事务 T1 和 T2,T1 读取了已经被 T2 更新但还没有被提交的字段。之后,若 T2 回滚,那么 T1 读取的内容就是临时且无效的。
- 不可重复读:对于两个事务 T1 和 T2,T1 读取了一个字段,然后 T2 更新了该字段。之后,T1 再次读取同一个字段,值会不一样。
- 幻读:对于两个事务 T1 和 T2,T1 从一个表中读取了一个字段,然后 T2 在该表中插入了一些新的行。之后, 如果 T1 再次读取同一个表,就会多出几行。
数据库事务的隔离性:数据库系统必须具有隔离并发运行各个事务的能力,使它们不会相互影响,从而避免各种并发问题。
一个事务与其他事务隔离的程度称为隔离级别。数据库规定了多种事务隔离级别,不同隔离级别对应不同的干扰程度,隔离级别越高,数据一致性就越好,但并发性越弱。
四种隔离级别
数据库提供了 4 种事务隔离级别:
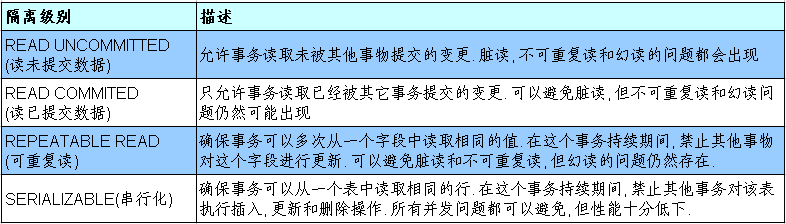
Oracle 支持 2 种事务隔离级别:READ COMMITED 和 SERIALIZABLE。 Oracle 默认的事务隔离级别为 READ COMMITED。
- MySQL 支持 4 种事务隔离级别。MySQL 默认的事务隔离级别为 REPEATABLE READ。
- 在开发中,要保证隔离级别至少为 READ COMMITED。如果数据库本身能够满足,不需要在代码中设置,否则,应该在代码中显式设置事物的隔离级别。
在 MySQL 中设置隔离级别
每启动一个 MySQL 程序,就会获得一个单独的数据库连接。每个数据库连接都有一个全局变量 @@transaction_isolation,表示当前的事务隔离级别。
查看当前的隔离级别:
1
SELECT @@transaction_isolation;
旧版本是 @@tx_isolation。
设置当前用户 MySQL 连接的隔离级别:
1
set transaction isolation level read committed;
设置数据库系统的全局的隔离级别:
1
set global transaction isolation level read committed;
设置隔离级别之后,需要重新连接 MySQL。
补充操作:
创建 MySQL 数据库用户:
1
create user tom identified by 'abc123';
授予权限:
1
2
3
4
5# 授予通过网络方式登录的tom用户,对所有库所有表的全部权限,密码设为abc123
grant all privileges on *.* to tom@'%' identified by 'abc123';
# 给tom用户使用本地命令行方式,授予test这个库下的所有表的插删改查的权限。
grant select, insert, delete, update on test.* to tom@localhost identified by 'abc123';
在 JDBC 中设置隔离级别
1 | public class TransactionTest { |
DAO 及相关实现类
- DAO:Data Access Object,访问数据信息的类和接口,包括了对数据的 CRUD (Create、Retrival、Update、Delete) 操作,但不包含任何业务相关的信息。有时也称作 BaseDAO。
- 作用:为了实现功能的模块化,更有利于代码的维护和升级。
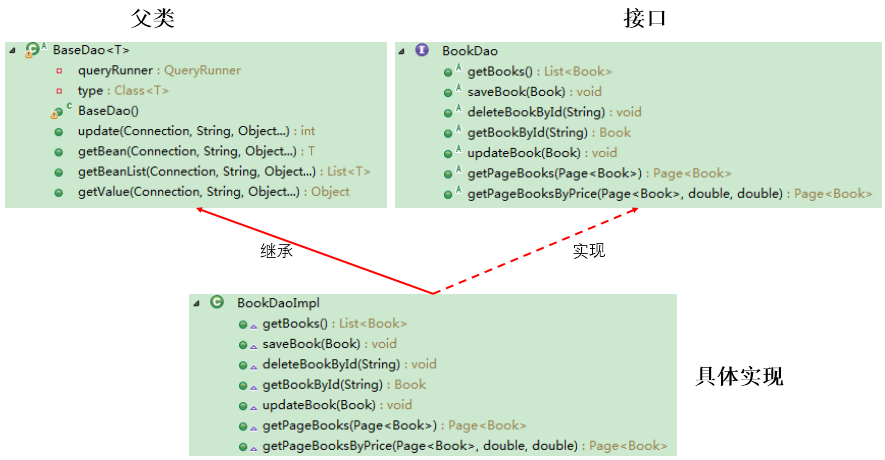
- 下面是尚硅谷 JavaWeb 阶段书城项目中 DAO 使用的体现:
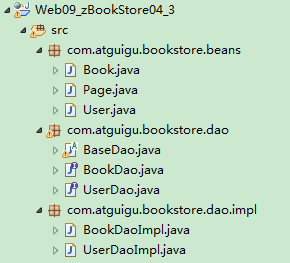
- 层次结构:
基础实现
Page.java:
1
2
3
4
5
6
7
8
9
10
11
12
13
14
15
16
17
18
19
20
21
22
23
24
25
26
27
28
29
30
31
32
33
34
35
36
37
38
39
40public class Page<T> {
public static final int PAGE_SIZE = 4; // 每页显示的记录数
private int pageNo; // 当前页
private List<T> list; // 每页查到的记录存放的集合
// private int totalPageNo; // 总页数,通过计算得到
private int totalRecord; // 总记录数,通过查询数据库得到
public List<T> getList() {
return list;
}
public void setList(List<T> list) {
this.list = list;
}
public int getPageNo() {
return pageNo;
}
public void setPageNo(int pageNo) {
this.pageNo = pageNo;
}
public int getTotalRecord() {
return totalRecord;
}
public void setTotalRecord(int totalRecord) {
this.totalRecord = totalRecord;
}
public String toString() {
return "Page{" + "list=" + list + ", pageNo=" + pageNo + ", totalRecord=" + totalRecord + '}';
}
}Customer.java:
1
2
3
4
5
6
7
8
9
10
11
12
13
14
15
16
17
18
19
20
21
22
23
24
25
26
27
28
29
30
31
32
33
34
35
36
37
38
39
40
41
42
43
44
45
46
47
48
49
50
51
52
53
54
55
56public class Customer {
private int id;
private String name;
private String email;
private Date birth;
public Customer() {
}
public Customer(int id, String name, String email, Date birth) {
this.id = id;
this.name = name;
this.email = email;
this.birth = birth;
}
public int getId() {
return id;
}
public void setId(int id) {
this.id = id;
}
public String getName() {
return name;
}
public void setName(String name) {
this.name = name;
}
public String getEmail() {
return email;
}
public void setEmail(String email) {
this.email = email;
}
public Date getBirth() {
return birth;
}
public void setBirth(Date birth) {
this.birth = birth;
}
public String toString() {
return "Customer [id=" + id + ", name=" + name + ", email=" + email + ", birth=" + birth + "]";
}
}BaseDao.java:
1
2
3
4
5
6
7
8
9
10
11
12
13
14
15
16
17
18
19
20
21
22
23
24
25
26
27
28
29
30
31
32
33
34
35
36
37
38
39
40
41
42
43
44
45
46
47
48
49
50
51
52
53
54
55
56
57
58
59
60
61
62
63
64
65
66
67
68
69
70
71
72
73
74
75
76
77
78
79
80
81
82
83
84
85
86
87
88
89
90
91
92
93
94
95
96
97
98
99
100
101
102
103
104
105
106
107/*
* DAO: Data(base) Access Object
* 封装了针对于数据表的通用的操作,声明为abstact类,不能被实例化
*/
public abstract class BaseDao {
// 通用的增删改操作---version 2.0(考虑上事务)
public int update(Connection connection, String sql, Object... args) {
PreparedStatement preparedStatement = null;
try {
preparedStatement = connection.prepareStatement(sql);
for (int i = 0; i < args.length; i++) {
preparedStatement.setObject(i + 1, args[i]);
}
return preparedStatement.executeUpdate();
} catch (Exception e) {
e.printStackTrace();
} finally {
JDBCUtils.closeResource(null, preparedStatement);
}
return 0;
}
// 通用的查询操作,用于返回数据表中的一条记录---version 2.0(考虑上事务)
public <T> T getInstance(Connection connection, Class<T> clazz, String sql, Object... args) {
PreparedStatement preparedStatement = null;
ResultSet resultSet = null;
try {
preparedStatement = connection.prepareStatement(sql);
for (int i = 0; i < args.length; i++) {
preparedStatement.setObject(i + 1, args[i]);
}
resultSet = preparedStatement.executeQuery();
ResultSetMetaData resultSetMetaData = resultSet.getMetaData();
int columnCount = resultSetMetaData.getColumnCount();
if (resultSet.next()) {
T t = clazz.newInstance();
for (int i = 0; i < columnCount; i++) {
Object columnValue = resultSet.getObject(i + 1);
String columnLabel = resultSetMetaData.getColumnLabel(i + 1);
Field field = clazz.getDeclaredField(columnLabel);
field.setAccessible(true);
field.set(t, columnValue);
}
return t;
}
} catch (Exception e) {
e.printStackTrace();
} finally {
JDBCUtils.closeResource(null, preparedStatement, resultSet);
}
return null;
}
// 通用的查询操作,用于返回数据表中的多条记录构成的集合---version 2.0(考虑事务)
public <T> List<T> getForList(Connection connection, Class<T> clazz, String sql, Object... args) {
PreparedStatement preparedStatement = null;
ResultSet resultSet = null;
try {
preparedStatement = connection.prepareStatement(sql);
for (int i = 0; i < args.length; i++) {
preparedStatement.setObject(i + 1, args[i]);
}
resultSet = preparedStatement.executeQuery();
ResultSetMetaData resultSetMetaData = resultSet.getMetaData();
int columnCount = resultSetMetaData.getColumnCount();
ArrayList<T> list = new ArrayList<T>();
while (resultSet.next()) {
T t = clazz.newInstance();
for (int i = 0; i < columnCount; i++) {
Object columnValue = resultSet.getObject(i + 1);
String columnLabel = resultSetMetaData.getColumnLabel(i + 1);
Field field = clazz.getDeclaredField(columnLabel);
field.setAccessible(true);
field.set(t, columnValue);
}
list.add(t);
}
return list;
} catch (Exception e) {
e.printStackTrace();
} finally {
JDBCUtils.closeResource(null, preparedStatement, resultSet);
}
return null;
}
// 用于查询特殊值的通用的方法,比如:select count(*) from test;
public <E> E getValue(Connection connection, String sql, Object... args) {
PreparedStatement preparedStatement = null;
ResultSet resultSet = null;
try {
preparedStatement = connection.prepareStatement(sql);
for (int i = 0; i < args.length; i++) {
preparedStatement.setObject(i + 1, args[i]);
}
resultSet = preparedStatement.executeQuery();
if (resultSet.next()) {
return (E) resultSet.getObject(1);
}
} catch (SQLException e) {
e.printStackTrace();
} finally {
JDBCUtils.closeResource(null, preparedStatement, resultSet);
}
return null;
}
}BaseDao 中未指定泛型,
getInstance()和getForList()两个方法是泛型方法,每个子类在实现这两个方法时,都需要传入一个对应的 Class 参数,实际上这个参数是可以省略的。CustomerDao.java:
1
2
3
4
5
6
7
8
9
10
11
12
13
14
15
16
17
18
19
20
21
22
23
24
25
26
27
28
29
30
31
32
33
34
35
36
37
38
39
40
41/*
* 此接口用于规范针对于customers表的常用操作
*/
public interface CustomerDao {
// 将customer对象添加到数据库中
void insert(Connection connection, Customer customer);
// 针对指定的id,删除表中的一条记录
void deleteById(Connection connection, int id);
// 针对内存中的customer对象,去修改数据表中指定的记录
void update(Connection connection, Customer customer);
// 针对指定的id查询得到对应的customer对象
Customer getCustomerById(Connection connection, int id);
// 查询表中的所有记录构成的集合
List<Customer> getAll(Connection connection);
// 返回数据表中的数据的条目数
Long getCount(Connection connection);
// 返回数据表中最大的生日
Date getMaxBirth(Connection connection);
/**
* 获取带分页的Customer信息
*
* @param page:是只包含了用户输入的pageNo属性的Page对象
* @return 返回的Page对象是包含了所有属性的Page对象
*/
Page<Customer> getPageCustomers(Connection connection, Page<Customer> page);
/**
* 获取带分页和生日范围的Customer信息
*
* @param page:是只包含了用户输入的pageNo属性的Page对象
* @return 返回的Page对象是包含了所有属性的Page对象
*/
Page<Customer> getPageCustomersByBirth(Connection connection, Page<Customer> page, Date minBirth, Date maxBirth);
}CustomerDaoImpl.java:
1
2
3
4
5
6
7
8
9
10
11
12
13
14
15
16
17
18
19
20
21
22
23
24
25
26
27
28
29
30
31
32
33
34
35
36
37
38
39
40
41
42
43
44
45
46
47
48
49
50
51
52
53
54
55
56
57
58
59
60
61
62
63
64
65
66
67
68
69
70
71
72
73
74
75
76
77
78
79public class CustomerDaoImpl extends BaseDao implements CustomerDao {
public void insert(Connection connection, Customer customer) {
String sql = "insert into customers(name, email, birth) values(?, ?, ?)";
update(connection, sql, customer.getName(), customer.getEmail(), customer.getBirth());
}
public void deleteById(Connection connection, int id) {
String sql = "delete from customers where id = ?";
update(connection, sql, id);
}
public void update(Connection connection, Customer customer) {
String sql = "update customers set name = ?, email = ?, birth = ? where id = ?";
update(connection, sql, customer.getName(), customer.getEmail(), customer.getBirth(), customer.getId());
}
public Customer getCustomerById(Connection connection, int id) {
String sql = "select id, name, email, birth from customers where id = ?";
return getInstance(connection, Customer.class, sql, id);
}
public List<Customer> getAll(Connection connection) {
String sql = "select id, name, email, birth from customers";
return getForList(connection, Customer.class, sql);
}
public Long getCount(Connection connection) {
String sql = "select count(*) from customers";
return getValue(connection, sql);
}
public Date getMaxBirth(Connection connection) {
String sql = "select max(birth) from customers";
return getValue(connection, sql);
}
public Page<Customer> getPageCustomers(Connection connection, Page<Customer> page) {
// 获取数据库中Customer的总数
String sql = "select count(*) from customers";
// 调用BaseDao中获取一个单一值的方法
long totalRecord = (long) getValue(connection, sql);
// 将总数设置都page对象中
page.setTotalRecord((int) totalRecord);
// 获取当前页中的记录存放的List
String sql2 = "select id, name, email, birth from customers limit ?, ?";
// 调用BaseDao中获取一个集合的方法
List<Customer> beanList = getForList(connection, sql2, (page.getPageNo() - 1) * Page.PAGE_SIZE, Page.PAGE_SIZE);
// 将这个List设置到page对象中
page.setList(beanList);
return page;
}
public Page<Customer> getPageCustomersByBirth(Connection connection, Page<Customer> page, Date minBirth, Date maxBirth) {
// 获取数据库中Customer的总数
String sql = "select count(*) from customers where birth between ? and ?";
// 调用BaseDao中获取一个单一值的方法
long totalRecord = getValue(connection, sql, minBirth, maxBirth);
// 将总数设置都page对象中
page.setTotalRecord((int) totalRecord);
// 获取当前页中的记录存放的List
String sql2 = "select id, name, email, birth from customers where birth between ? and ? limit ?, ?";
// 调用BaseDao中获取一个集合的方法
List<Customer> beanList = getForList(connection, sql2, minBirth, maxBirth, (page.getPageNo() - 1) * Page.PAGE_SIZE, Page.PAGE_SIZE);
// 将这个List设置到page对象中
page.setList(beanList);
return page;
}
}CustomerDaoImpl 实现父类 BaseDao 的
getInstance()和getForList()方法,需要传入 Customer.class 参数。CustomerDaoImplTest.java:
1
2
3
4
5
6
7
8
9
10
11
12
13
14
15
16
17
18
19
20
21
22
23
24
25
26
27
28
29
30
31
32
33
34
35
36
37
38
39
40
41
42
43
44
45
46
47
48
49
50
51
52
53
54
55
56
57
58
59
60
61
62
63
64
65
66
67
68
69
70
71
72
73
74
75
76
77
78
79
80
81
82
83
84
85
86
87
88
89
90
91
92
93
94
95
96
97
98
99
100
101
102
103
104
105
106
107
108
109
110
111
112
113
114
115
116
117
118
119
120
121
122
123
124
125
126
127
128
129
130
131
132
133
134
135
136
137
138class CustomerDaoImplTest {
private final CustomerDaoImpl dao = new CustomerDaoImpl();
public void testInsert() {
Connection connection = null;
try {
connection = JDBCUtils.getConnection();
Customer customer = new Customer(1, "于小飞", "xiaofei@126.com", new Date(43534646435L));
dao.insert(connection, customer);
System.out.println("添加成功");
} catch (Exception e) {
e.printStackTrace();
} finally {
JDBCUtils.closeResource(connection, null);
}
}
public void testDeleteById() {
Connection connection = null;
try {
connection = JDBCUtils.getConnection();
dao.deleteById(connection, 22);
System.out.println("删除成功");
} catch (Exception e) {
e.printStackTrace();
} finally {
JDBCUtils.closeResource(connection, null);
}
}
public void testUpdate() {
Connection connection = null;
try {
connection = JDBCUtils.getConnection();
Customer customer = new Customer(18, "贝多芬", "beiduofen@126.com", new Date(453465656L));
dao.update(connection, customer);
System.out.println("修改成功");
} catch (Exception e) {
e.printStackTrace();
} finally {
JDBCUtils.closeResource(connection, null);
}
}
public void testGetCustomerById() {
Connection connection = null;
try {
connection = JDBCUtils.getConnection();
Customer customer = dao.getCustomerById(connection, 20);
System.out.println(customer);
} catch (Exception e) {
e.printStackTrace();
} finally {
JDBCUtils.closeResource(connection, null);
}
}
public void testGetAll() {
Connection connection = null;
try {
connection = JDBCUtils.getConnection();
List<Customer> list = dao.getAll(connection);
list.forEach(System.out::println);
} catch (Exception e) {
e.printStackTrace();
} finally {
JDBCUtils.closeResource(connection, null);
}
}
public void testGetCount() {
Connection connection = null;
try {
connection = JDBCUtils.getConnection();
Long count = dao.getCount(connection);
System.out.println("表中的记录数为:" + count);
} catch (Exception e) {
e.printStackTrace();
} finally {
JDBCUtils.closeResource(connection, null);
}
}
public void testGetMaxBirth() {
Connection connection = null;
try {
connection = JDBCUtils.getConnection();
Date maxBirth = dao.getMaxBirth(connection);
System.out.println("最大的生日为:" + maxBirth);
} catch (Exception e) {
e.printStackTrace();
} finally {
JDBCUtils.closeResource(connection, null);
}
}
public void testGetPageCustomers() {
Connection connection = null;
try {
connection = JDBCUtils.getConnection();
Page<Customer> page = new Page<>();
page.setPageNo(2);// 查询第二页
page = dao.getPageCustomers(connection, page);
System.out.println(page);
} catch (Exception exception) {
exception.printStackTrace();
} finally {
JDBCUtils.closeResource(connection, null);
}
}
public void testGetPageCustomersByBirth() {
Connection connection = null;
try {
connection = JDBCUtils.getConnection();
Page<Customer> page = new Page<>();
page.setPageNo(1);// 查询第二页
SimpleDateFormat sdf = new SimpleDateFormat("yyyy-MM-dd");
java.util.Date minDate = sdf.parse("1984-01-01");
java.util.Date maxDate = sdf.parse("2010-12-31");
page = dao.getPageCustomersByBirth(connection, page, new Date(minDate.getTime()), new Date(maxDate.getTime()));
System.out.println(page);
} catch (Exception exception) {
exception.printStackTrace();
} finally {
JDBCUtils.closeResource(connection, null);
}
}
}
升级
在 BaseDao 中添加泛型,同步修改 CustomerDaoImpl 的相应代码:
BaseDao.java:
1
2
3
4
5
6
7
8
9
10
11
12
13
14
15
16
17
18
19
20
21
22
23
24
25
26
27
28
29
30
31
32
33
34
35
36
37
38
39
40
41
42
43
44
45
46
47
48
49
50
51
52
53
54
55
56
57
58
59
60
61
62
63
64
65
66
67
68
69
70
71
72
73
74
75
76
77
78
79
80
81
82
83
84
85
86
87
88
89
90
91
92
93
94
95
96
97
98
99
100
101
102
103
104
105
106
107
108
109
110
111
112
113
114
115
116
117
118
119
120
121
122
123
124
125
126
127
128
129
130
131
132
133
134/*
* DAO: Data(base) Access Object
* 封装了针对于数据表的通用的操作,声明为abstact类,不能被实例化
*/
public abstract class BaseDao<T> {
// 在构造器中,或者代码块中赋值,clazz就是当前类的父类的泛型参数
// 比如当前类为CustomerDaoImpl,clazz就是它的父类BaseDao<Customer>的泛型参数
private Class<T> clazz;
// 方式一:获取T的Class对象,获取泛型的类型,泛型是在被子类继承时才确定
public BaseDao() {
// 获取子类的类型
Class clazz = this.getClass();
// 获取父类的类型
// getGenericSuperclass()用来获取当前类的父类的类型
// ParameterizedType表示的是带泛型的类型
ParameterizedType parameterizedType = (ParameterizedType) clazz.getGenericSuperclass();
// 获取具体的泛型类型 getActualTypeArguments获取具体的泛型的类型
// 这个方法会返回一个Type的数组
Type[] types = parameterizedType.getActualTypeArguments();
// 获取具体的泛型的类型·
this.type = (Class<T>) types[0];
}
// 方式二:
/*{
Type genericSuperclass = this.getClass().getGenericSuperclass();
ParameterizedType parameterizedType = (ParameterizedType) genericSuperclass;
Type[] actualTypeArguments = parameterizedType.getActualTypeArguments();// 获取了父类的泛型参数
clazz = (Class<T>) actualTypeArguments[0];// 泛型的第一个参数
}*/
// 通用的增删改操作---version 2.0(考虑上事务)
public int update(Connection connection, String sql, Object... args) {
PreparedStatement preparedStatement = null;
try {
preparedStatement = connection.prepareStatement(sql);
for (int i = 0; i < args.length; i++) {
preparedStatement.setObject(i + 1, args[i]);
}
return preparedStatement.executeUpdate();
} catch (Exception e) {
e.printStackTrace();
} finally {
JDBCUtils.closeResource(null, preparedStatement);
}
return 0;
}
// 通用的查询操作,用于返回数据表中的一条记录---version 2.0(考虑上事务)
public T getInstance(Connection connection, String sql, Object... args) {
PreparedStatement preparedStatement = null;
ResultSet resultSet = null;
try {
preparedStatement = connection.prepareStatement(sql);
for (int i = 0; i < args.length; i++) {
preparedStatement.setObject(i + 1, args[i]);
}
resultSet = preparedStatement.executeQuery();
ResultSetMetaData resultSetMetaData = resultSet.getMetaData();
int columnCount = resultSetMetaData.getColumnCount();
if (resultSet.next()) {
T t = clazz.newInstance();
for (int i = 0; i < columnCount; i++) {
Object columnValue = resultSet.getObject(i + 1);
String columnLabel = resultSetMetaData.getColumnLabel(i + 1);
Field field = clazz.getDeclaredField(columnLabel);
field.setAccessible(true);
field.set(t, columnValue);
}
return t;
}
} catch (Exception e) {
e.printStackTrace();
} finally {
JDBCUtils.closeResource(null, preparedStatement, resultSet);
}
return null;
}
// 通用的查询操作,用于返回数据表中的多条记录构成的集合---version 2.0(考虑事务)
public List<T> getForList(Connection connection, String sql, Object... args) {
PreparedStatement preparedStatement = null;
ResultSet resultSet = null;
try {
preparedStatement = connection.prepareStatement(sql);
for (int i = 0; i < args.length; i++) {
preparedStatement.setObject(i + 1, args[i]);
}
resultSet = preparedStatement.executeQuery();
ResultSetMetaData resultSetMetaData = resultSet.getMetaData();
int columnCount = resultSetMetaData.getColumnCount();
ArrayList<T> list = new ArrayList<T>();
while (resultSet.next()) {
T t = clazz.newInstance();
for (int i = 0; i < columnCount; i++) {
Object columnValue = resultSet.getObject(i + 1);
String columnLabel = resultSetMetaData.getColumnLabel(i + 1);
Field field = clazz.getDeclaredField(columnLabel);
field.setAccessible(true);
field.set(t, columnValue);
}
list.add(t);
}
return list;
} catch (Exception e) {
e.printStackTrace();
} finally {
JDBCUtils.closeResource(null, preparedStatement, resultSet);
}
return null;
}
// 用于查询特殊值的通用的方法,比如:select count(*) from test;
public <E> E getValue(Connection connection, String sql, Object... args) {
PreparedStatement preparedStatement = null;
ResultSet resultSet = null;
try {
preparedStatement = connection.prepareStatement(sql);
for (int i = 0; i < args.length; i++) {
preparedStatement.setObject(i + 1, args[i]);
}
resultSet = preparedStatement.executeQuery();
if (resultSet.next()) {
return (E) resultSet.getObject(1);
}
} catch (SQLException e) {
e.printStackTrace();
} finally {
JDBCUtils.closeResource(null, preparedStatement, resultSet);
}
return null;
}
}BaseDao 中添加了泛型参数,每一个子类在继承时,直接添加对应的 Class,这样在方法中,就不需要再单独传入 Class 参数。
CustomerDaoImpl.java:
1
2
3
4
5
6
7
8
9
10
11
12
13
14
15
16
17
18
19
20
21
22
23
24
25
26
27
28
29
30
31
32
33
34
35
36
37
38
39
40
41
42
43public class CustomerDaoImpl extends BaseDao<Customer> implements CustomerDao {
public void insert(Connection connection, Customer customer) {
String sql = "insert into customers(name, email, birth) values(?, ?, ?)";
update(connection, sql, customer.getName(), customer.getEmail(), customer.getBirth());
}
public void deleteById(Connection connection, int id) {
String sql = "delete from customers where id = ?";
update(connection, sql, id);
}
public void update(Connection connection, Customer customer) {
String sql = "update customers set name = ?, email = ?, birth = ? where id = ?";
update(connection, sql, customer.getName(), customer.getEmail(), customer.getBirth(), customer.getId());
}
public Customer getCustomerById(Connection connection, int id) {
String sql = "select id, name, email, birth from customers where id = ?";
return getInstance(connection, sql, id);
}
public List<Customer> getAll(Connection connection) {
String sql = "select id, name, email, birth from customers";
return getForList(connection, sql);
}
public Long getCount(Connection connection) {
String sql = "select count(*) from customers";
return getValue(connection, sql);
}
public Date getMaxBirth(Connection connection) {
String sql = "select max(birth) from customers";
return getValue(connection, sql);
}
}
数据库连接池
JDBC 数据库连接池的必要性
在使用开发基于数据库的 Web 程序时,传统的模式基本是按以下步骤:
- 在主程序 (如 servlet、beans) 中建立数据库连接;
- 进行 SQL 操作;
- 断开数据库连接。
这种模式开发,存在的问题:
- 普通的 JDBC 数据库连接使用 DriverManager 来获取,每次向数据库建立连接的时候都要将 Connection 加载到内存中,再验证用户名和密码 (需要耗费 0.05s~1s 的时间)。当需要数据库连接的时候,就向数据库要求一个,执行完成后再断开连接。这样的方式将会消耗大量的资源和时间。数据库的连接资源并没有得到很好的重复利用。若同时有几百人甚至几千人在线,频繁的进行数据库连接操作将占用很多的系统资源,严重的甚至会造成服务器的崩溃。
- 对于每一次数据库连接,使用完后都得断开。否则,如果程序出现异常而未能关闭,将会导致数据库系统中的内存泄漏,最终将导致重启数据库。
- 这种开发不能控制被创建的连接对象数,系统资源会被毫无顾及的分配出去,如连接过多,也可能导致内存泄漏,服务器崩溃。
数据库连接池技术
为解决传统开发中的数据库连接问题,可以采用数据库连接池技术。
数据库连接池的基本思想:就是为数据库连接建立一个”缓冲池”。预先在缓冲池中放入一定数量的连接,当需要建立数据库连接时,只需从”缓冲池”中取出一个,使用完毕之后再放回去。
数据库连接池负责分配、管理和释放数据库连接,它允许应用程序重复使用一个现有的数据库连接,而不是重新建立一个。
数据库连接池在初始化时,会创建一定数量的数据库连接放到连接池中,这些数据库连接的数量是由最小数据库连接数来设定的。无论这些数据库连接是否被使用,连接池都将一直保证至少拥有这么多的连接数量。连接池的最大数据库连接数量限定了这个连接池能占有的最大连接数,当应用程序向连接池请求的连接数超过最大连接数量时,这些请求将被加入到等待队列中。
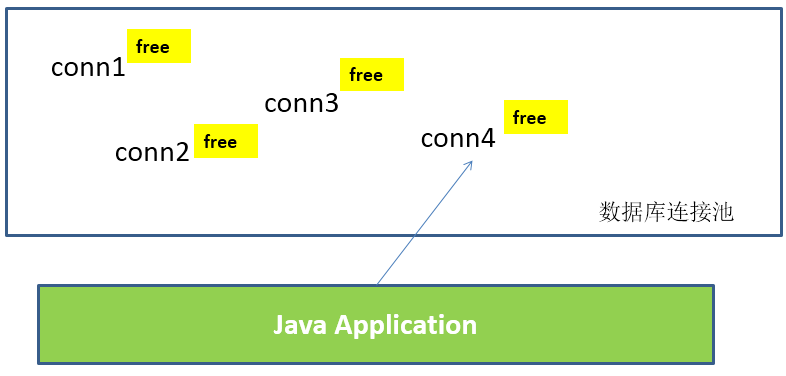
工作原理:
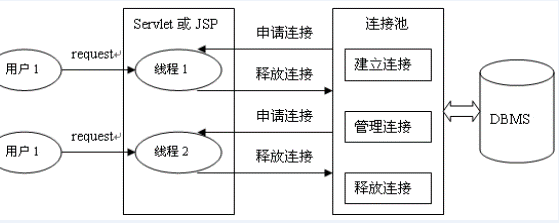
数据库连接池技术的优点:
- 资源重用
- 由于数据库连接得以重用,避免了频繁创建、释放连接所引起的大量性能开销。在减少系统消耗的基础上,另一方面也增加了系统运行环境的平稳性。
- 更快的系统反应速度
- 数据库连接池在初始化过程中,往往已经创建了若干数据库连接置于连接池中备用。此时连接的初始化工作均已完成。对于业务请求处理而言,直接利用现有可用连接,避免了数据库连接初始化和释放过程的时间开销,从而减少了系统的响应时间。
- 新的资源分配手段
- 对于多应用共享同一数据库的系统而言,可在应用层通过数据库连接池的配置,实现某一应用最大可用数据库连接数的限制,避免某一应用独占所有的数据库资源。
- 统一的连接管理,避免数据库连接泄漏
- 在较为完善的数据库连接池实现中,可根据预先的占用超时设定,强制回收被占用连接,从而避免了常规数据库连接操作中可能出现的资源泄露。
- 资源重用
多种开源的数据库连接池
- JDBC 的数据库连接池使用
javax.sql.DataSource来表示,DataSource 是一个接口,该接口通常由服务器 (如 Weblogic,WebSphere,Tomcat 等) 提供实现,也有一些开源组织提供实现:- DBCP:是 Apache 提供的数据库连接池。Tomcat 服务器自带 DBCP 数据库连接池。速度相对 C3P0 较快,但因自身存在 BUG,Hibernate3 已不再提供支持。
- C3P0:是一个开源组织提供的一个数据库连接池,速度相对较慢,稳定性还可以。Hibernate 官方推荐使用。
- Proxool:是 sourceforge 下的一个开源项目数据库连接池,有监控连接池状态的功能,稳定性较 C3P0 差一点。
- BoneCP:是一个开源组织提供的数据库连接池,速度快。
- Druid:是阿里提供的数据库连接池,据说是集DBCP 、C3P0 、Proxool 优点于一身的数据库连接池,但是速度不确定是否有BoneCP快
- DataSource 通常被称为数据源,它包含连接池和连接池管理两个部分,习惯上也经常把 DataSource 称为连接池。
- DataSource 用来取代 DriverManager 来获取 Connection,获取速度快,同时可以大幅度提高数据库访问速度。
- 特别注意:
- 数据源和数据库连接不同,数据源无需创建多个,它是产生数据库连接的工厂,因此,整个应用只需要一个数据源即可。
- 当数据库访问结束后,程序还是像以前一样关闭数据库连接:
connection.close();,但connection.close()并没有关闭数据库的物理连接,它仅仅把数据库连接释放,将其归还给了数据库连接池。
C3P0 数据库连接池
Maven 添加依赖:
1
2
3
4
5<dependency>
<groupId>com.mchange</groupId>
<artifactId>c3p0</artifactId>
<version>0.9.5.2</version>
</dependency>获取连接方式一
1
2
3
4
5
6
7
8
9
10
11
12
13
14
15
16
17
18
19
20
21
22
23
24
25
26
27
28
29
30public class C3P0Test {
// 方式一:不推荐
private ComboPooledDataSource cpds = new ComboPooledDataSource();
{
try {
// 创建c3p0数据库连接池
cpds.setDriverClass("com.mysql.cj.jdbc.Driver");
cpds.setJdbcUrl("jdbc:mysql://localhost:3306/test");
cpds.setUser("root");
cpds.setPassword("abc123");
// 通过设置相关的参数,对数据库连接池进行管理
cpds.setInitialPoolSize(10);// 设置初始时数据库连接池中的连接数
// ......
} catch (PropertyVetoException e) {
e.printStackTrace();
}
}
public Connection getC3P0Connection() throws Exception {
Connection connection = cpds.getConnection();
System.out.println(connection);
// 销毁c3p0数据库连接池的方法,了解,不要轻易使用
// DataSources.destroy(cpds);
return connection;
}
}获取连接方式二
1
2
3
4
5
6
7
8
9
10public class C3P0Test {
// 方式二:使用配置文件,推荐
private final DataSource cpds = new ComboPooledDataSource("helloc3p0");
public Connection getC3P0Connection() throws SQLException {
Connection connection = cpds.getConnection();
System.out.println(connection);
return connection;
}
}1
2
3
4
5
6
7
8
9
10
11
12
13
14
15
16
17
18
19
20
21
22
23
24
25
<c3p0-config>
<named-config name="helloc3p0">
<!-- 获取连接的4个基本信息 -->
<property name="driverClass">com.mysql.cj.jdbc.Driver</property>
<!-- 如果连接本地3306端口,可以简写为:jdbc:mysql:///test -->
<property name="jdbcUrl">jdbc:mysql://localhost:3306/test</property>
<property name="user">root</property>
<property name="password">abc123</property>
<!-- 涉及到数据库连接池的管理的常用相关属性的设置 -->
<!-- 若数据库中连接数不足时,一次向数据库服务器申请多少个连接 -->
<property name="acquireIncrement">5</property>
<!-- 初始化数据库连接池时连接的数量 -->
<property name="initialPoolSize">5</property>
<!-- 数据库连接池中的最小的数据库连接数 -->
<property name="minPoolSize">5</property>
<!-- 数据库连接池中的最大的数据库连接数 -->
<property name="maxPoolSize">10</property>
<!-- C3P0数据库连接池可以维护的Statement的个数 -->
<property name="maxStatements">20</property>
<!-- 每个连接同时可以使用的Statement对象的个数 -->
<property name="maxStatementsPerConnection">5</property>
</named-config>
</c3p0-config>c3p0-config.xml 配置文件,在 resourcs 目录下新建。
DBCP 数据库连接池
DBCP 是 Apache 软件基金组织下的开源连接池实现,该连接池依赖该组织下的另一个开源系统:Common-pool。如需使用该连接池实现,应在系统中增加如下两个 jar 文件:
- Commons-dbcp.jar:连接池的实现。
- Commons-pool.jar:连接池实现的依赖库。
Tomcat 的连接池正是采用该连接池来实现的。该数据库连接池既可以与应用服务器整合使用,也可由应用程序独立使用。
配置属性说明:
属性 默认值 说明 initialSize 0 连接池启动时创建的初始化连接数量 maxActive 8 连接池中可同时连接的最大的连接数 maxIdle 8 连接池中最大的空闲的连接数,超过的空闲连接将被释放,如果设置为负数表示不限制 minIdle 0 连接池中最小的空闲的连接数,低于这个数量会被创建新的连接。该参数越接近maxIdle,性能越好,因为连接的创建和销毁,都是需要消耗资源的;但是不能太大。 maxWait 无限制 最大等待时间,当没有可用连接时,连接池等待连接释放的最大时间,超过该时间限制会抛出异常,如果设置-1表示无限等待 poolPreparedStatements false 开启池的Statement是否prepared maxOpenPreparedStatements 无限制 开启池的prepared 后的同时最大连接数 minEvictableIdleTimeMillis 连接池中连接,在时间段内一直空闲, 被逐出连接池的时间 removeAbandonedTimeout 300 超过时间限制,回收没有用(废弃)的连接 removeAbandoned false 超过removeAbandonedTimeout时间后,是否进 行没用连接(废弃)的回收 Maven 添加依赖:
1
2
3
4
5<dependency>
<groupId>commons-dbcp</groupId>
<artifactId>commons-dbcp</artifactId>
<version>1.4</version>
</dependency>
获取连接方式一
1
2
3
4
5
6
7
8
9
10
11
12
13
14
15
16
17
18
19
20
21
22
23
24
25
26
27
28public class DBCPTest {
// 方式一:不推荐
private final BasicDataSource source = new BasicDataSource();
{
// 设置基本信息
source.setDriverClassName("com.mysql.cj.jdbc.Driver");
source.setUrl("jdbc:mysql:///test");
source.setUsername("root");
source.setPassword("abc123");
// 设置其他涉及数据库连接池管理的相关属性:
source.setInitialSize(10);
source.setMaxActive(10);
// ......
}
public Connection getDbcpConnection() {
Connection connection = null;
try {
connection = source.getConnection();
System.out.println(connection);
} catch (SQLException throwables) {
throwables.printStackTrace();
}
return connection;
}
}获取连接方式二
1
2
3
4
5
6
7
8
9
10
11
12
13
14
15
16
17
18
19
20
21
22
23
24public class DBCPTest {
// 方式二:使用配置文件,推荐
private DataSource source = null;
{
try {
Properties properties = new Properties();
// 方式1:
// FileInputStream is = new FileInputStream(new File("dbcp.properties"));
// 方式2:
InputStream is = ClassLoader.getSystemClassLoader().getResourceAsStream("dbcp.properties");
properties.load(is);
source = BasicDataSourceFactory.createDataSource(properties);
} catch (Exception e) {
e.printStackTrace();
}
}
public Connection getDbcpConnection() throws Exception {
Connection connection = source.getConnection();
System.out.println(connection);
return connection;
}
}1
2
3
4
5driverClassName=com.mysql.cj.jdbc.Driver
url=jdbc:mysql://localhost:3306/test?rewriteBatchedStatements=true&useServerPrepStmts=false
username=root
password=abc123
initialSize=10dbcp.properties 配置文件,在 resourcs 目录下新建。
Druid (德鲁伊) 数据库连接池
Druid是阿里巴巴开源平台上一个数据库连接池实现,它结合了C3P0、DBCP、Proxool等DB池的优点,同时加入了日志监控,可以很好的监控DB池连接和SQL的执行情况,可以说是针对监控而生的DB连接池,可以说是目前最好的连接池之一。
详细配置参数:
配置 缺省 说明 name 配置这个属性的意义在于,如果存在多个数据源,监控的时候可以通过名字来区分开来。 如果没有配置,将会生成一个名字,格式是:”DataSource-” + System.identityHashCode(this) url 连接数据库的url,不同数据库不一样。例如:mysql : jdbc:mysql://10.20.153.104:3306/druid2 oracle : jdbc:oracle:thin:@10.20.149.85:1521:ocnauto username 连接数据库的用户名 password 连接数据库的密码。如果你不希望密码直接写在配置文件中,可以使用ConfigFilter。详细看这里:https://github.com/alibaba/druid/wiki/%E4%BD%BF%E7%94%A8ConfigFilter driverClassName 根据url自动识别 这一项可配可不配,如果不配置druid会根据url自动识别dbType,然后选择相应的driverClassName(建议配置下) initialSize 0 初始化时建立物理连接的个数。初始化发生在显示调用init方法,或者第一次getConnection时 maxActive 8 最大连接池数量 maxIdle 8 已经不再使用,配置了也没效果 minIdle 最小连接池数量 maxWait 获取连接时最大等待时间,单位毫秒。配置了maxWait之后,缺省启用公平锁,并发效率会有所下降,如果需要可以通过配置useUnfairLock属性为true使用非公平锁。 poolPreparedStatements false 是否缓存preparedStatement,也就是PSCache。PSCache对支持游标的数据库性能提升巨大,比如说oracle。在mysql下建议关闭。 maxOpenPreparedStatements -1 要启用PSCache,必须配置大于0,当大于0时,poolPreparedStatements自动触发修改为true。在Druid中,不会存在Oracle下PSCache占用内存过多的问题,可以把这个数值配置大一些,比如说100 validationQuery 用来检测连接是否有效的sql,要求是一个查询语句。如果validationQuery为null,testOnBorrow、testOnReturn、testWhileIdle都不会其作用。 testOnBorrow true 申请连接时执行validationQuery检测连接是否有效,做了这个配置会降低性能。 testOnReturn false 归还连接时执行validationQuery检测连接是否有效,做了这个配置会降低性能 testWhileIdle false 建议配置为true,不影响性能,并且保证安全性。申请连接的时候检测,如果空闲时间大于timeBetweenEvictionRunsMillis,执行validationQuery检测连接是否有效。 timeBetweenEvictionRunsMillis 有两个含义: 1)Destroy线程会检测连接的间隔时间2)testWhileIdle的判断依据,详细看testWhileIdle属性的说明 numTestsPerEvictionRun 不再使用,一个DruidDataSource只支持一个EvictionRun minEvictableIdleTimeMillis connectionInitSqls 物理连接初始化的时候执行的sql exceptionSorter 根据dbType自动识别 当数据库抛出一些不可恢复的异常时,抛弃连接 filters 属性类型是字符串,通过别名的方式配置扩展插件,常用的插件有:监控统计用的filter:stat;日志用的filter:log4j;防御sql注入的filter:wall。 proxyFilters 类型是List,如果同时配置了filters和proxyFilters,是组合关系,并非替换关系 Maven 添加依赖:
1
2
3
4
5<dependency>
<groupId>com.alibaba</groupId>
<artifactId>druid</artifactId>
<version>1.2.6</version>
</dependency>获取连接方式一
1
2
3
4
5
6
7
8
9
10
11
12
13
14
15
16
17
18
19
20
21
22
23public class DruidTest {
// 方式一:不推荐
private DruidDataSource dataSource = null;
{
// 设置基本信息
dataSource = new DruidDataSource();
dataSource.setDriverClassName("com.mysql.cj.jdbc.Driver");
dataSource.setUrl("jdbc:mysql:///test");
dataSource.setUsername("root");
dataSource.setPassword("abc123");
// 设置其他涉及数据库连接池管理的相关属性:
dataSource.setInitialSize(10);
// ......
}
public Connection getDruidConnection() throws Exception {
Connection connection = dataSource.getConnection();
System.out.println(connection);
return connection;
}
}获取连接方式二
1
2
3
4
5
6
7
8
9
10
11
12
13
14
15
16
17
18
19
20
21public class DruidTest {
// 方式二:使用配置文件,推荐
private DataSource dataSource = null;
{
try {
Properties properties = new Properties();
InputStream is = ClassLoader.getSystemClassLoader().getResourceAsStream("druid.properties");
properties.load(is);
dataSource = DruidDataSourceFactory.createDataSource(properties);
} catch (Exception e) {
e.printStackTrace();
}
}
public Connection getDruidConnection() throws Exception {
Connection connection = dataSource.getConnection();
System.out.println(connection);
return connection;
}
}1
2
3
4
5
6
7
8driverClassName=com.mysql.cj.jdbc.Driver
url=jdbc:mysql://localhost:3306/test?rewriteBatchedStatements=true
username=root
password=abc123
initialSize=10
maxActive=20
maxWait=1000
filters=walldruid.properties 配置文件,在 resourcs 目录下新建。
Apache-DBUtils 实现 CRUD 操作
Apache-DBUtils 简介
commons-dbutils是 Apache 组织提供的一个开源 JDBC工具类库,它是对 JDBC 的简单封装,学习成本极低,并且使用 DBUtils 能极大简化 JDBC 编码的工作量,同时也不会影响程序的性能。API 介绍:
org.apache.commons.dbutils.DbUtils- 工具类。
org.apache.commons.dbutils.QueryRunner- 提供数据库操作的一系列重载的
update()和query()操作。
- 提供数据库操作的一系列重载的
org.apache.commons.dbutils.ResultSetHandler- 此接口用于处理数据库查询操作得到的结果集。不同的结果集的情形,由其不同的子类来实现。
Maven 添加依赖:
1
2
3
4
5<dependency>
<groupId>commons-dbutils</groupId>
<artifactId>commons-dbutils</artifactId>
<version>1.7</version>
</dependency>
主要 API 的使用
DbUtils
- DbUtils :提供如关闭连接、装载 JDBC 驱动程序等常规工作的工具类,里面的所有方法都是静态的。
- 主要方法如下:
public static void close(…) throws java.sql.SQLException: DbUtils 类提供了三个重载的关闭方法。这些方法检查所提供的参数是不是 null,如果不是的话,它们就关闭 Connection、Statement 和 ResultSet。public static void closeQuietly(…):这一类方法不仅能在 Connection、Statement 和 ResultSet 为 null 情况下避免关闭,还能隐藏一些在程序中抛出的 SQLEeception。public static void commitAndClose(Connection connection)throws SQLException: 用来提交连接的事务,然后关闭连接。public static void commitAndCloseQuietly(Connection connection): 用来提交连接,然后关闭连接,并且在关闭连接时不抛出 SQL 异常。public static void rollback(Connection connection)throws SQLException:允许 connection 为 null,因为方法内部做了判断。public static void rollbackAndClose(Connection connection)throws SQLExceptionrollbackAndCloseQuietly(Connection connection)public static boolean loadDriver(java.lang.String driverClassName):这一方装载并注册 JDBC 驱动程序,如果成功就返回 true。使用该方法,你不需要捕捉 ClassNotFoundException 异常。
QueryRunner类
该类简单化了 SQL 查询,它与 ResultSetHandler 组合在一起使用可以完成大部分的数据库操作,能够大大减少编码量。
QueryRunner 类提供了两个构造器:
- 默认的构造器。
- 需要一个
javax.sql.DataSource来作参数的构造器。
QueryRunner类的主要方法:
- 更新
public int update(Connection connection, String sql, Object... params) throws SQLException:用来执行一个更新 (插入、更新或删除) 操作。
- 插入
public <T> T insert(Connection connection, String sql, ResultSetHandler<T> rsh, Object... params) throws SQLException:只支持 INSERT 语句,其中,rsh:The handler used to create the result object from the ResultSet of auto-generated keys。返回值:An object generated by the handler,即自动生成的键值。
- 批处理
public int[] batch(Connection connection, String sql, Object[][] params)throws SQLException: INSERT,UPDATE,DELETE 语句。public <T> T insertBatch(Connection connection, String sql, ResultSetHandler<T> rsh, Object[][] params)throws SQLException:只支持 INSERT 语句。
- 查询
public Object query(Connection connection, String sql, ResultSetHandler rsh, Object... params) throws SQLException:执行一个查询操作,在这个查询中,对象数组中的每个元素值被用来作为查询语句的置换参数。该方法会自行处理 PreparedStatement 和 ResultSet 的创建和关闭。
- 更新
ResultSetHandler 接口及实现类
该接口用于处理
java.sql.ResultSet,将数据按要求转换为另一种形式。ResultSetHandler 接口提供了一个单独的方法:
Object handle (java.sql.ResultSet rs)。接口的主要实现类:
ArrayHandler:把结果集中的第一行数据转成对象数组。
ArrayListHandler:把结果集中的每一行数据都转成一个数组,再存放到 List 中。
BeanHandler:将结果集中的第一行数据封装到一个对应的 JavaBean 实例中。
BeanListHandler:将结果集中的每一行数据都封装到一个对应的 JavaBean 实例中,再存放到 List 中。
ColumnListHandler:将结果集中某一列的数据存放到 List 中。
KeyedHandler(name):将结果集中的每一行数据都封装到一个 Map 里,再把这些 Map 再存到一个 Map 里,其 key 为指定的 key。
MapHandler:将结果集中的第一行数据封装到一个 Map 里,key 是列名,value 是对应的值。
MapListHandler:将结果集中的每一行数据都封装到一个 Map 里,再存放到 List 中。
ScalarHandler:查询单个值对象。
JDBC 总结
pom.xml:
1
2
3
4
5
6
7
8
9
10
11
12
13
14
15
16
17
18
19
20
21
22
23
24
25
26
27
28
29
30
31
32
33
34
35
36
37
38
39
40
41
42
43
44
45
46
47
48
49
<project xmlns="http://maven.apache.org/POM/4.0.0"
xmlns:xsi="http://www.w3.org/2001/XMLSchema-instance"
xsi:schemaLocation="http://maven.apache.org/POM/4.0.0 http://maven.apache.org/xsd/maven-4.0.0.xsd">
<modelVersion>4.0.0</modelVersion>
<groupId>cn.xisun</groupId>
<artifactId>xisun-jdbc</artifactId>
<version>1.0-SNAPSHOT</version>
<dependencies>
<dependency>
<groupId>org.junit.jupiter</groupId>
<artifactId>junit-jupiter</artifactId>
<version>5.6.2</version>
<scope>chemicalStructure</scope>
</dependency>
<dependency>
    <groupId>mysql</groupId>
    <artifactId>mysql-connector-java</artifactId>
    <version>8.0.25</version>
</dependency>
<dependency>
<groupId>com.mchange</groupId>
<artifactId>c3p0</artifactId>
<version>0.9.5.2</version>
</dependency>
<dependency>
<groupId>commons-dbcp</groupId>
<artifactId>commons-dbcp</artifactId>
<version>1.4</version>
</dependency>
<dependency>
<groupId>com.alibaba</groupId>
<artifactId>druid</artifactId>
<version>1.2.6</version>
</dependency>
<dependency>
<groupId>commons-dbutils</groupId>
<artifactId>commons-dbutils</artifactId>
<version>1.7</version>
</dependency>
</dependencies>
</project>JDBCUtils.java:
1
2
3
4
5
6
7
8
9
10
11
12
13
14
15
16
17
18
19
20
21
22
23
24
25
26
27
28
29
30
31
32
33
34
35
36
37
38
39
40
41
42
43
44
45
46
47
48
49
50
51
52
53
54
55
56
57
58
59
60
61
62
63
64
65
66
67
68
69
70
71
72
73
74
75
76
77
78
79
80
81
82
83
84
85
86
87
88
89
90
91
92
93
94
95
96
97
98
99
100
101
102
103
104
105
106
107
108
109
110
111
112
113
114
115
116
117
118
119
120
121
122
123
124
125
126
127
128
129
130
131
132
133
134
135
136
137
138
139
140
141
142
143
144
145
146
147
148
149
150
151
152
153
154
155public class JDBCUtils {
/**
* @Description 常规方式获取数据库的连接
*/
public static Connection getCommonConnection() throws Exception {
// 1.读取配置文件中的4个基本信息
Properties properties = new Properties();
InputStream is = ClassLoader.getSystemClassLoader().getResourceAsStream("jdbc.properties");
properties.load(is);
String driverClass = properties.getProperty("driverClass");
String url = properties.getProperty("url");
String user = properties.getProperty("user");
String password = properties.getProperty("password");
// 2.加载驱动
Class.forName(driverClass);
// 3.获取连接
return DriverManager.getConnection(url, user, password);
}
/**
* @Description 使用C3P0数据库连接池技术获取数据库连接
*/
// 创建一个C3P0数据库连接池,数据库连接池只需提供一个即可
private static final ComboPooledDataSource CPDS = new ComboPooledDataSource("hellc3p0");
public static Connection getC3P0Connection() throws SQLException {
return CPDS.getConnection();
}
/**
* @Description 使用DBCP数据库连接池技术获取数据库连接
*/
// 创建一个DBCP数据库连接池,数据库连接池只需提供一个即可
private static DataSource dbcpSource;
static {
try {
Properties properties = new Properties();
InputStream is = ClassLoader.getSystemClassLoader().getResourceAsStream("dbcp.properties");
properties.load(is);
dbcpSource = BasicDataSourceFactory.createDataSource(properties);
} catch (Exception e) {
e.printStackTrace();
}
}
public static Connection getDbcpConnection() throws Exception {
return dbcpSource.getConnection();
}
/**
* @Description 使用Druid数据库连接池技术获取数据库连接
*/
// 创建一个Druid数据库连接池,数据库连接池只需提供一个即可
private static DataSource druidSource;
static {
try {
Properties properties = new Properties();
InputStream is = ClassLoader.getSystemClassLoader().getResourceAsStream("druid.properties");
properties.load(is);
druidSource = DruidDataSourceFactory.createDataSource(properties);
} catch (Exception e) {
e.printStackTrace();
}
}
public static Connection getDruidConnection() throws SQLException {
return druidSource.getConnection();
}
/**
* @Description 连接回滚
*/
public static void rollBackConnection(Connection connection) {
if (connection != null) {
try {
connection.rollback();
} catch (SQLException throwables) {
throwables.printStackTrace();
}
}
// DbUtils工具类提供的回滚操作
/*DbUtils.rollback(connection);
DbUtils.rollbackAndClose(connection);
DbUtils.rollbackAndCloseQuietly(connection);*/
}
/**
* @Description 常规方式,实现资源的关闭
*/
public static void closeResource(Connection connection, Statement statement, ResultSet resultSet) {
if (resultSet != null) {
try {
resultSet.close();
} catch (SQLException throwables) {
throwables.printStackTrace();
}
}
if (statement != null) {
try {
statement.close();
} catch (SQLException e) {
e.printStackTrace();
}
}
if (connection != null) {
try {
connection.close();
} catch (SQLException e) {
e.printStackTrace();
}
}
}
/**
* @Description 使用DbUtils工具类,实现资源的关闭
*/
public static void closeResourceByDbUtils(Connection connection, Statement statement, ResultSet resultSet) {
// 方式一
/*try {
DbUtils.close(resultSet);
} catch (SQLException e) {
e.printStackTrace();
}
try {
DbUtils.close(statement);
} catch (SQLException e) {
e.printStackTrace();
}
try {
DbUtils.close(connection);
} catch (SQLException e) {
e.printStackTrace();
}*/
// 方式二
DbUtils.closeQuietly(resultSet);
DbUtils.closeQuietly(statement);
DbUtils.closeQuietly(connection);
}
}resources:
jdbc.properties:
1
2
3
4driverClass=com.mysql.cj.jdbc.Driver
url=jdbc:mysql://localhost:3306/test
user=root
password=abc123c3p0-config.xml:
1
2
3
4
5
6
7
8
9
10
11
12
13
14
15
16
17
18
19
20
21
22
23
24
25
<c3p0-config>
<named-config name="helloc3p0">
<!-- 获取连接的4个基本信息 -->
<property name="driverClass">com.mysql.cj.jdbc.Driver</property>
<!-- 如果连接本地3306端口,可以简写为:jdbc:mysql:///test -->
<property name="jdbcUrl">jdbc:mysql://localhost:3306/test</property>
<property name="user">root</property>
<property name="password">abc123</property>
<!-- 涉及到数据库连接池的管理的常用相关属性的设置 -->
<!-- 若数据库中连接数不足时,一次向数据库服务器申请多少个连接 -->
<property name="acquireIncrement">5</property>
<!-- 初始化数据库连接池时连接的数量 -->
<property name="initialPoolSize">5</property>
<!-- 数据库连接池中的最小的数据库连接数 -->
<property name="minPoolSize">5</property>
<!-- 数据库连接池中的最大的数据库连接数 -->
<property name="maxPoolSize">10</property>
<!-- C3P0数据库连接池可以维护的Statement的个数 -->
<property name="maxStatements">20</property>
<!-- 每个连接同时可以使用的Statement对象的个数 -->
<property name="maxStatementsPerConnection">5</property>
</named-config>
</c3p0-config>dbcp.properties:
1
2
3
4
5driverClassName=com.mysql.cj.jdbc.Driver
url=jdbc:mysql:///test?rewriteBatchedStatements=true&useServerPrepStmts=false
username=root
password=abc123
initialSize=10druid.properties:
1
2
3
4
5
6
7
8driverClassName=com.mysql.cj.jdbc.Driver
url=jdbc:mysql:///test?rewriteBatchedStatements=true
username=root
password=abc123
initialSize=10
maxActive=20
maxWait=1000
filters=wall?rewriteBatchedStatements=true:开启 MySQL 批处理的支持。
QueryRunnerTest.java:
1
2
3
4
5
6
7
8
9
10
11
12
13
14
15
16
17
18
19
20
21
22
23
24
25
26
27
28
29
30
31
32
33
34
35
36
37
38
39
40
41
42
43
44
45
46
47
48
49
50
51
52
53
54
55
56
57
58
59
60
61
62
63
64
65
66
67
68
69
70
71
72
73
74
75
76
77
78
79
80
81
82
83
84
85
86
87
88
89
90
91
92
93
94
95
96
97
98
99
100
101
102
103
104
105
106
107
108
109
110
111
112
113
114
115
116
117
118
119
120
121
122
123
124
125
126
127
128
129
130
131
132
133
134
135
136
137
138
139
140
141
142
143
144
145
146
147
148
149
150
151
152
153
154
155
156
157
158
159
160
161
162
163
164
165
166
167
168
169
170
171
172
173
174
175
176
177
178
179
180
181
182
183
184
185
186
187
188
189
190
191
192
193
194
195
196
197
198
199
200
201
202
203
204
205
206
207
208
209
210
211
212
213
214
215
216
217
218
219
220
221
222
223
224
225
226
227
228
229
230
231
232
233
234
235
236
237
238
239
240
241
242
243
244
245
246
247
248
249
250
251
252
253
254
255
256
257
258
259
260
261
262
263
264
265
266
267
268
269
270
271
272
273
274
275
276
277
278
279
280
281
282public class QueryRunnerTest {
/**
* @Description 测试插入
*/
public void testInsert() {
Connection connection = null;
try {
connection = JDBCUtils.getDruidConnection();
QueryRunner runner = new QueryRunner();
String sql = "insert into customers(name, email, birth) values(?, ?, ?)";
int insertCount = runner.update(connection, sql, "cc", "cc@126.com", "1997-09-08");
System.out.println("添加了" + insertCount + "条记录");
} catch (SQLException e) {
e.printStackTrace();
} finally {
JDBCUtils.closeResourceByDbUtils(connection, null, null);
}
}
/**
* @Description 测试删除
*/
public void testDelete() {
Connection connection = null;
try {
connection = JDBCUtils.getDruidConnection();
QueryRunner runner = new QueryRunner();
String sql = "delete from customers where id < ?";
int deleteCount = runner.update(connection, sql, 26);
System.out.println("删除了" + deleteCount + "条记录");
} catch (SQLException e) {
e.printStackTrace();
} finally {
JDBCUtils.closeResourceByDbUtils(connection, null, null);
}
}
/**
* @Description 测试更新
*/
public void testUpdate() {
Connection connection = null;
FileInputStream fis = null;
try {
connection = JDBCUtils.getDruidConnection();
QueryRunner runner = new QueryRunner();
String sql = "update customers set name = ?, email = ?, birth = ?, photo = ? where id = ?";
SimpleDateFormat sdf = new SimpleDateFormat("yyyy-MM-dd");
java.util.Date date = sdf.parse("1997-05-21");
// 处理BLOB类型字段数据
fis = new FileInputStream(new File("E:/test.png"));
int updateCount = runner.update(connection, sql, "zhangsan", "zs@163.com", new Date(date.getTime()), fis, 26);
System.out.println("更新了" + updateCount + "条记录");
} catch (SQLException | ParseException | FileNotFoundException e) {
e.printStackTrace();
} finally {
if (fis != null) {
try {
fis.close();
} catch (IOException exception) {
exception.printStackTrace();
}
}
JDBCUtils.closeResourceByDbUtils(connection, null, null);
}
}
/**
* @Description 测试查询
* BeanHander:ResultSetHandler接口的实现类,用于封装表中的一条记录。
*/
public void testQueryForBean() {
Connection connection = null;
try {
connection = JDBCUtils.getDruidConnection();
QueryRunner runner = new QueryRunner();
String sql = "select id, name, email, birth from customers where id = ?";
BeanHandler<Customer> handler = new BeanHandler<>(Customer.class);
Customer customer = runner.query(connection, sql, handler, 26);
System.out.println(customer);
} catch (SQLException e) {
e.printStackTrace();
} finally {
JDBCUtils.closeResourceByDbUtils(connection, null, null);
}
}
/**
* @Description 测试查询
* BeanListHandler:ResultSetHandler接口的实现类,用于封装表中的多条记录构成的集合。
*/
public void testQueryForBeanList() {
Connection connection = null;
try {
connection = JDBCUtils.getDruidConnection();
QueryRunner runner = new QueryRunner();
String sql = "select id, name, email, birth from customers where id < ?";
BeanListHandler<Customer> handler = new BeanListHandler<>(Customer.class);
List<Customer> list = runner.query(connection, sql, handler, 28);
list.forEach(System.out::println);
} catch (SQLException e) {
e.printStackTrace();
} finally {
JDBCUtils.closeResourceByDbUtils(connection, null, null);
}
}
/**
* @Description 测试查询
* MapHander:ResultSetHandler接口的实现类,对应表中的一条记录。
* 将字段及相应字段的值作为Map中的key和value
*/
public void testQueryForMap() {
Connection connection = null;
try {
connection = JDBCUtils.getDruidConnection();
QueryRunner runner = new QueryRunner();
String sql = "select id, name, email, birth from customers where id = ?";
MapHandler handler = new MapHandler();
Map<String, Object> map = runner.query(connection, sql, handler, 26);
System.out.println(map);
} catch (SQLException e) {
e.printStackTrace();
} finally {
JDBCUtils.closeResourceByDbUtils(connection, null, null);
}
}
/**
* @Description 测试查询
* MapListHander:ResultSetHandler接口的实现类,对应表中的多条记录。
* 将字段及相应字段的值作为Map中的key和value,再将每一个Map添加到List中
*/
public void testQueryForMapList() {
Connection connection = null;
try {
connection = JDBCUtils.getDruidConnection();
QueryRunner runner = new QueryRunner();
String sql = "select id, name, email, birth from customers where id < ?";
MapListHandler handler = new MapListHandler();
List<Map<String, Object>> list = runner.query(connection, sql, handler, 28);
list.forEach(System.out::println);
} catch (SQLException e) {
e.printStackTrace();
} finally {
JDBCUtils.closeResourceByDbUtils(connection, null, null);
}
}
/**
* @Description 测试查询
* ScalarHandler:用于查询特殊值。
* 类似于最大的,最小的,平均的,总和,个数相关的数据。
*/
public void testQueryForSpecialValue1() {
Connection connection = null;
try {
connection = JDBCUtils.getDruidConnection();
QueryRunner runner = new QueryRunner();
String sql = "select count(*) from customers";
ScalarHandler<Long> handler = new ScalarHandler<>();
Long count = runner.query(connection, sql, handler);
System.out.println(count);
} catch (SQLException e) {
e.printStackTrace();
} finally {
JDBCUtils.closeResourceByDbUtils(connection, null, null);
}
}
public void testQueryForSpecialValue2() {
Connection connection = null;
try {
connection = JDBCUtils.getDruidConnection();
QueryRunner runner = new QueryRunner();
String sql = "select max(birth) from customers";
ScalarHandler<Date> handler = new ScalarHandler<>();
Date maxBirth = runner.query(connection, sql, handler);
System.out.println(maxBirth);
} catch (SQLException e) {
e.printStackTrace();
} finally {
JDBCUtils.closeResourceByDbUtils(connection, null, null);
}
}
/**
* @Description 自定义ResultSetHandler的实现类
*/
public void testQueryPersonal() {
Connection connection = null;
try {
connection = JDBCUtils.getDruidConnection();
QueryRunner runner = new QueryRunner();
String sql = "select id, name, email, birth, photo from customers where id = ?";
// 匿名内部类
ResultSetHandler<Customer> handler = new ResultSetHandler<Customer>() {
public Customer handle(ResultSet resultSet) throws SQLException {
if (resultSet.next()) {
int id = resultSet.getInt("id");
String name = resultSet.getString("name");
String email = resultSet.getString("email");
Date birth = resultSet.getDate("birth");
// 处理BLOB类型字段
InputStream is = null;
FileOutputStream fos = null;
try {
Blob photo = resultSet.getBlob("photo");
is = photo.getBinaryStream();
fos = new FileOutputStream("test2.jpg");
byte[] buffer = new byte[1024];
int len;
while ((len = is.read(buffer)) != -1) {
fos.write(buffer, 0, len);
}
} catch (IOException exception) {
exception.printStackTrace();
} finally {
if (fos != null) {
try {
fos.close();
} catch (IOException exception) {
exception.printStackTrace();
}
}
if (is != null) {
try {
is.close();
} catch (IOException exception) {
exception.printStackTrace();
}
}
}
return new Customer(id, name, email, birth);
}
return null;
}
};
Customer customer = runner.query(connection, sql, handler, 26);
System.out.println(customer);
} catch (SQLException e) {
e.printStackTrace();
} finally {
JDBCUtils.closeResourceByDbUtils(connection, null, null);
}
}
/**
* @Description 测试事务操作
*/
public void testTransaction() {
Connection connection = null;
try {
connection = JDBCUtils.getDruidConnection();
// 1.取消数据的自动提交
connection.setAutoCommit(false);
QueryRunner runner = new QueryRunner();
String sql1 = "update user_table set balance = balance - 100 where user = ?";
runner.update(connection, sql1, "AA");
// 模拟网络异常
System.out.println(10 / 0);
String sql2 = "update user_table set balance = balance + 100 where user = ?";
runner.update(connection, sql2, "BB");
System.out.println("转账成功");
// 2.提交数据
connection.commit();
} catch (Exception e) {
e.printStackTrace();
// 3.回滚数据
JDBCUtils.rollBackConnection(connection);
System.out.println("转账失败");
} finally {
JDBCUtils.closeResourceByDbUtils(connection, null, null);
}
}
}
本文参考
https://www.bilibili.com/video/BV1eJ411c7rf
声明:写作本文初衷是个人学习记录,鉴于本人学识有限,如有侵权或不当之处,请联系 wdshfut@163.com。
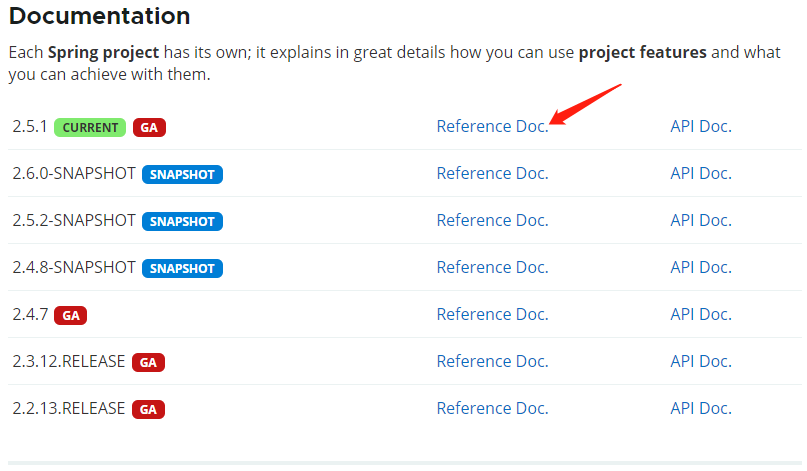
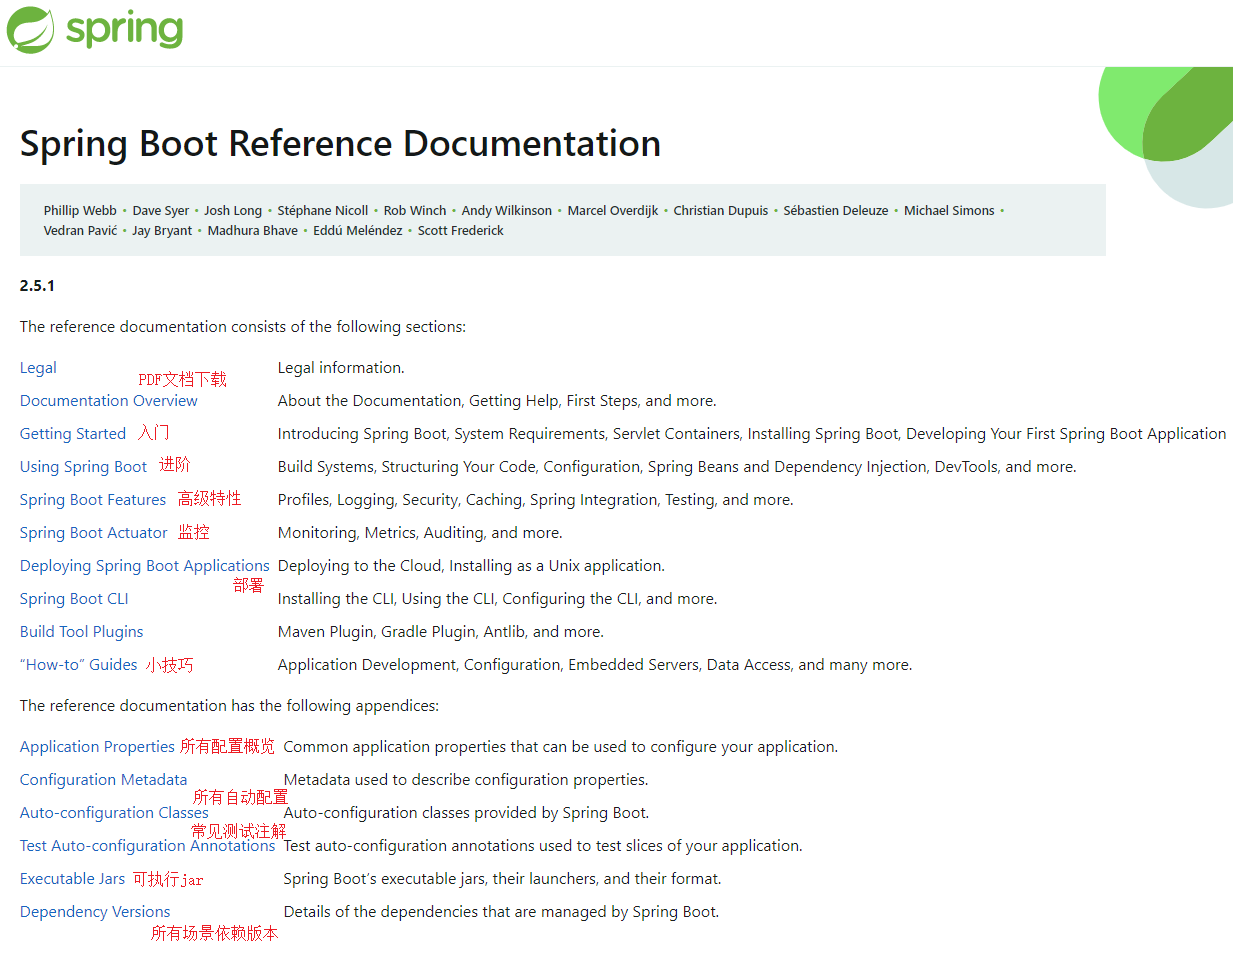
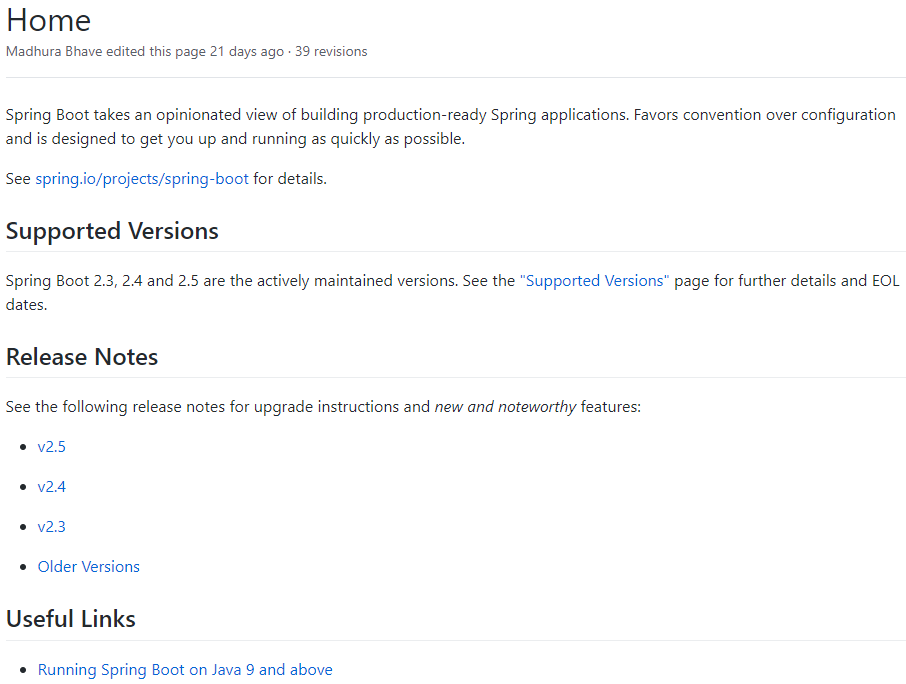


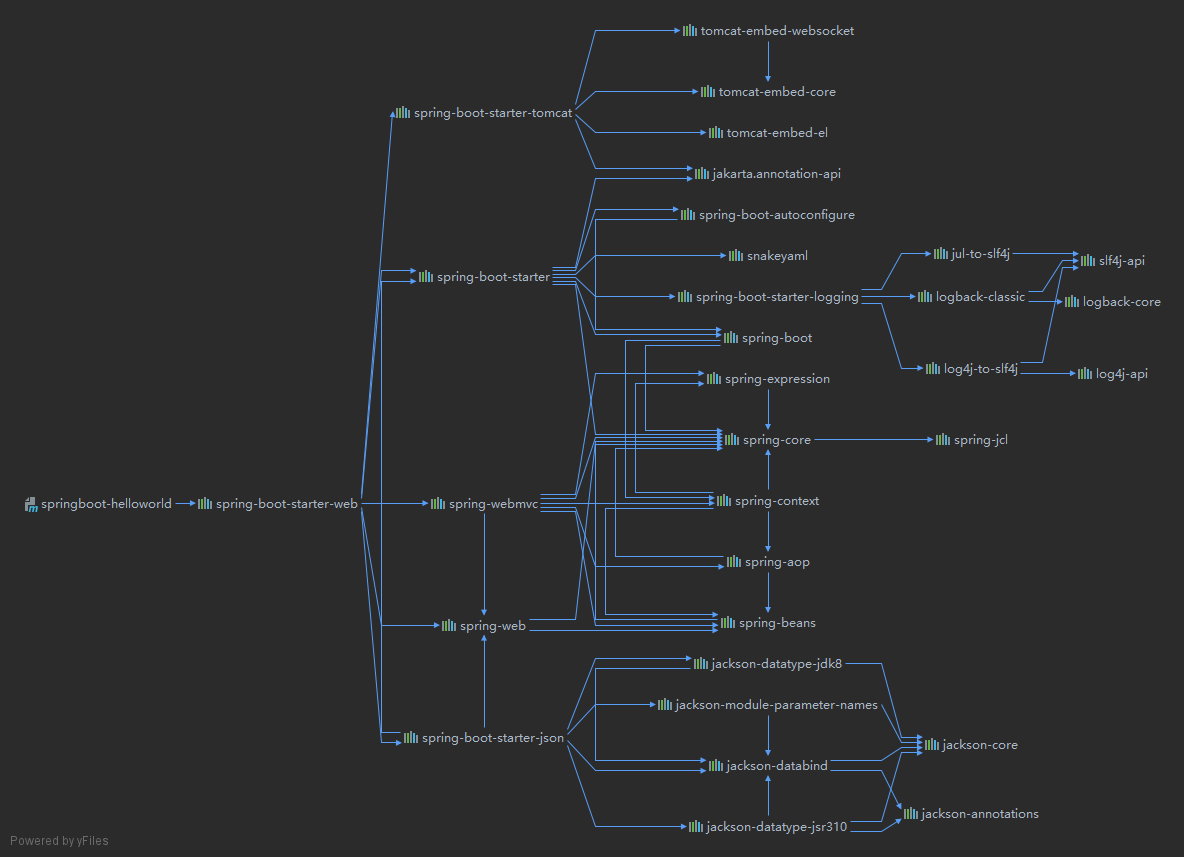
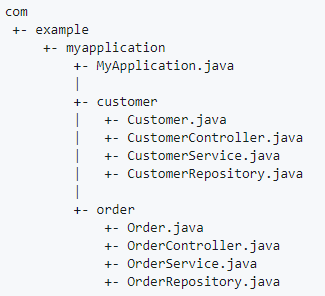
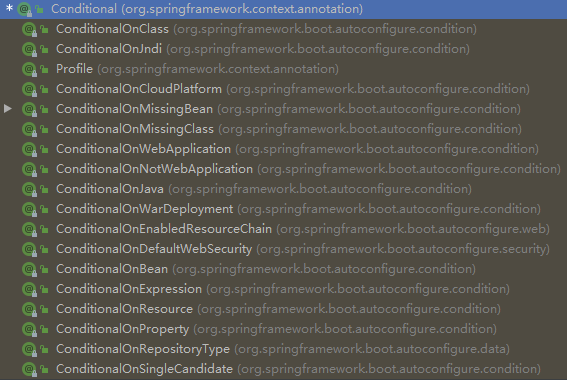

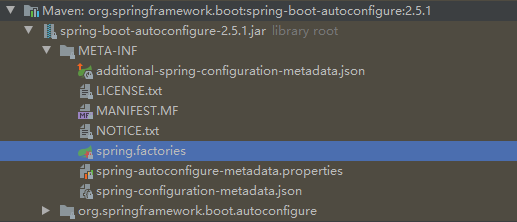
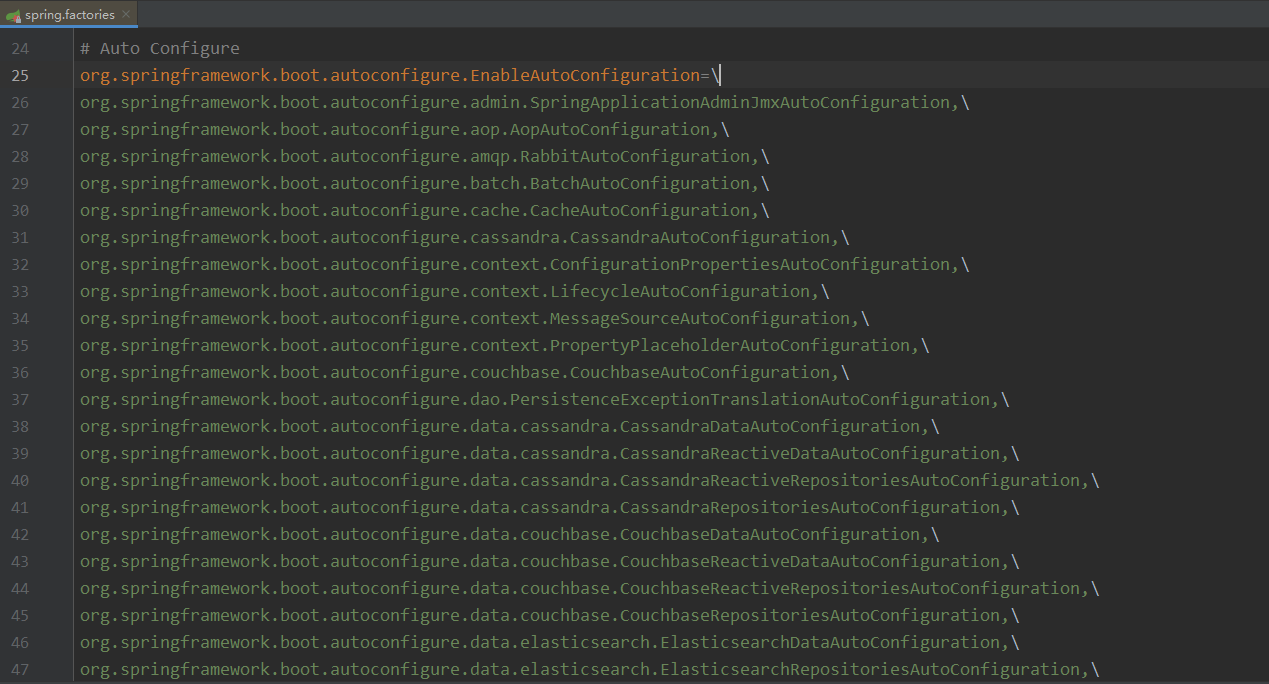
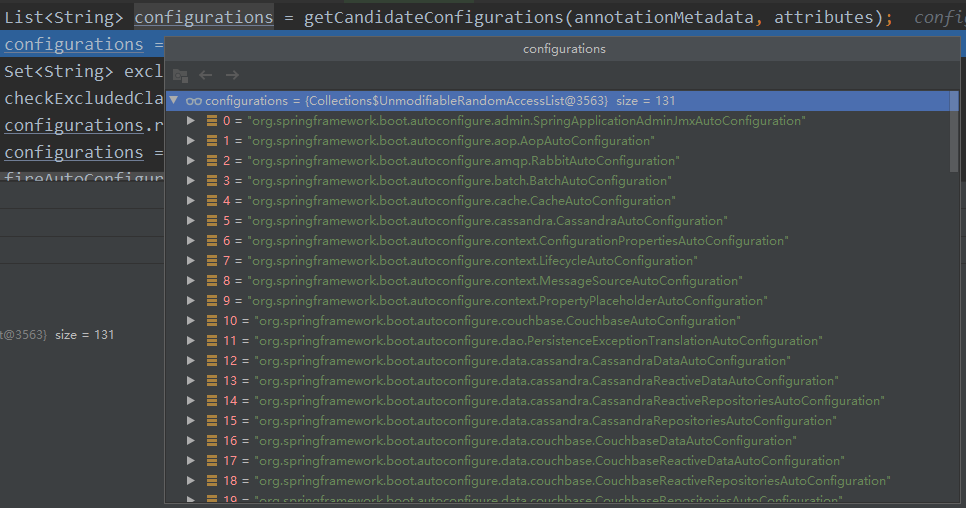
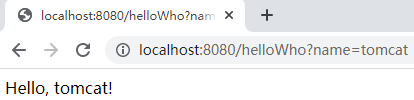
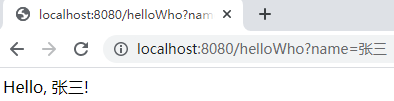
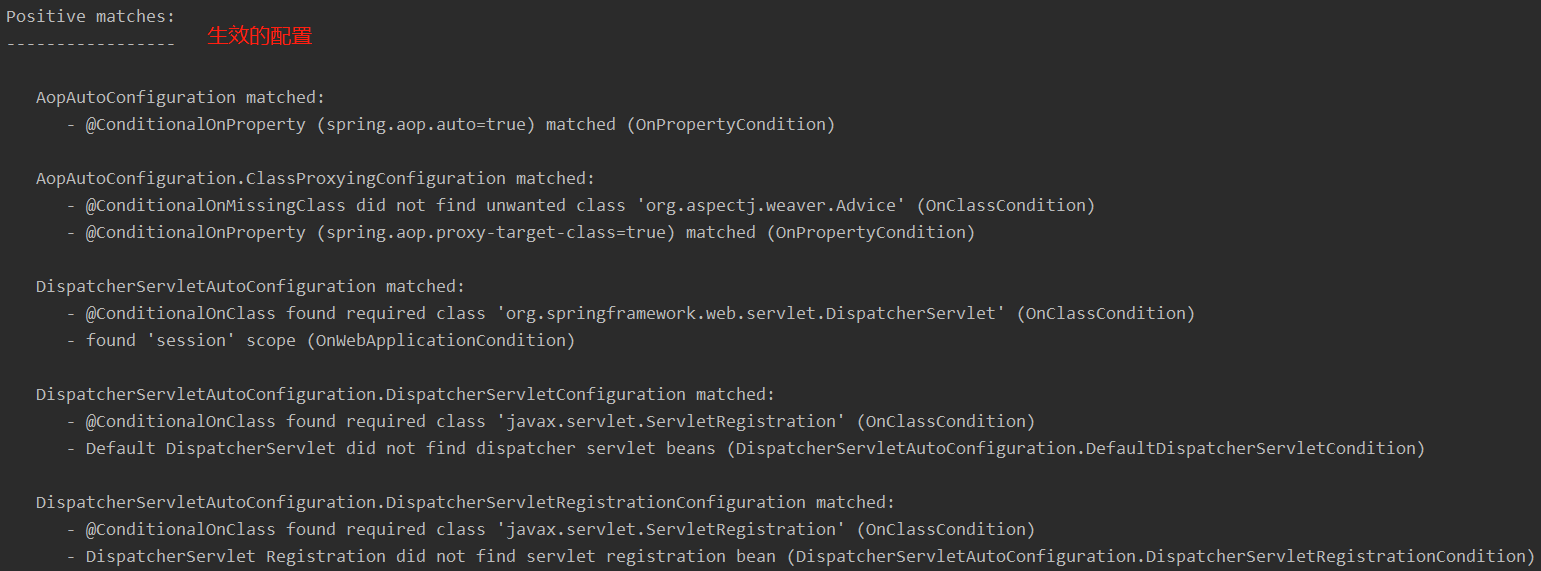
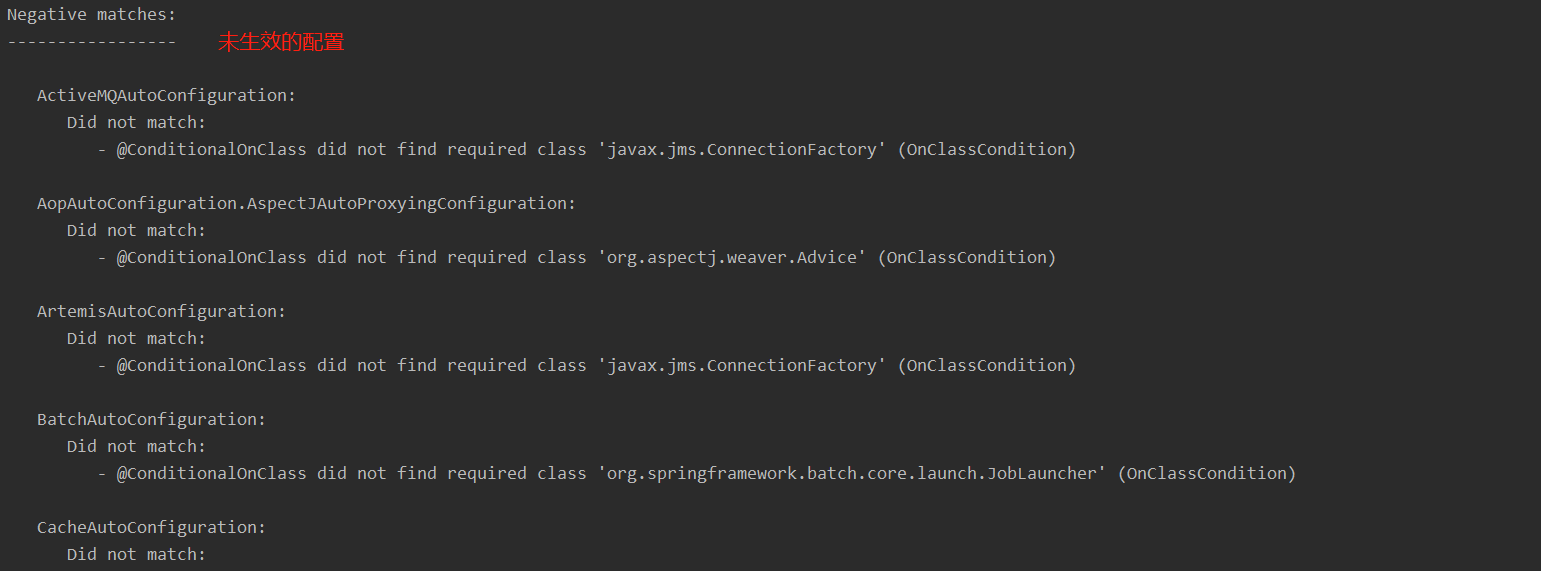
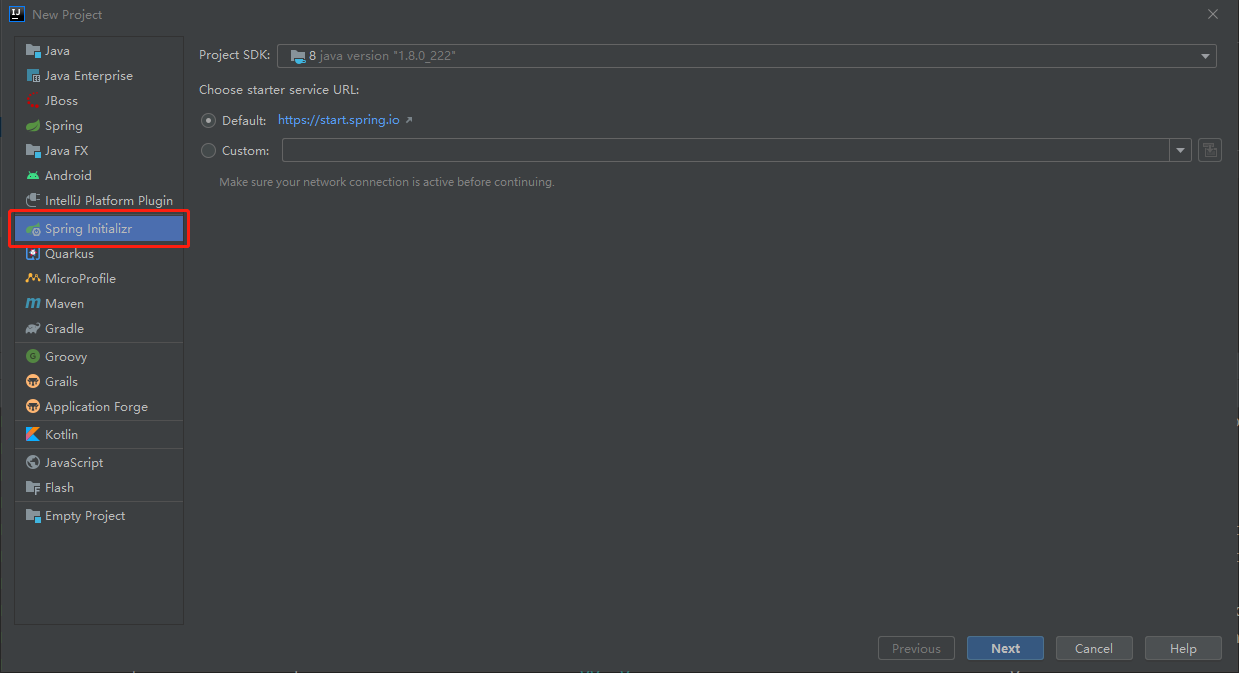
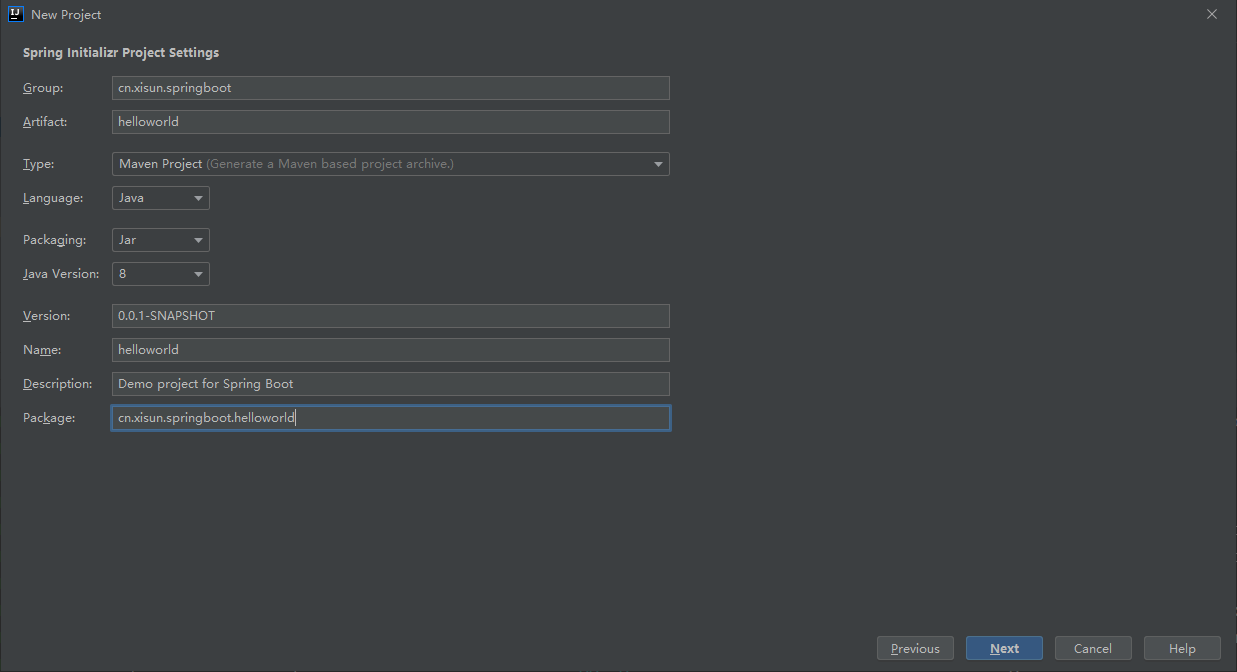
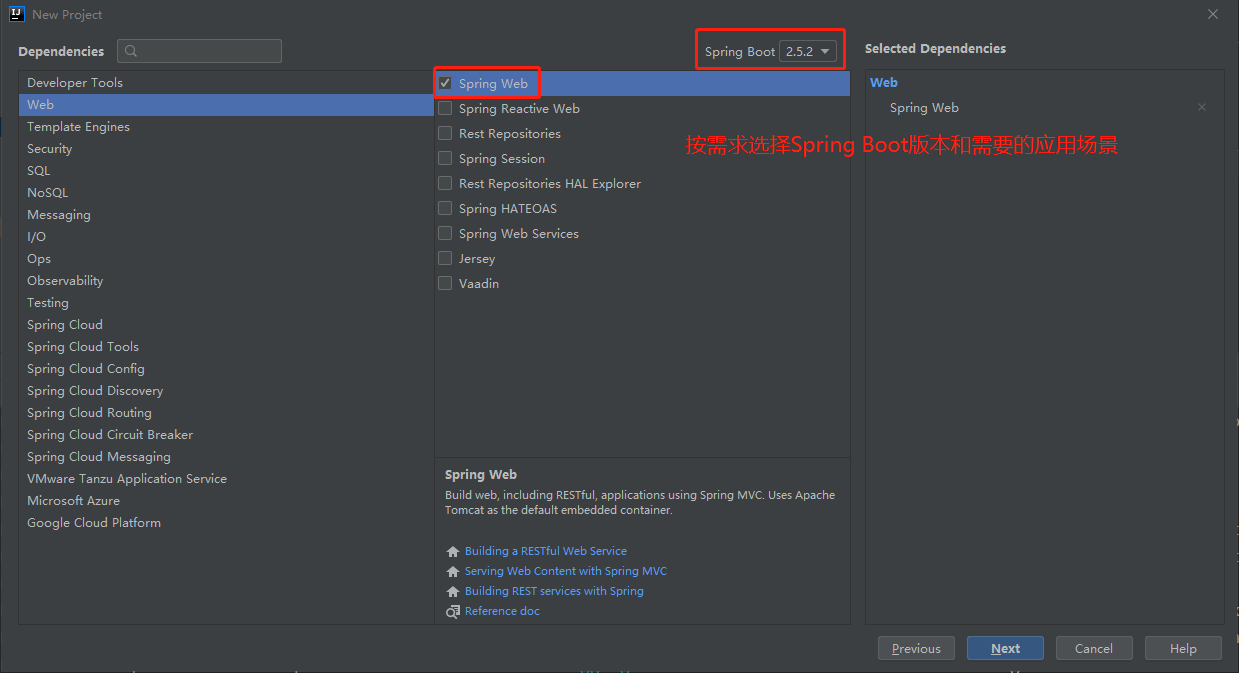


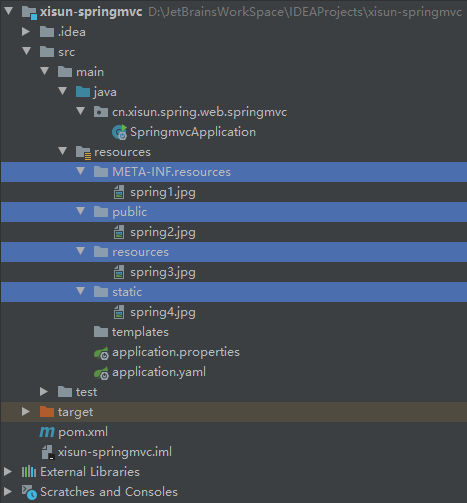
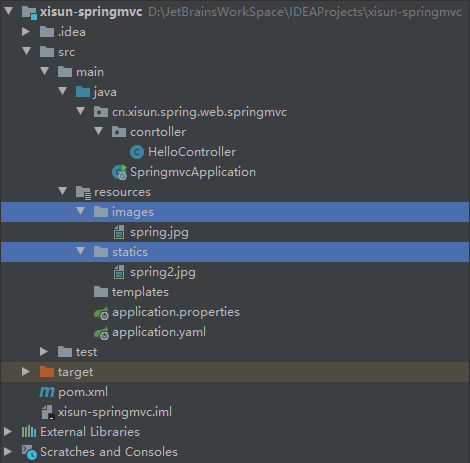
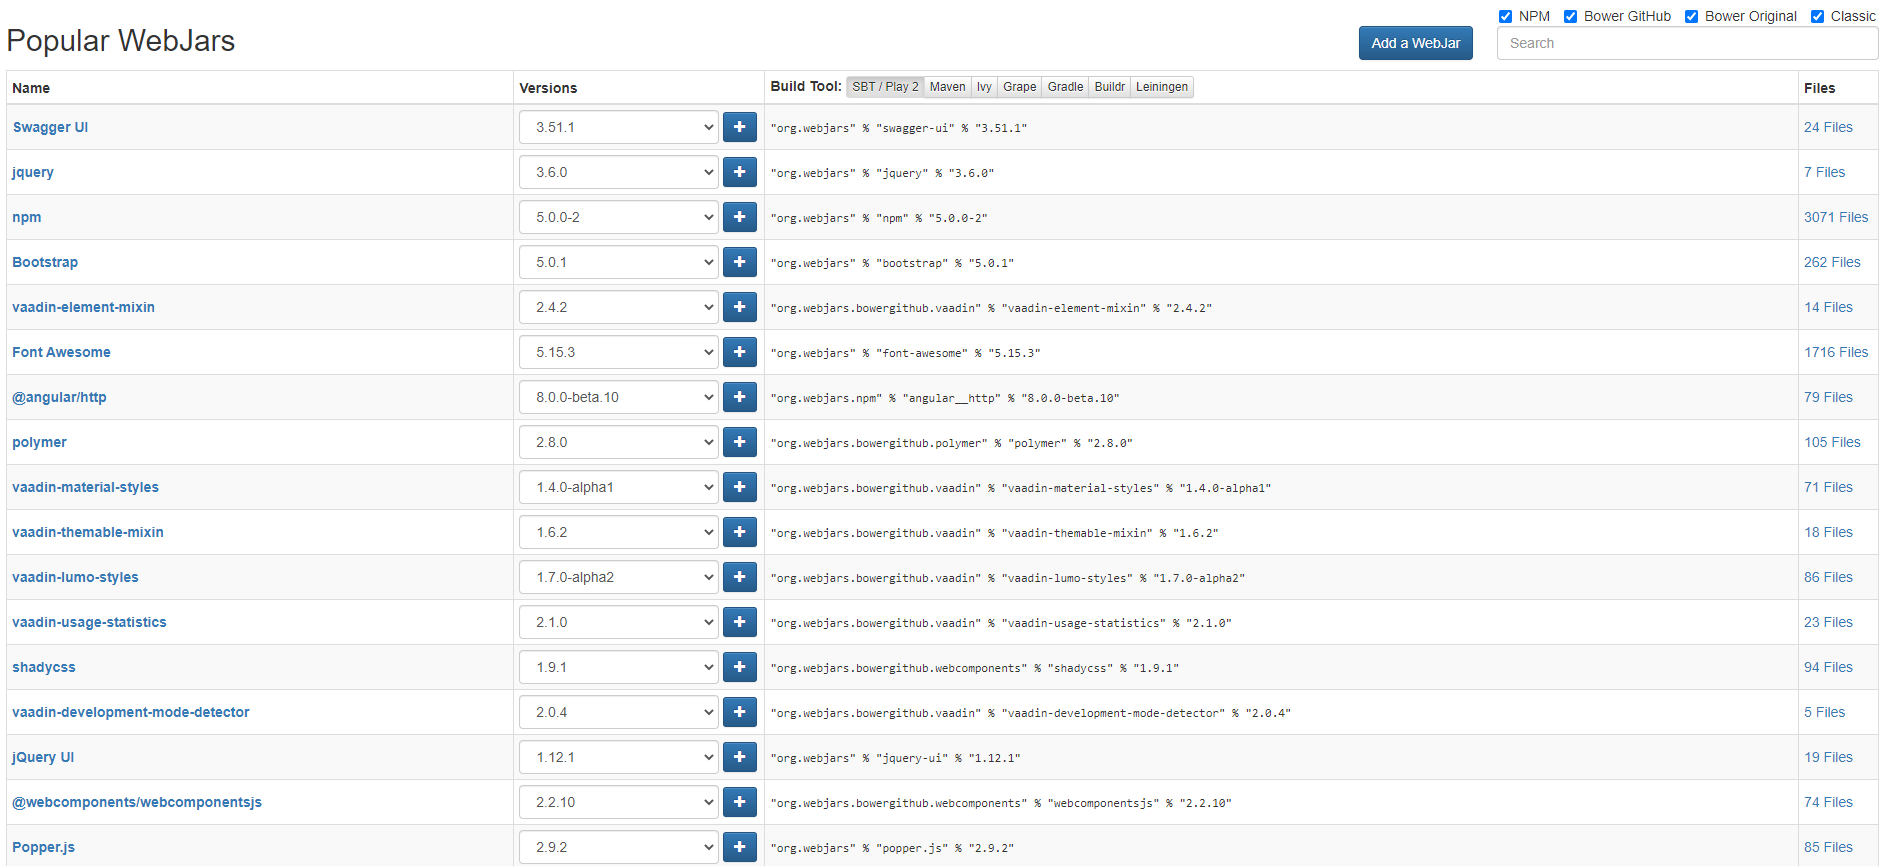
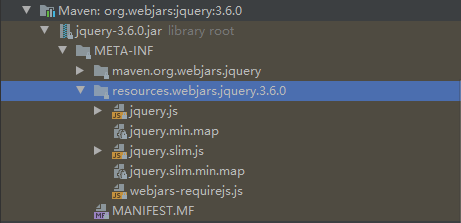
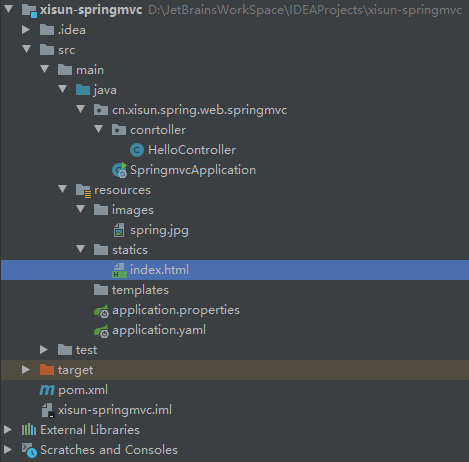

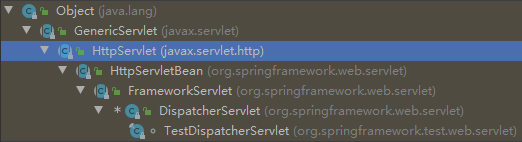
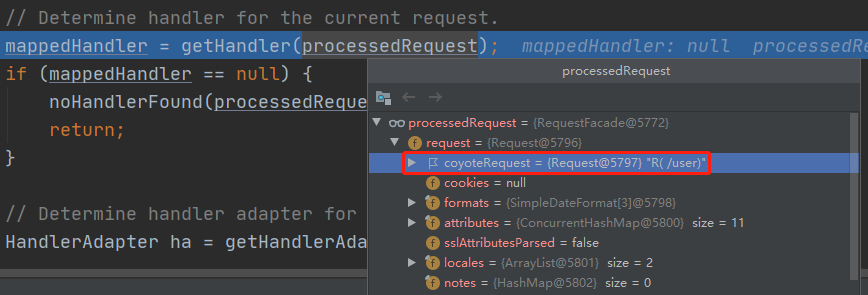
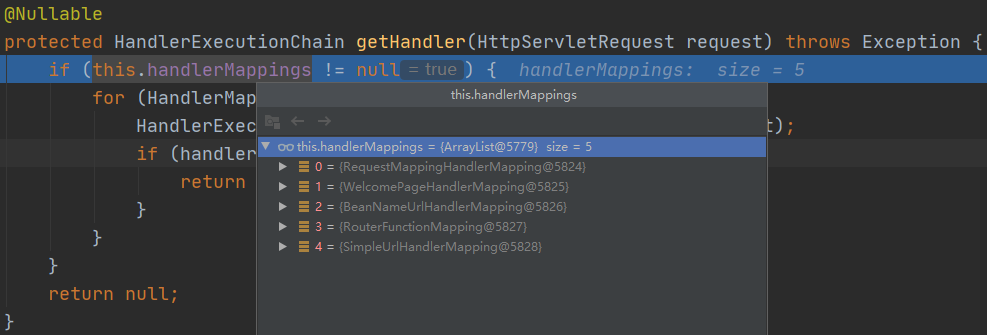
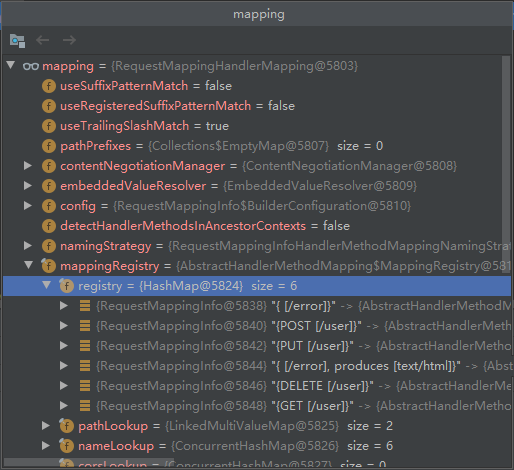
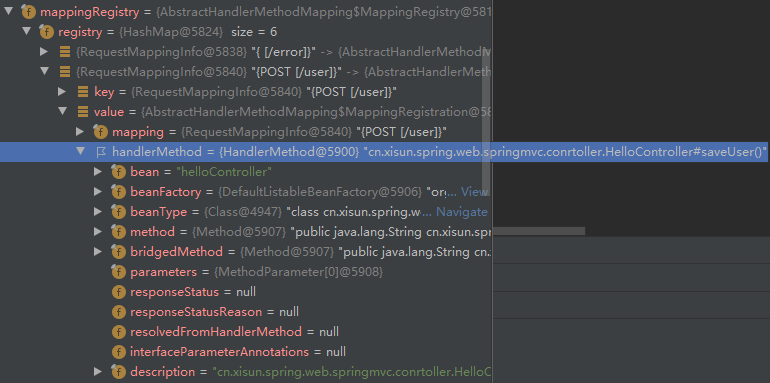
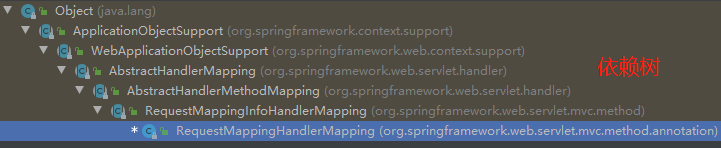

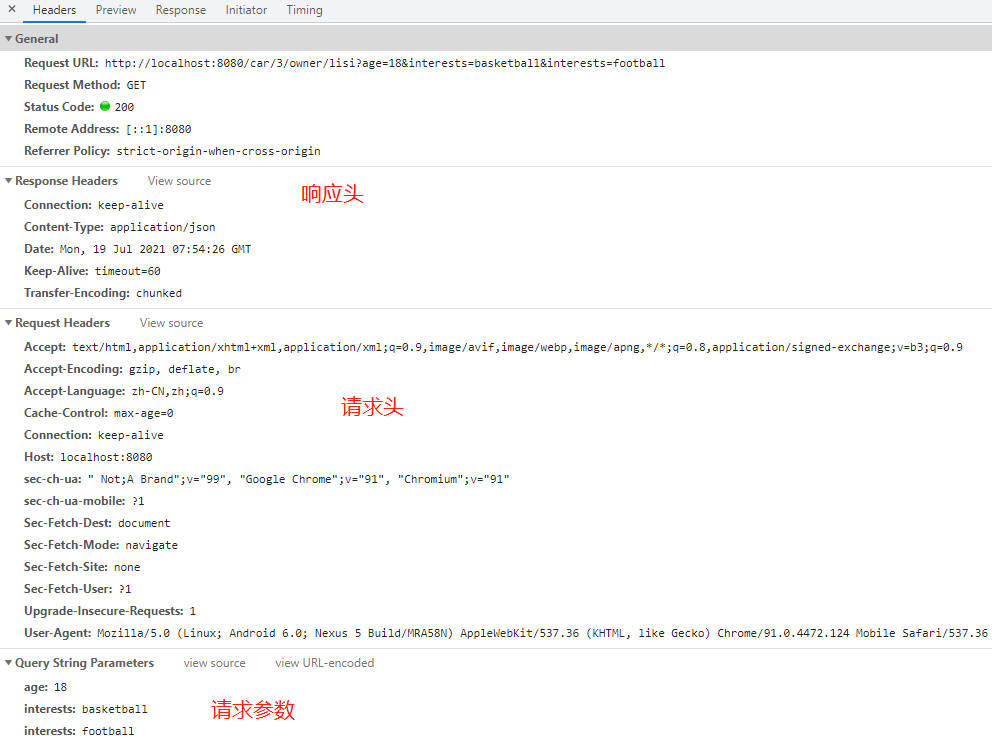
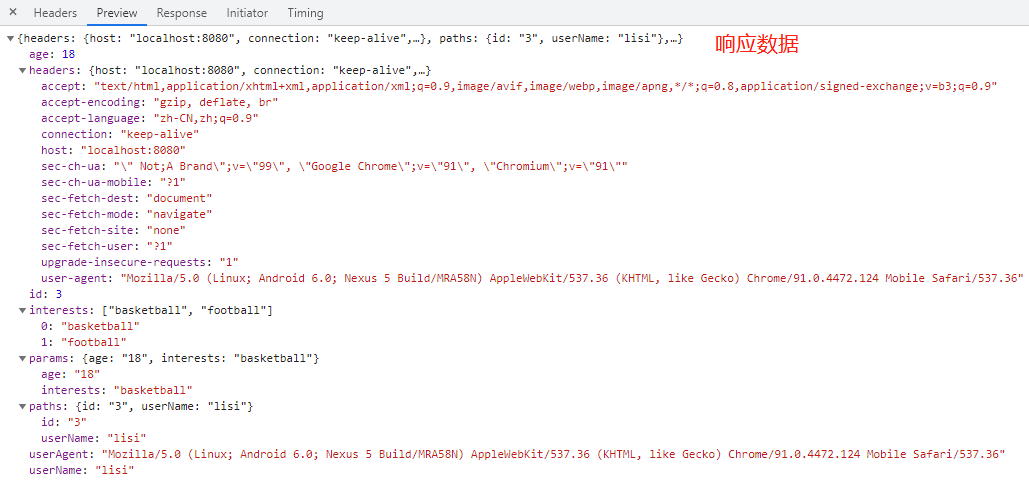
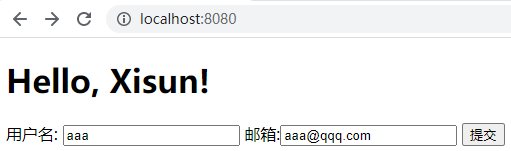
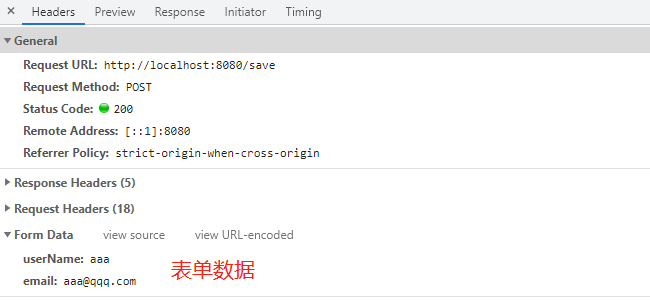


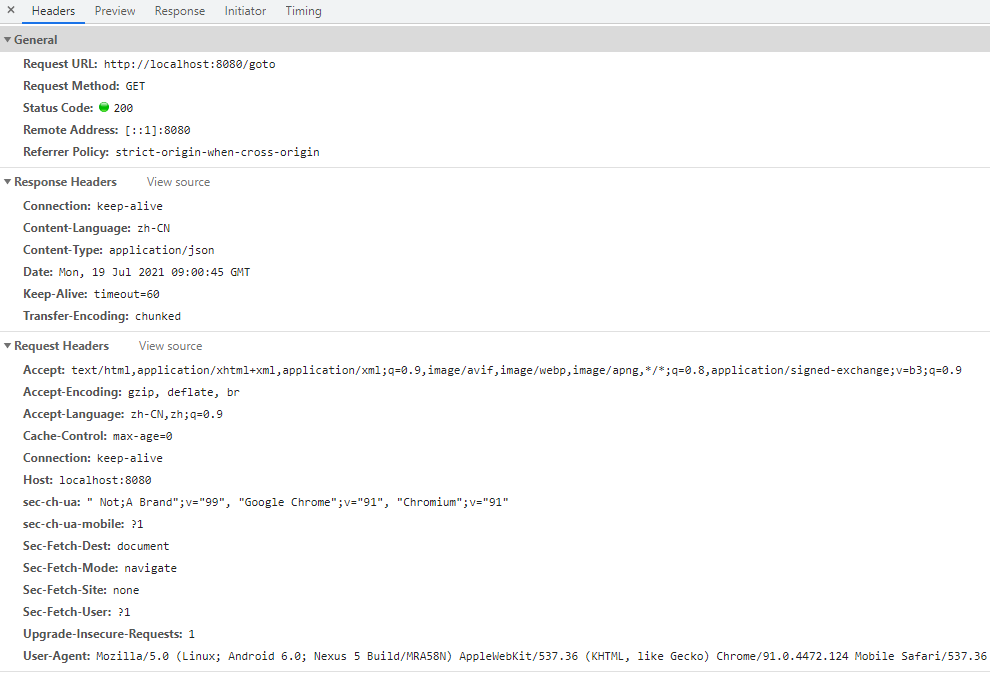

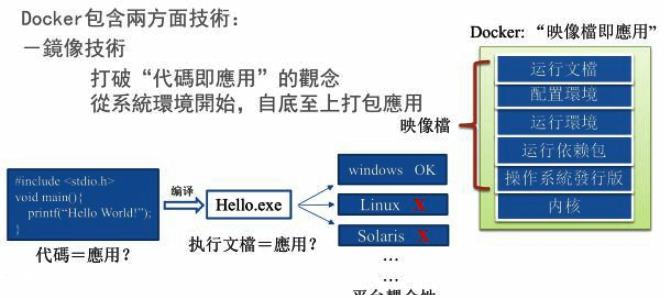
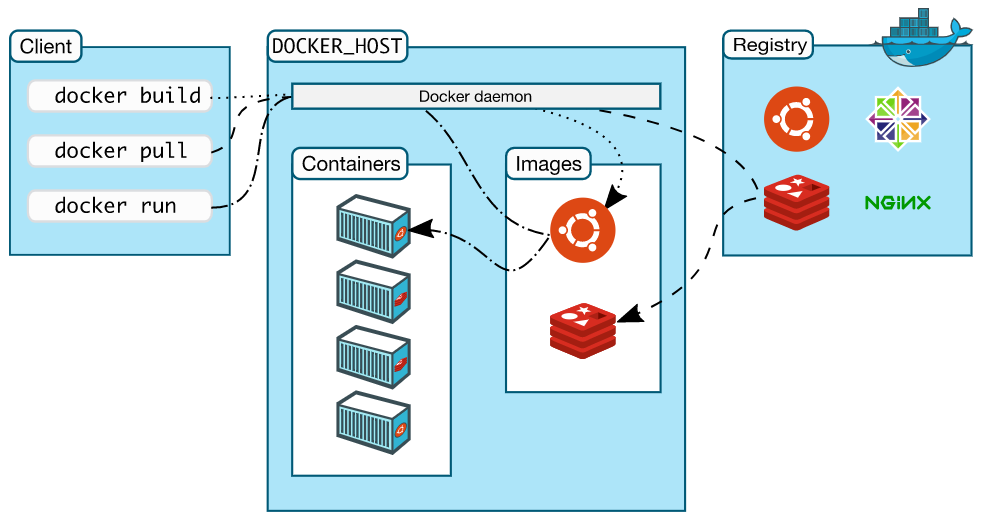
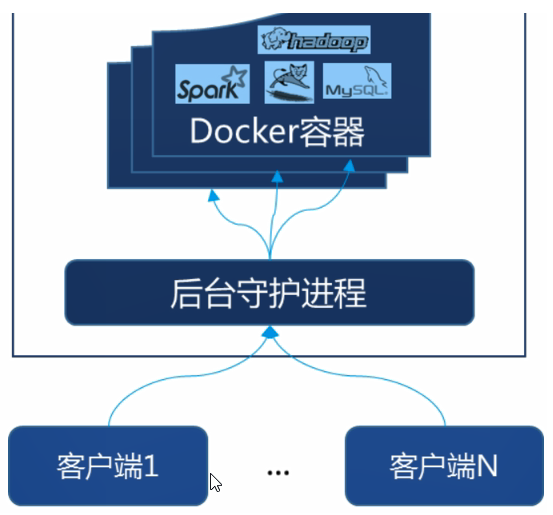

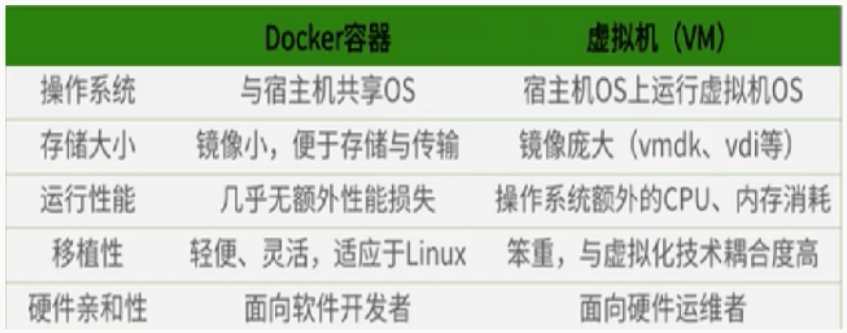

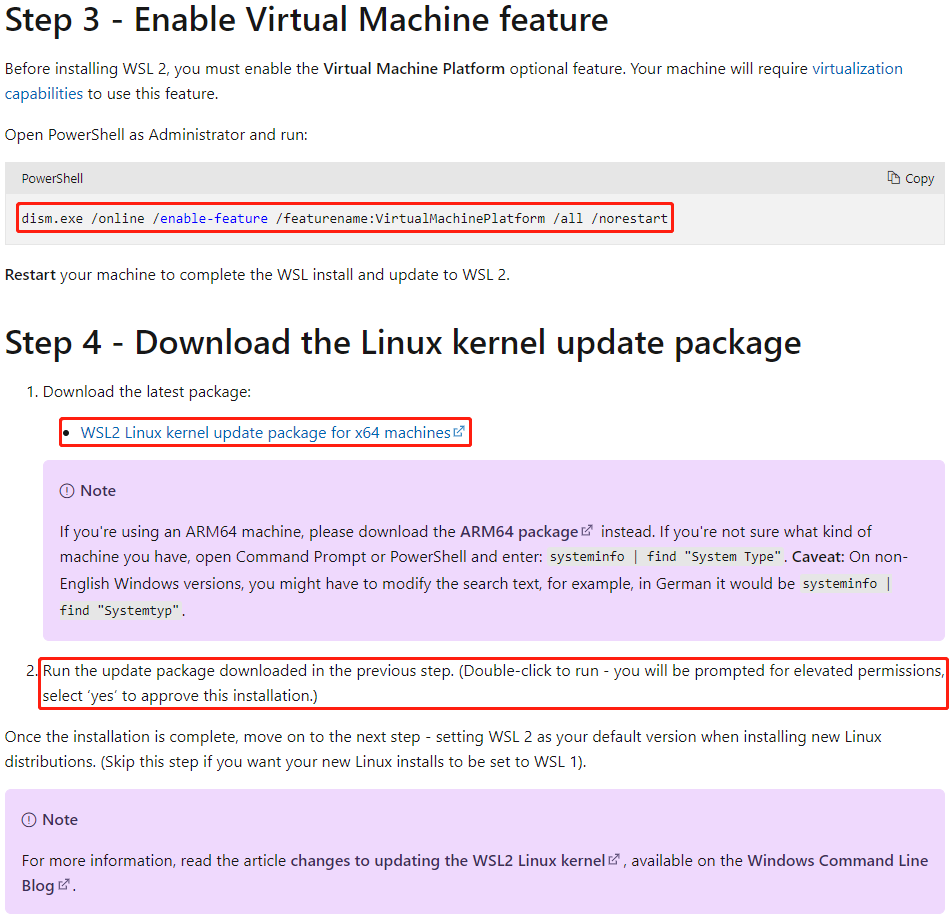
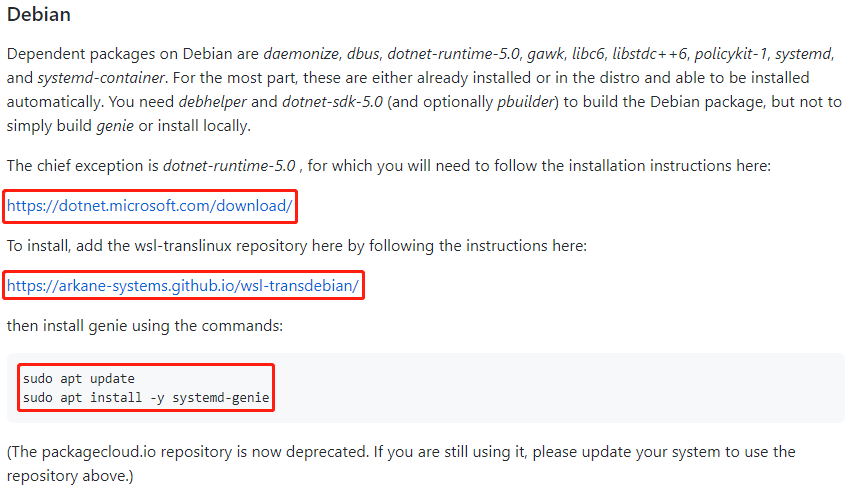

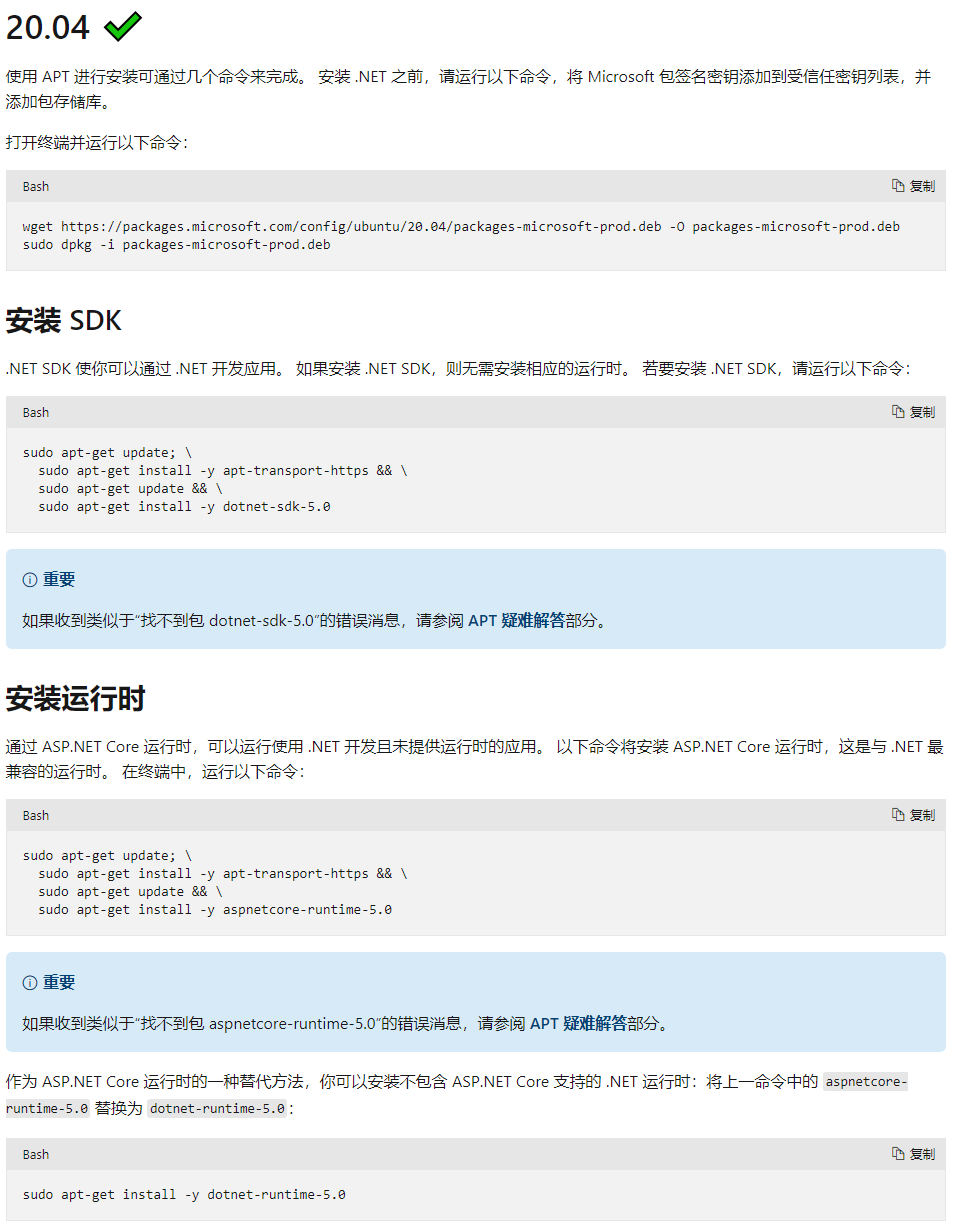
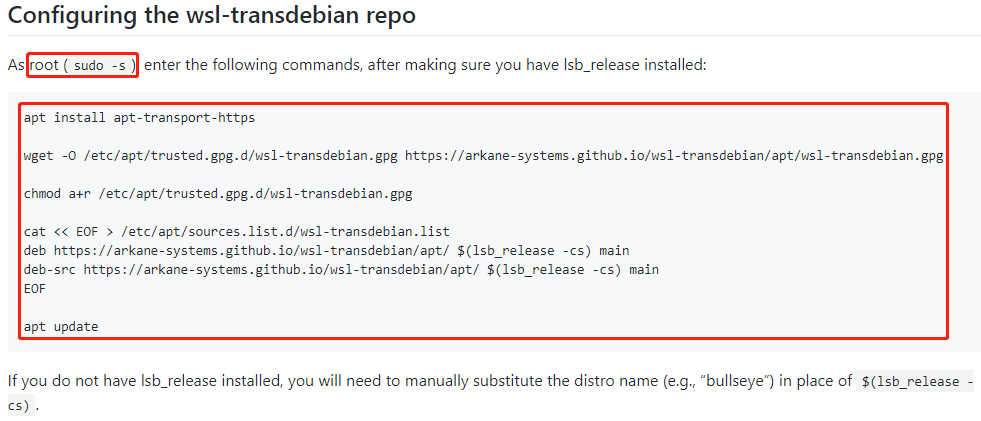
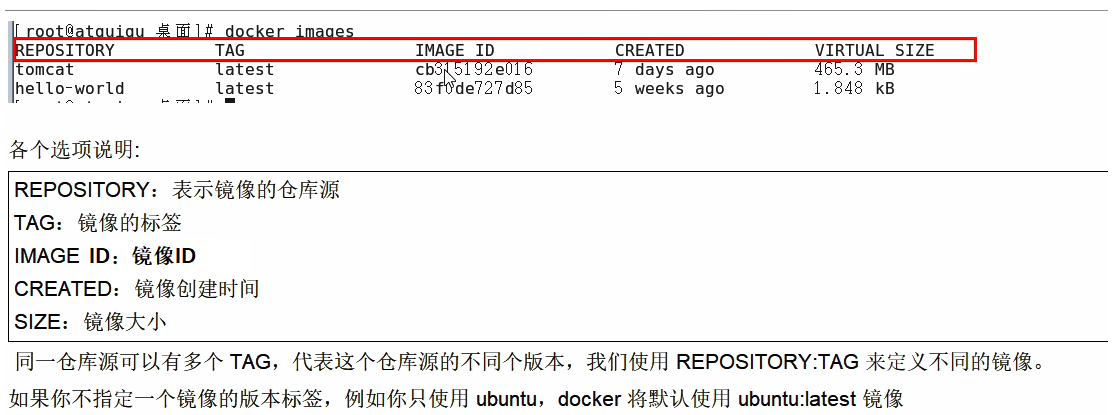
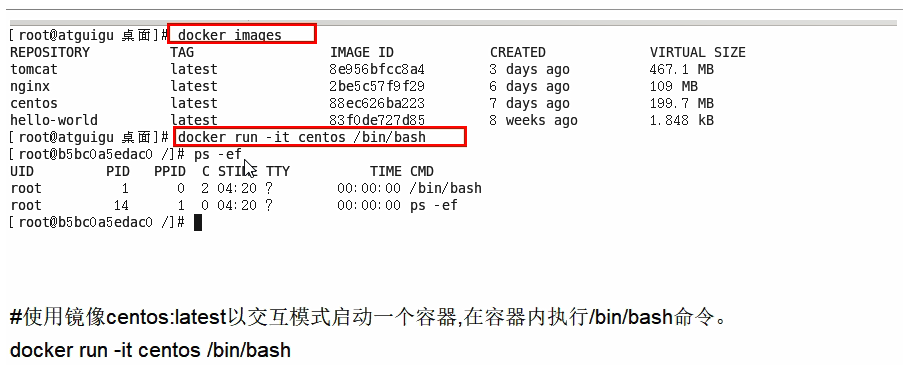
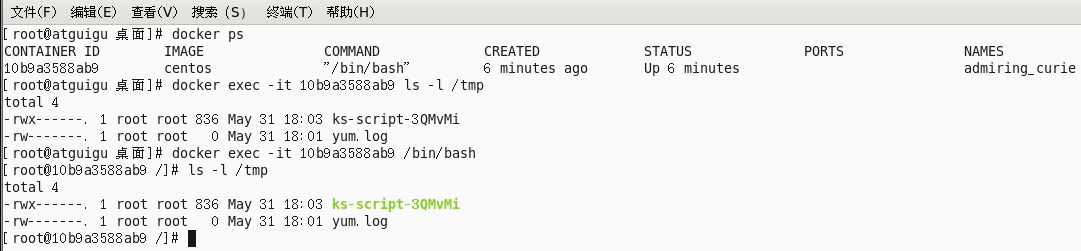

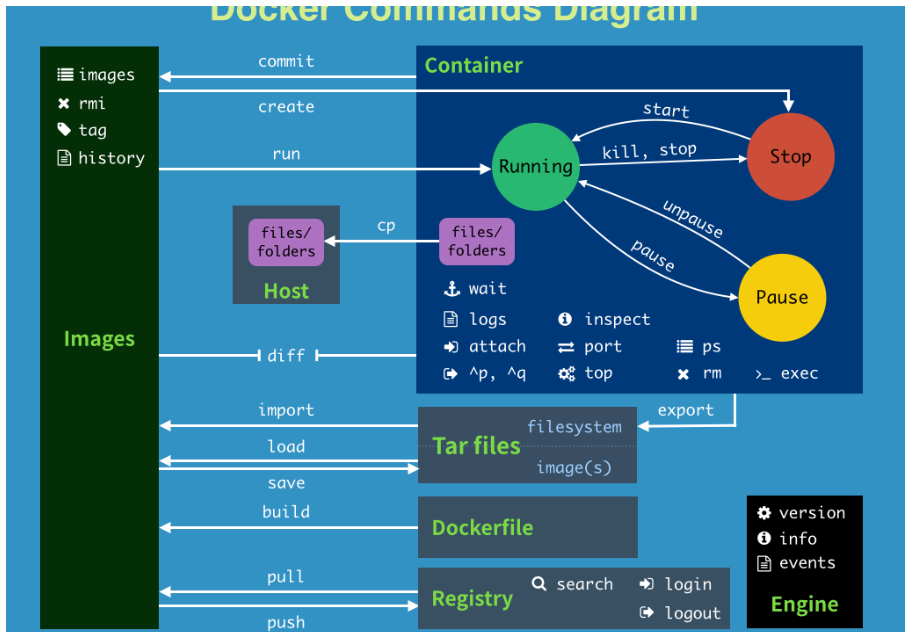
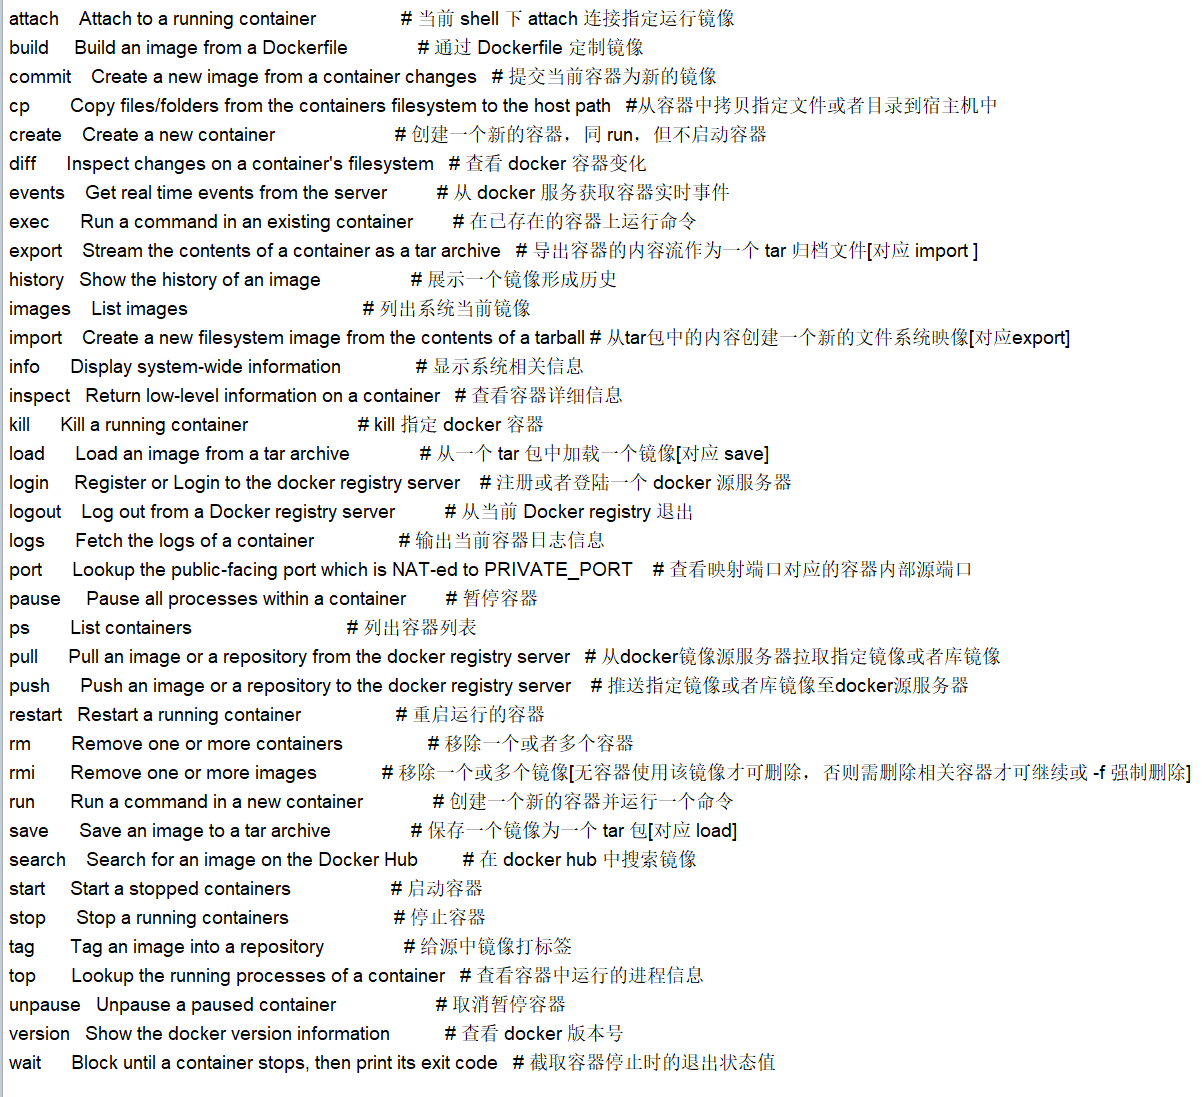


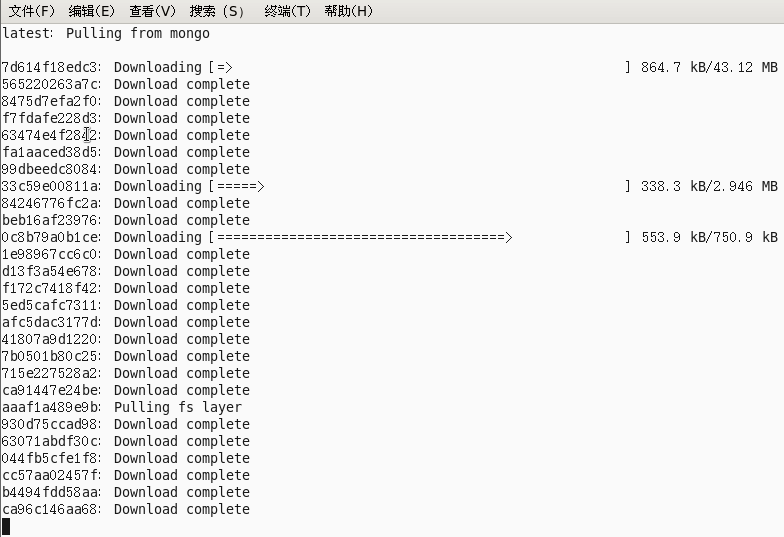
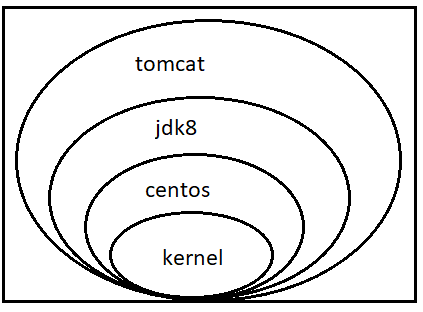
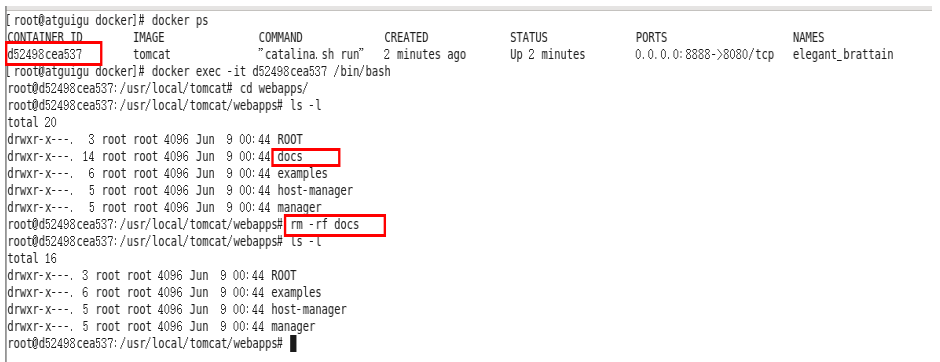

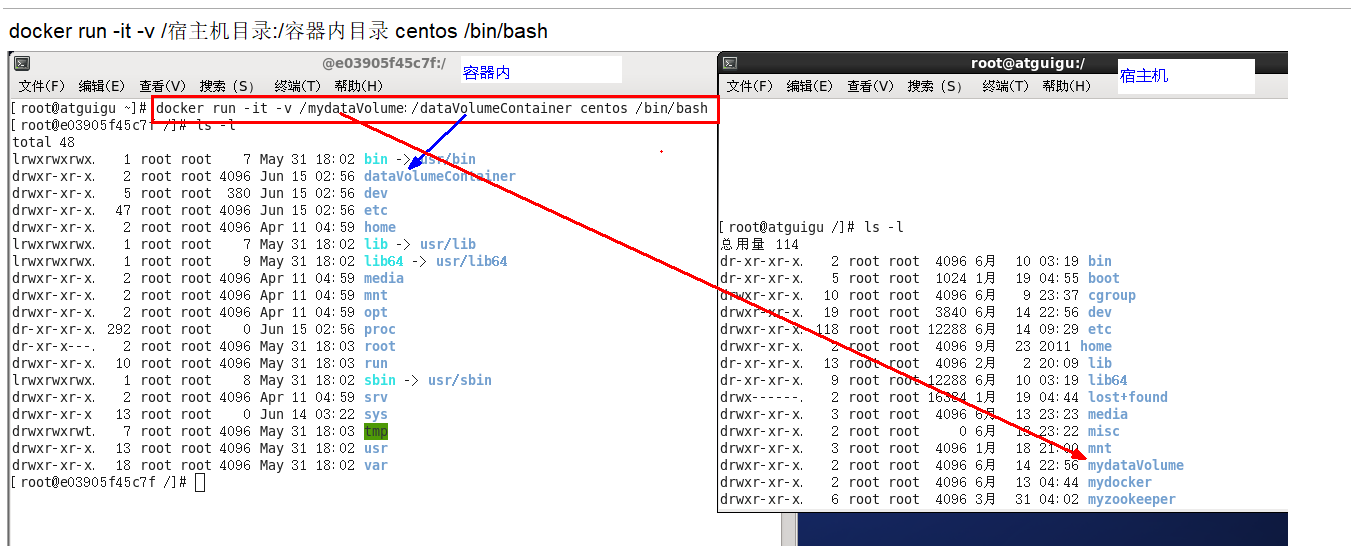
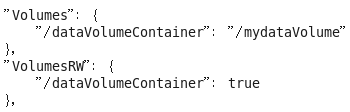
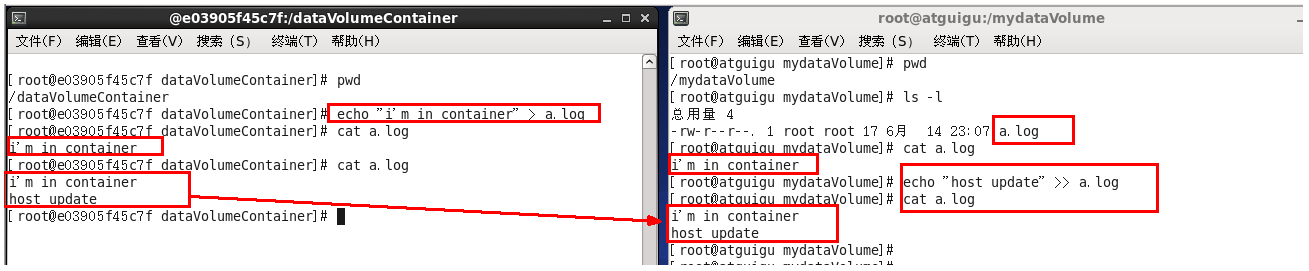
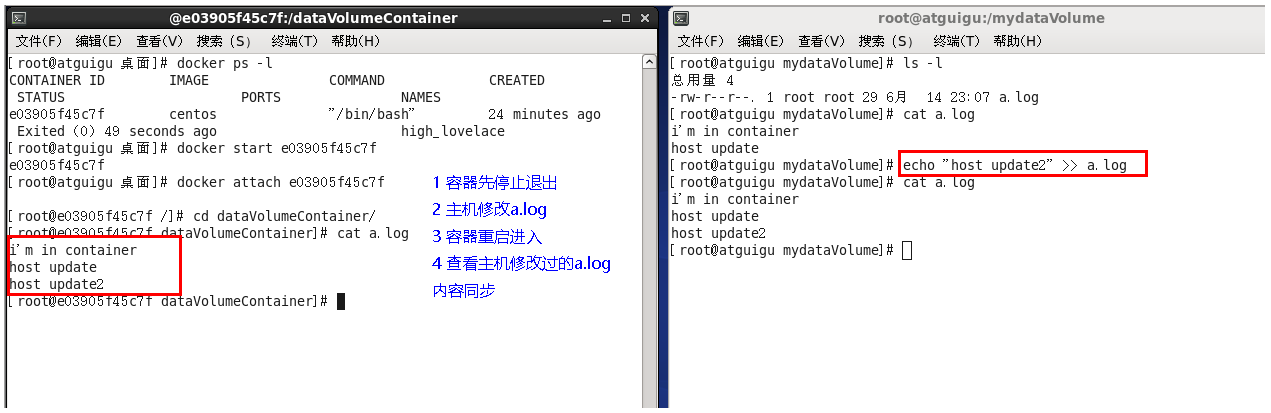
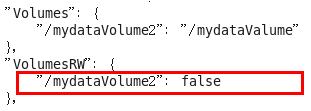
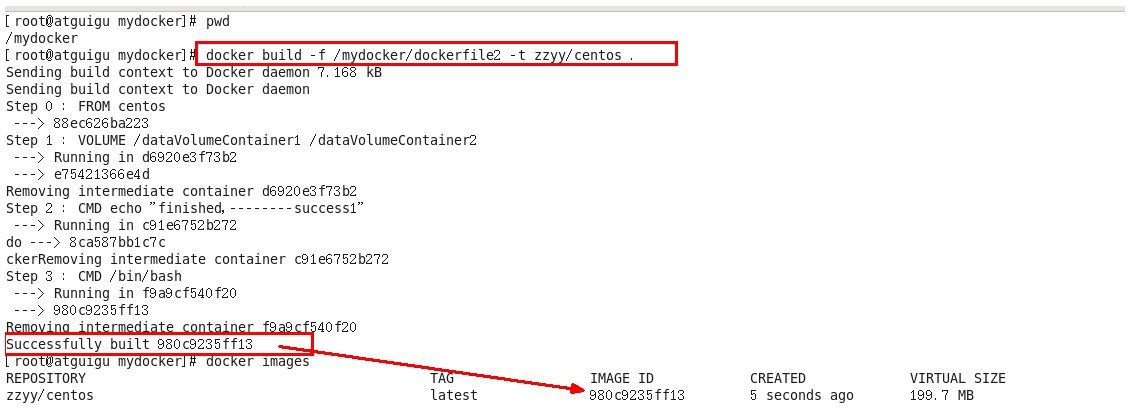
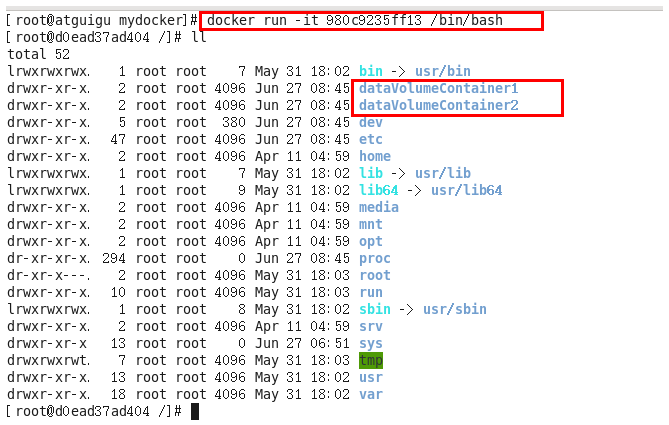
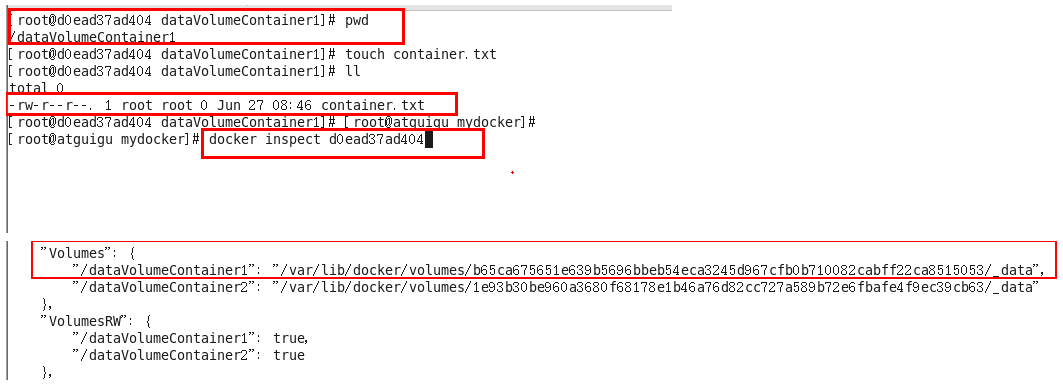
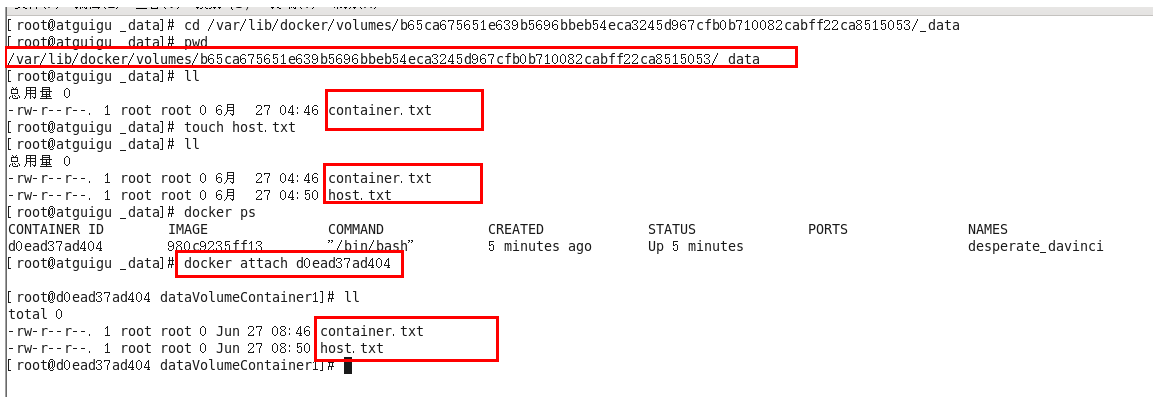
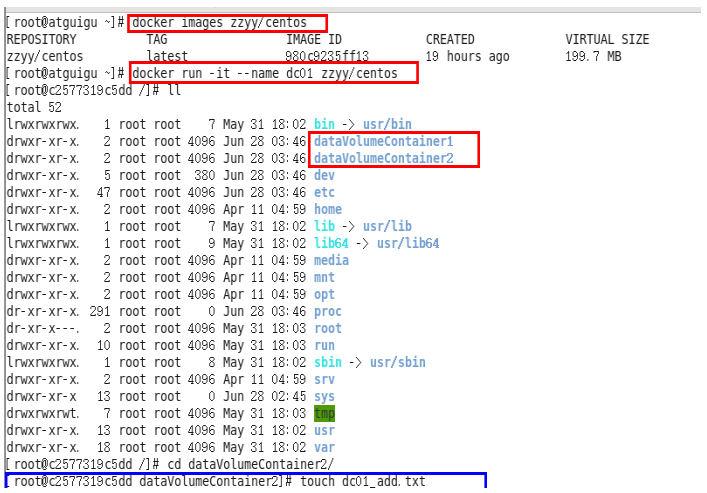
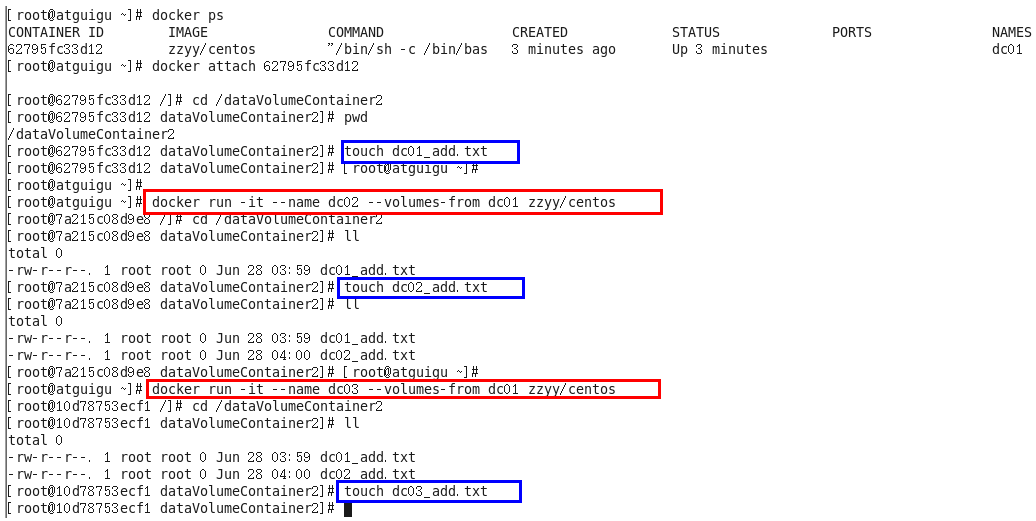
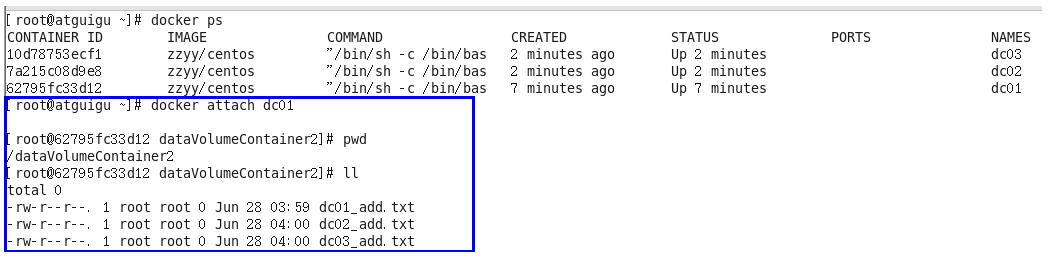

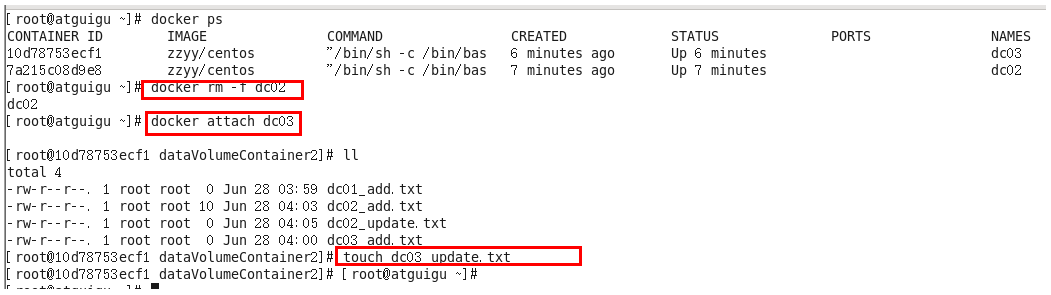

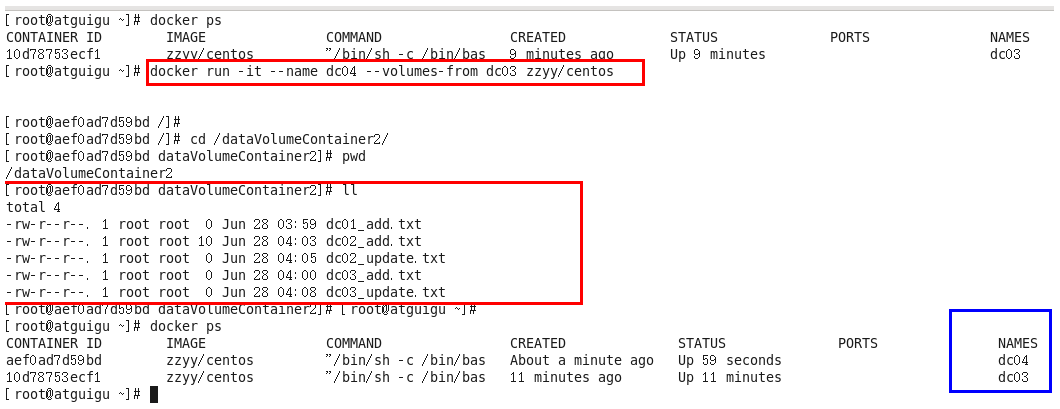
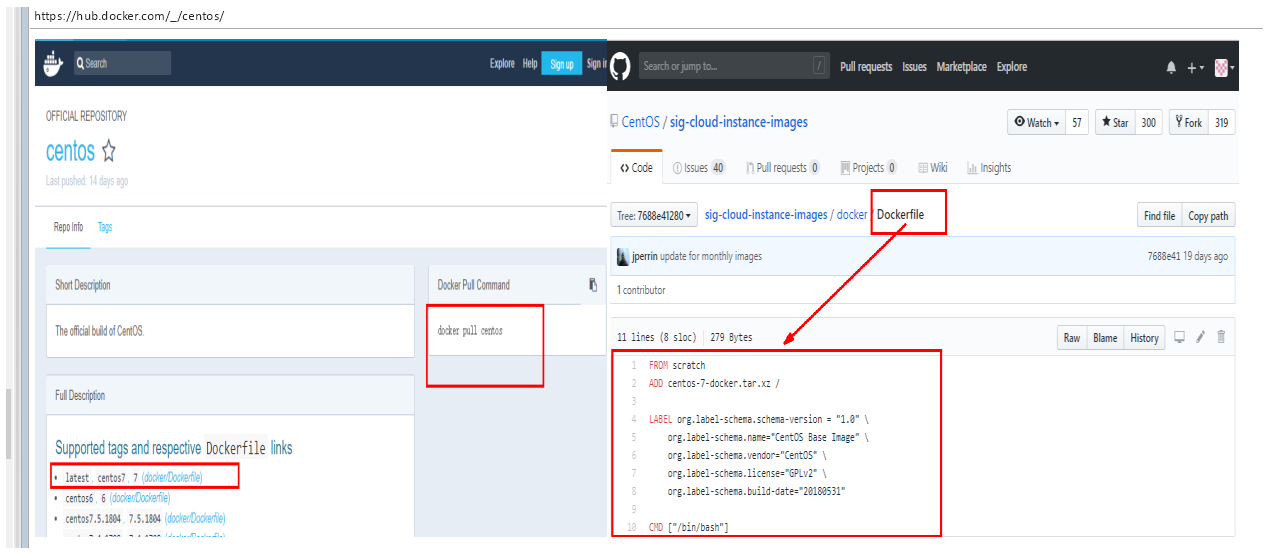
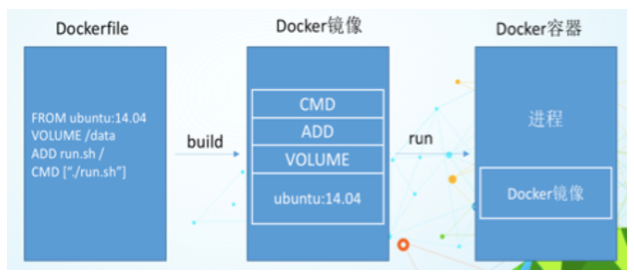
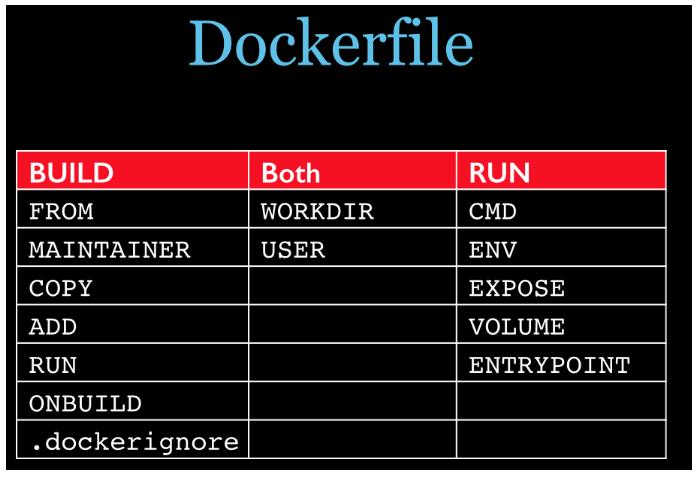
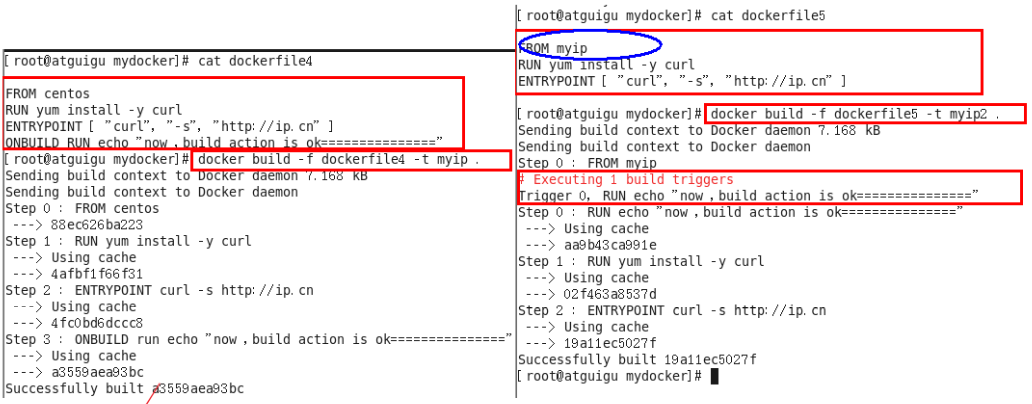
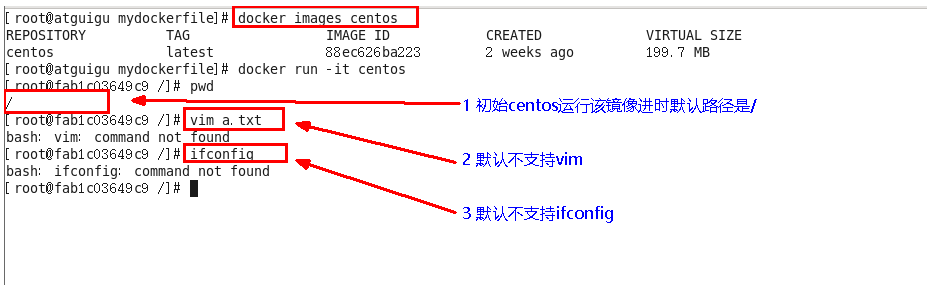
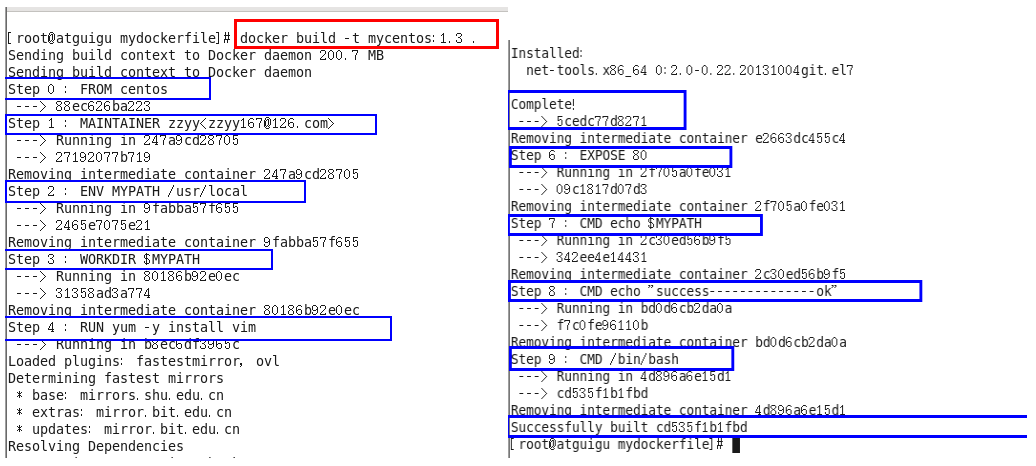
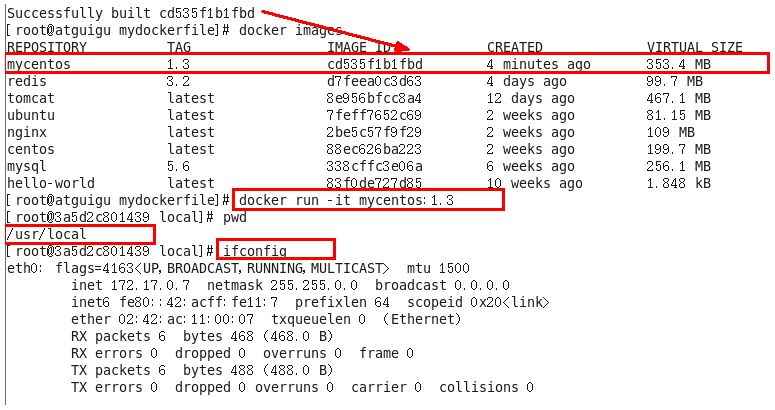
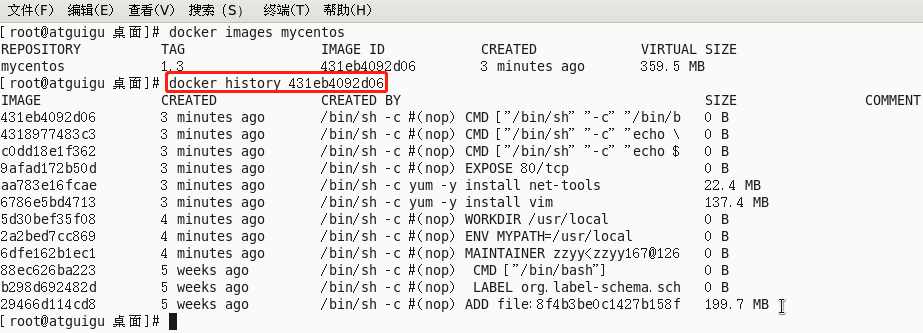
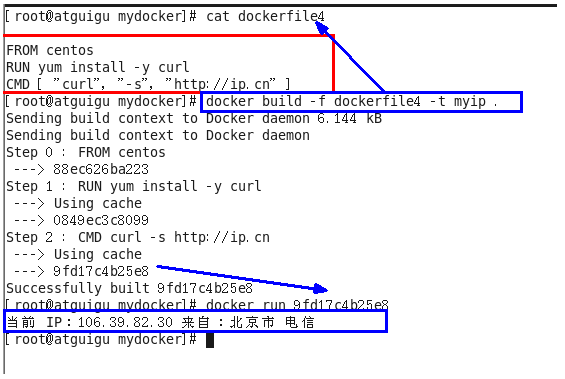
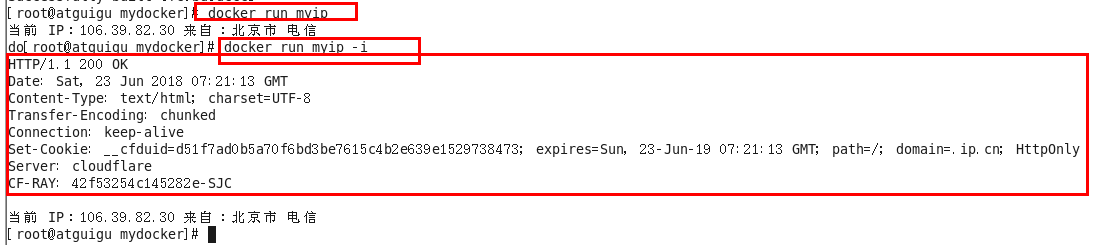
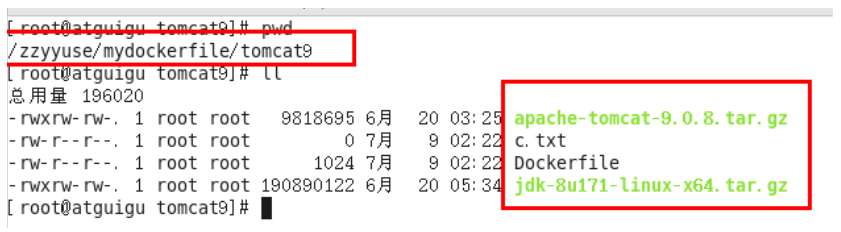
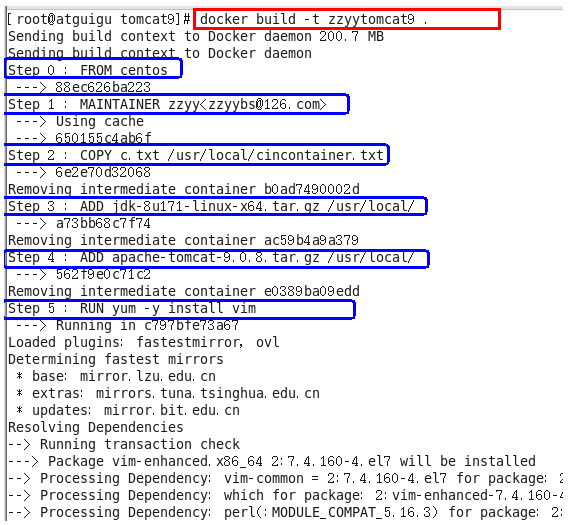
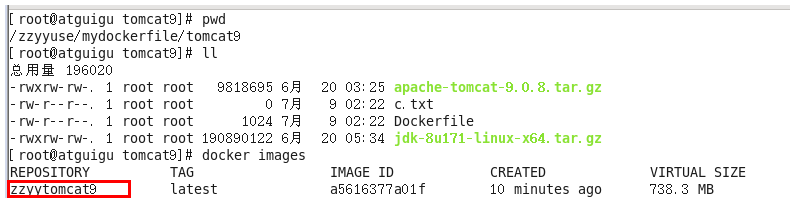
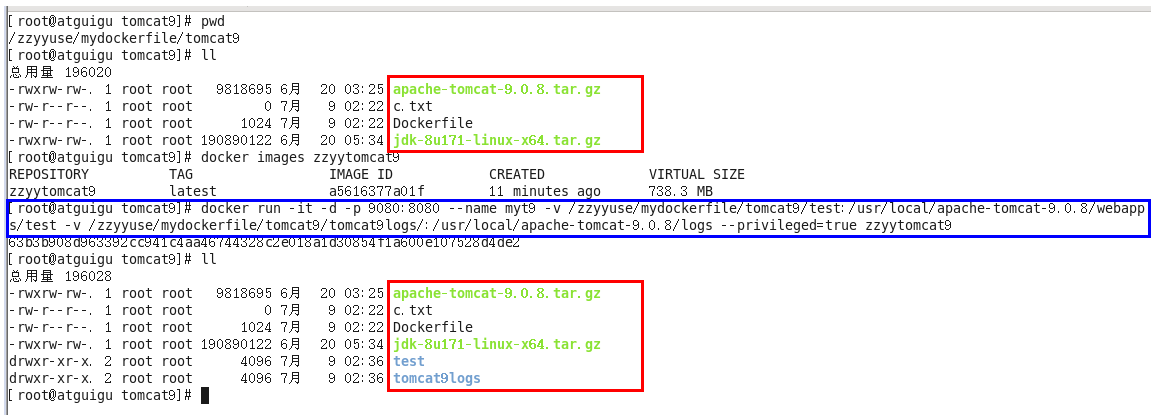
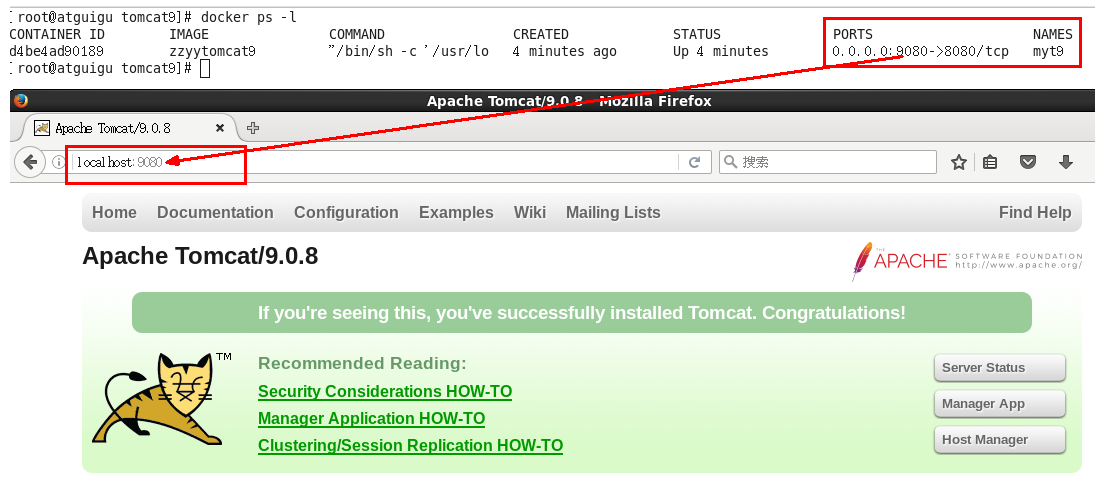
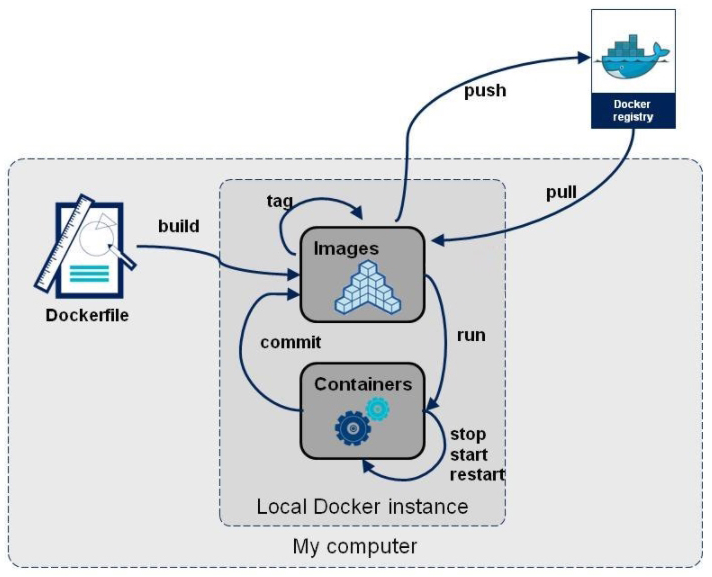
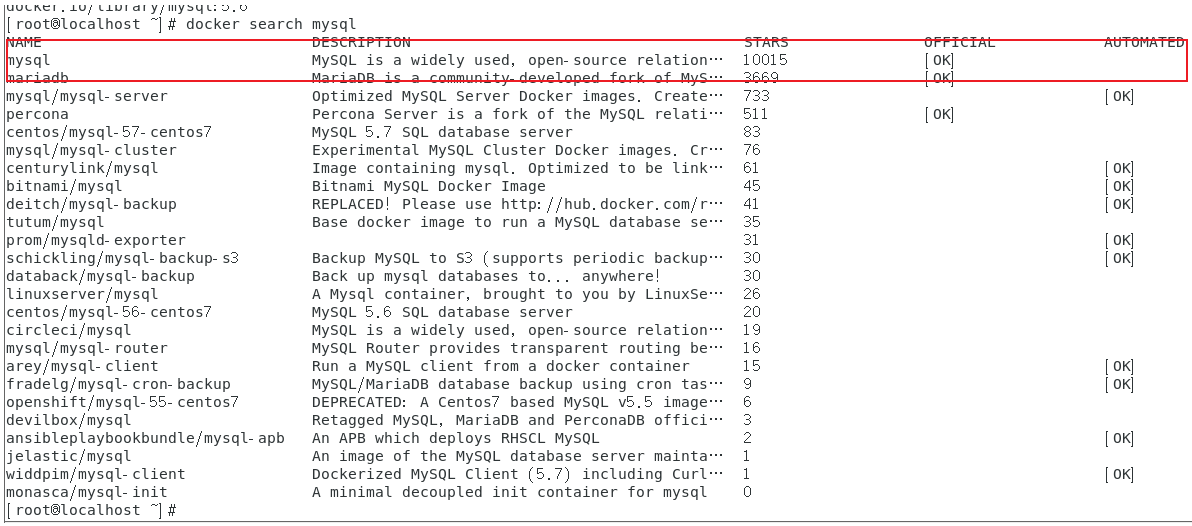

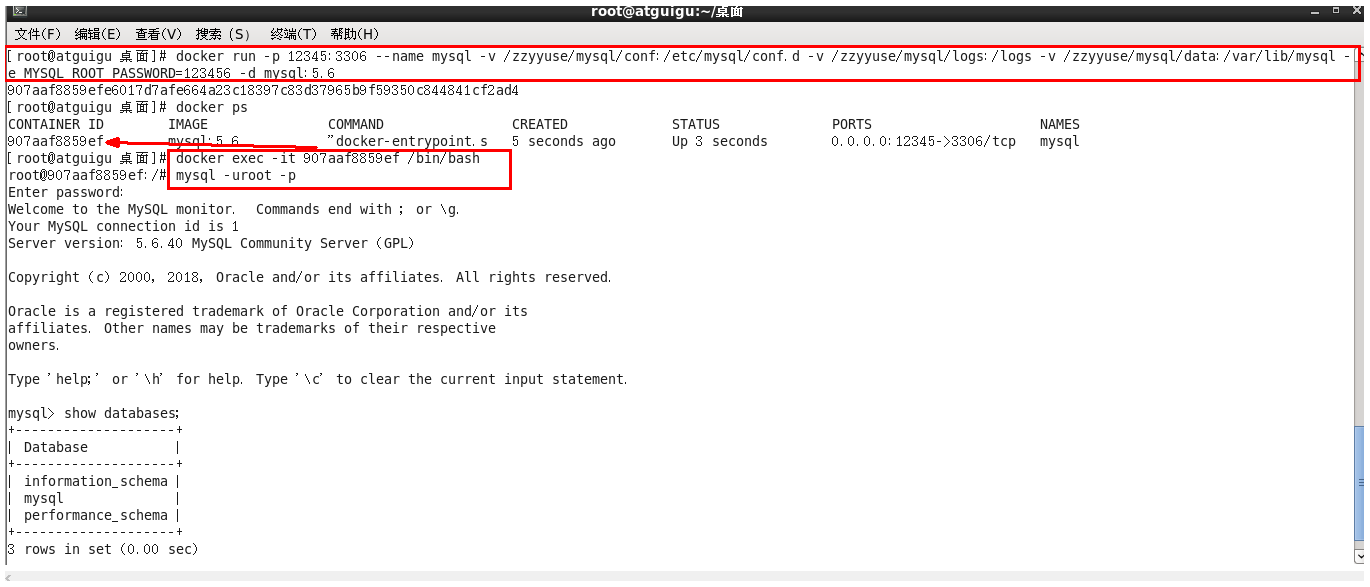
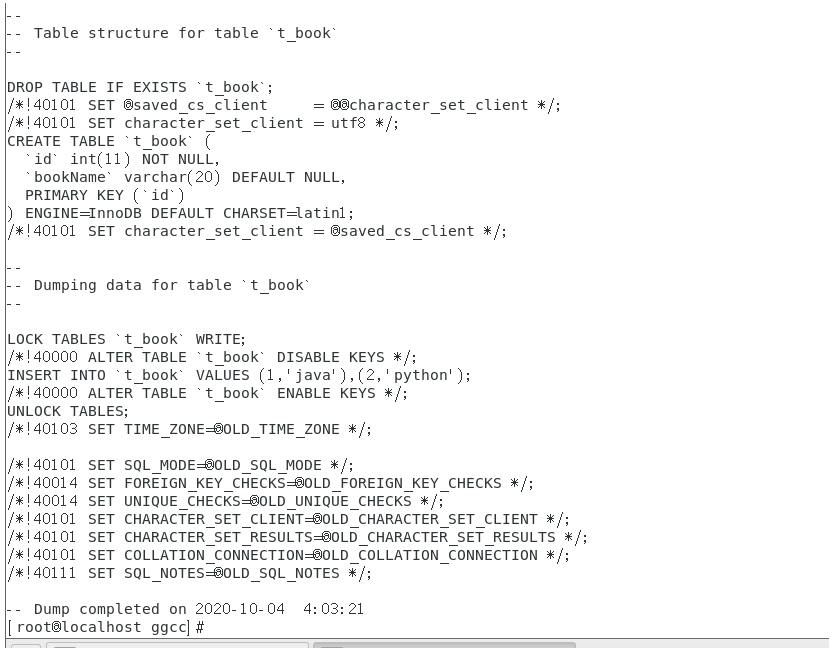

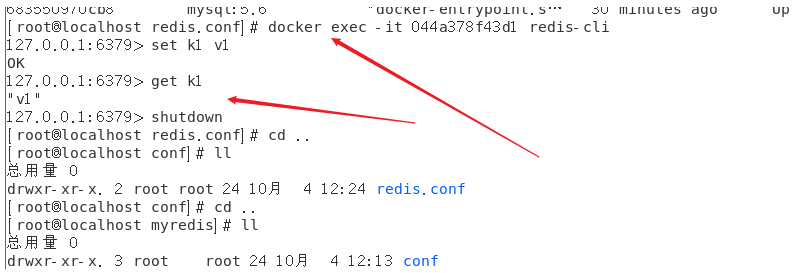
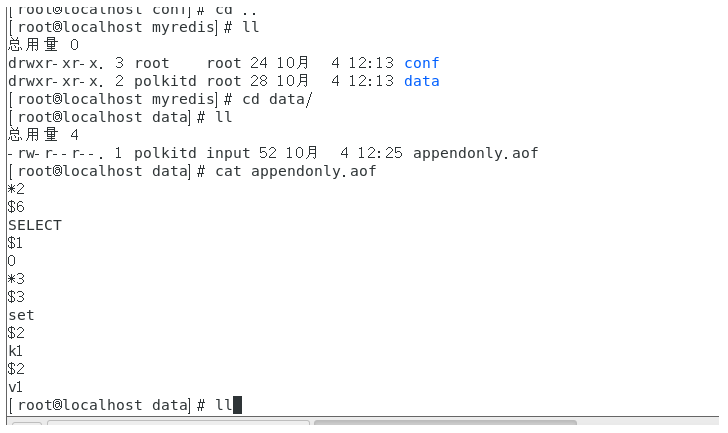
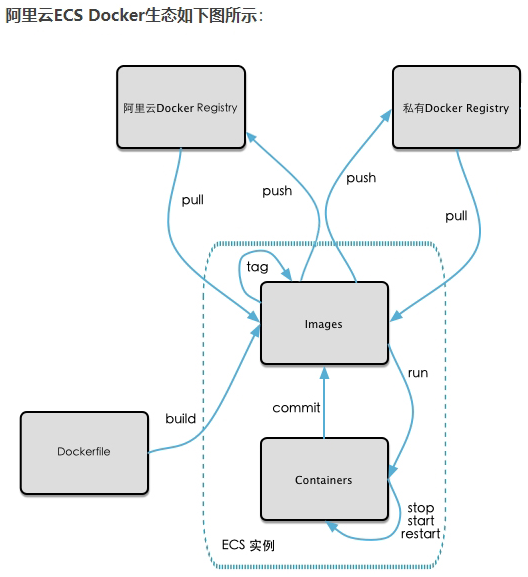

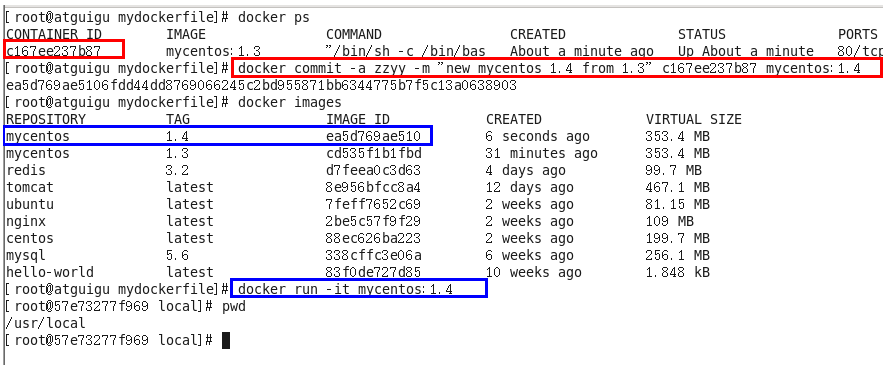

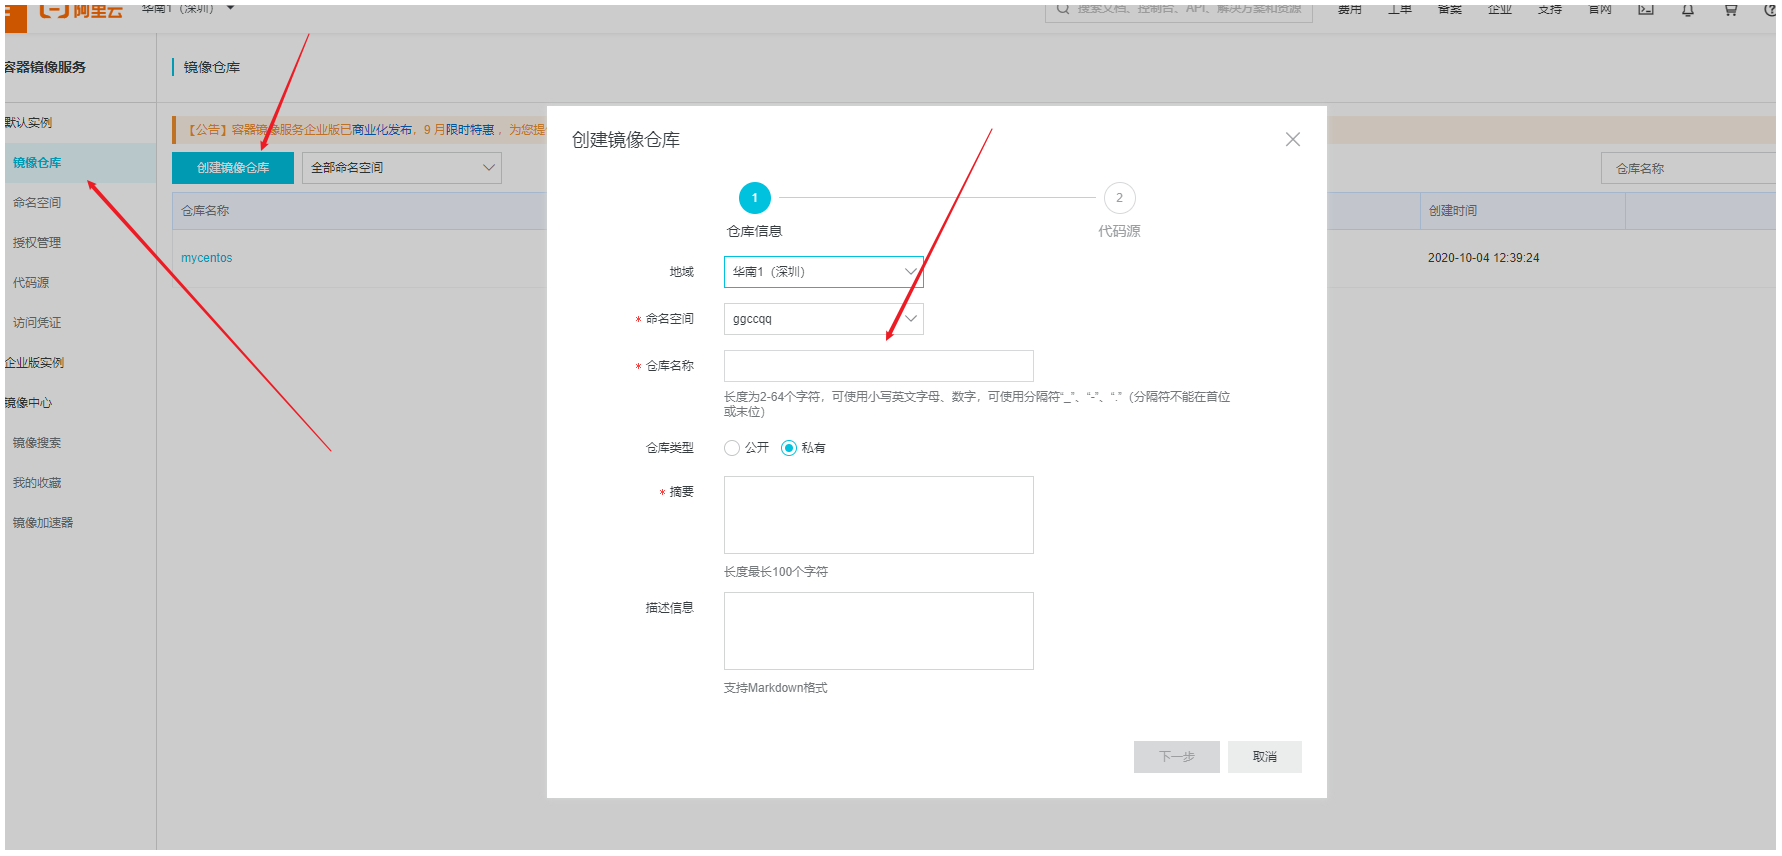
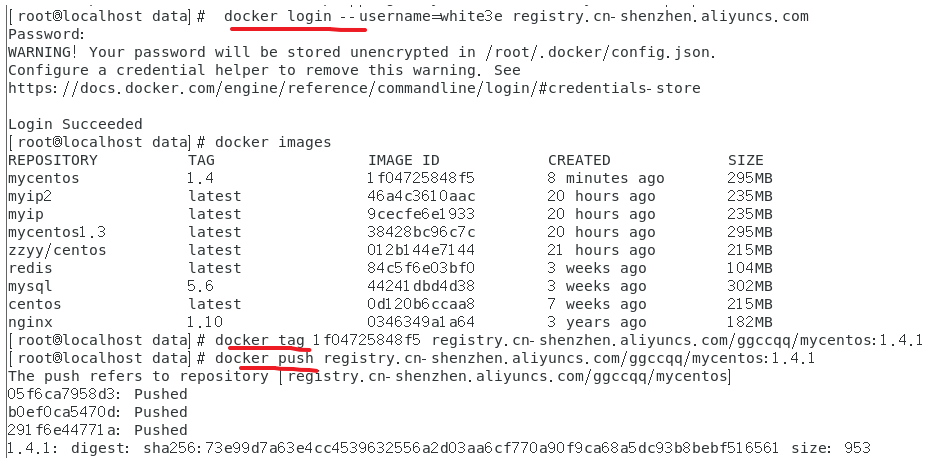

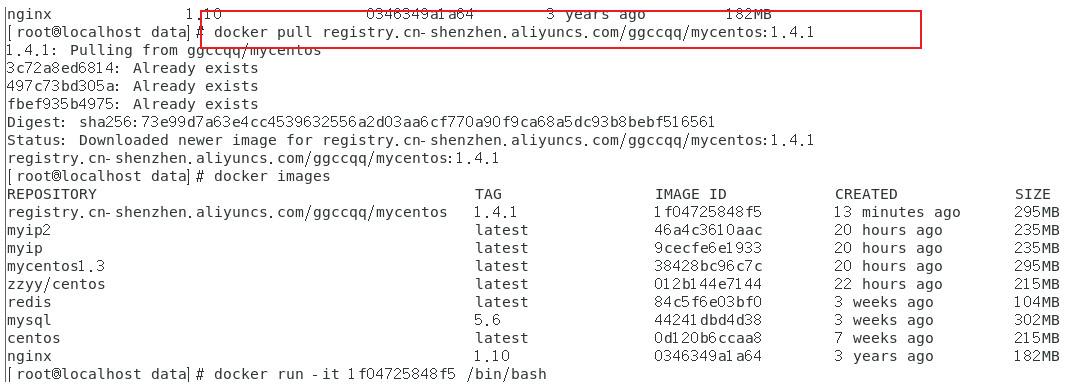
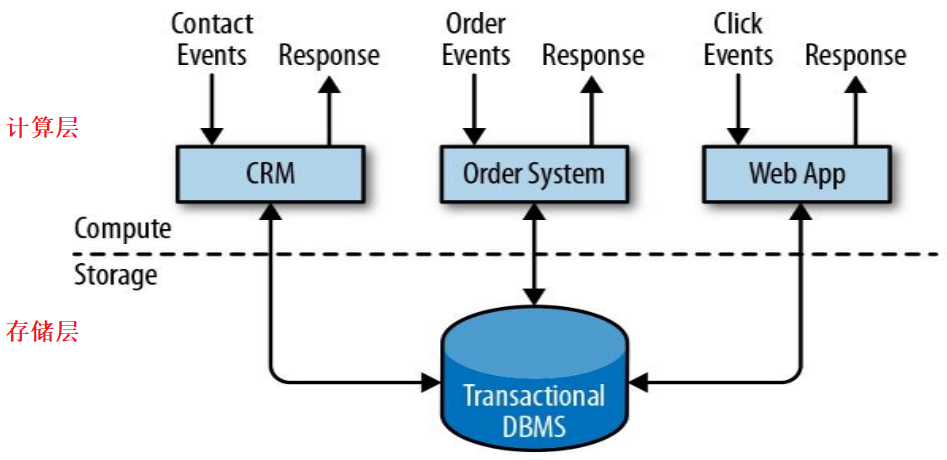
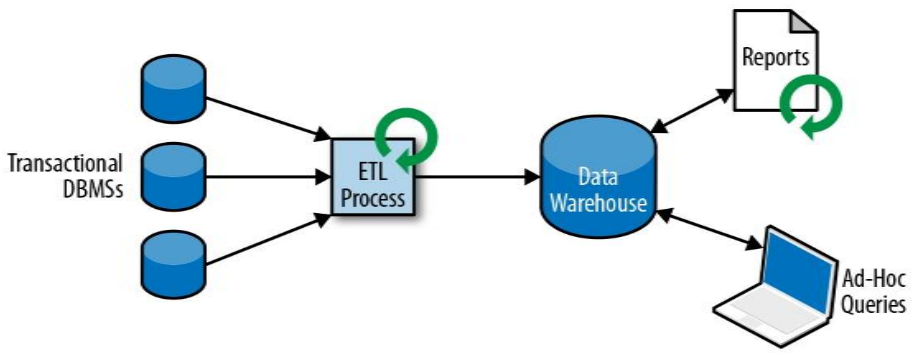
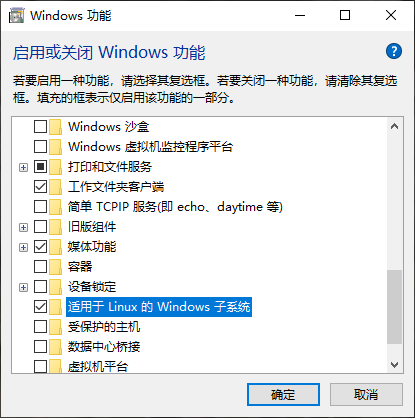

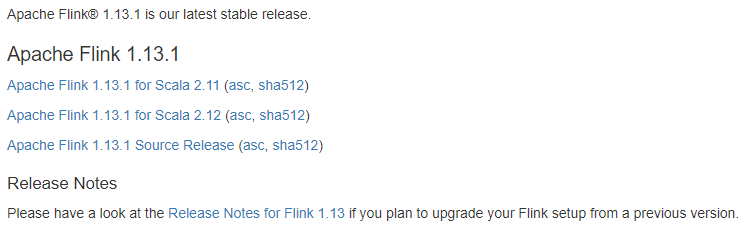
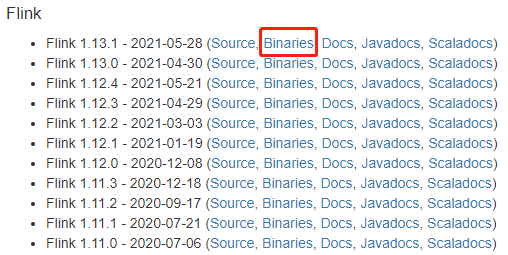
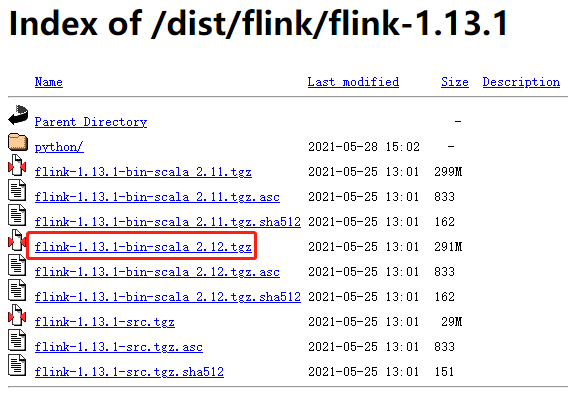


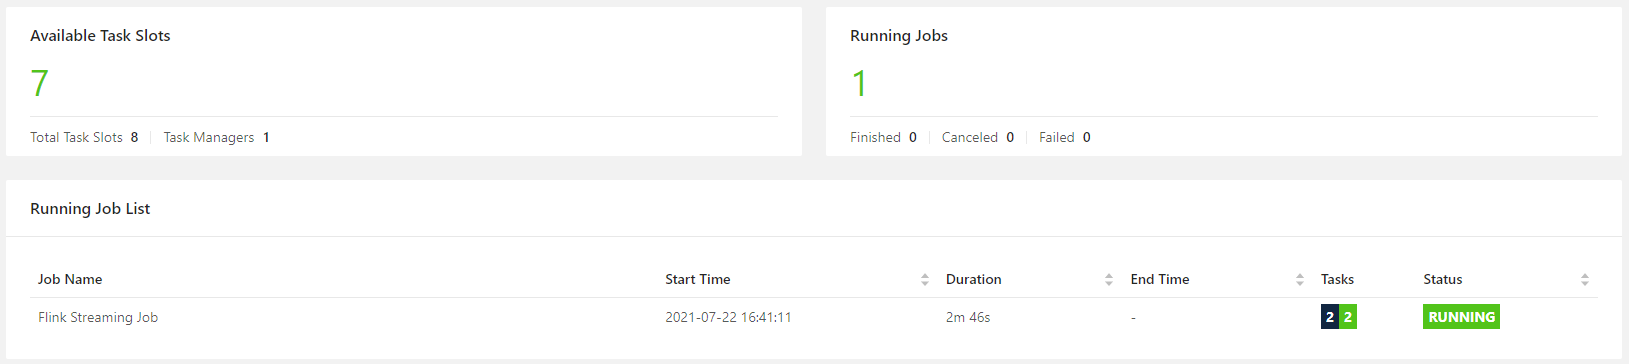
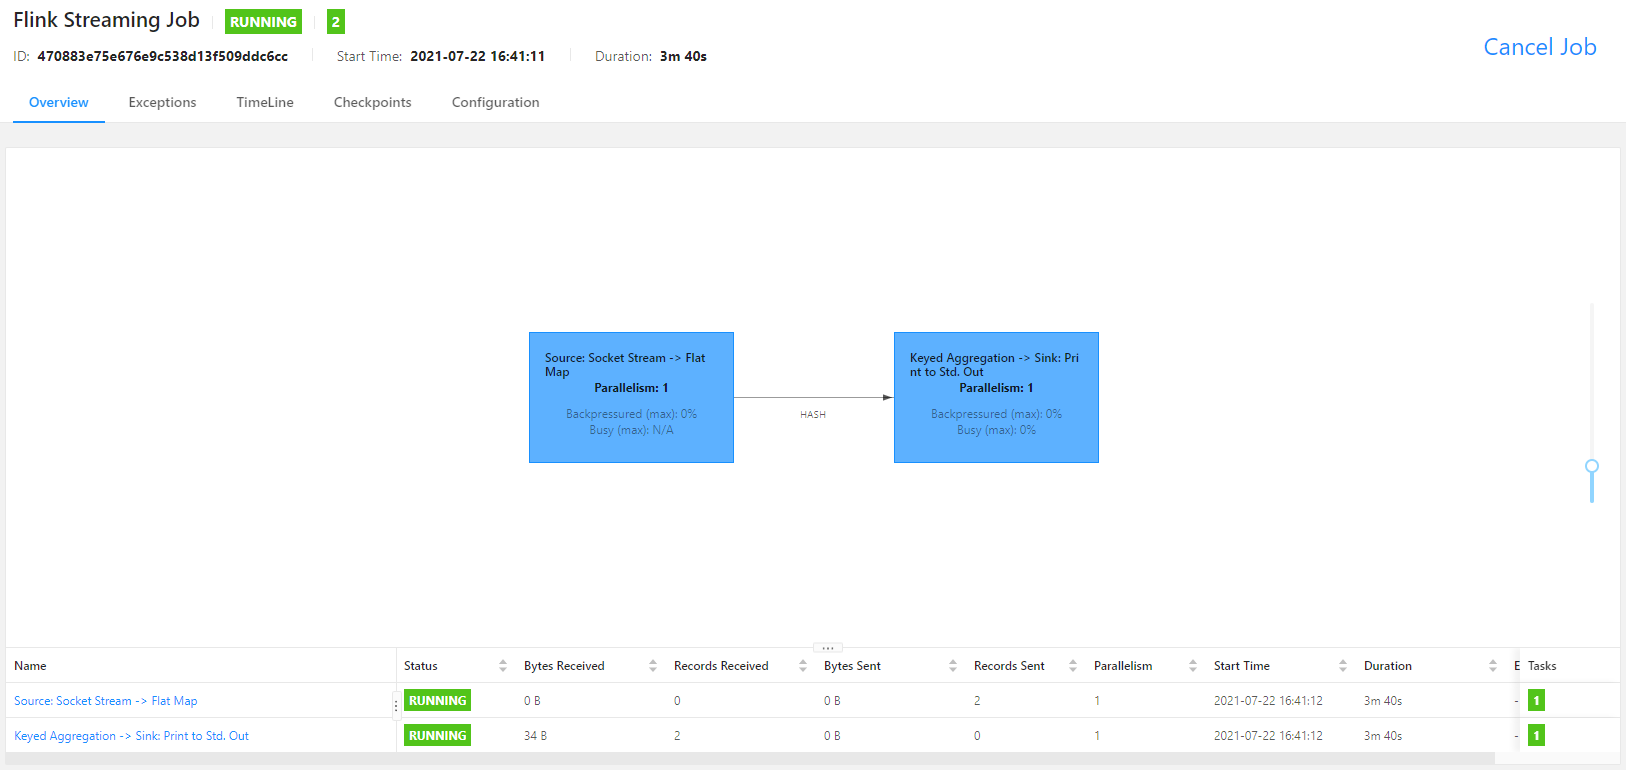


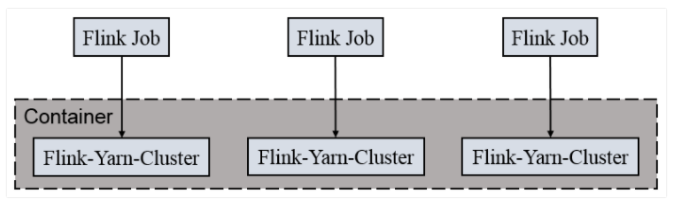
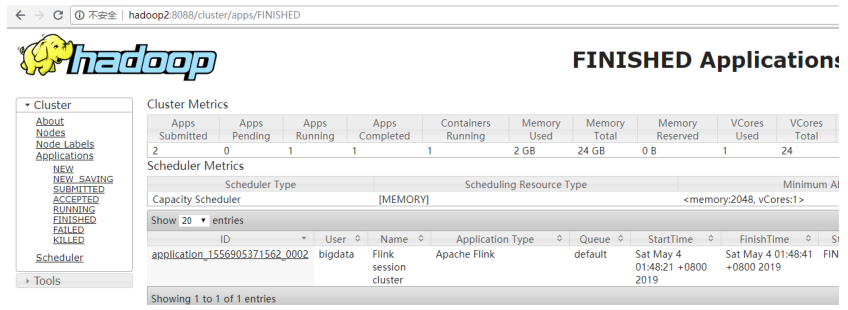
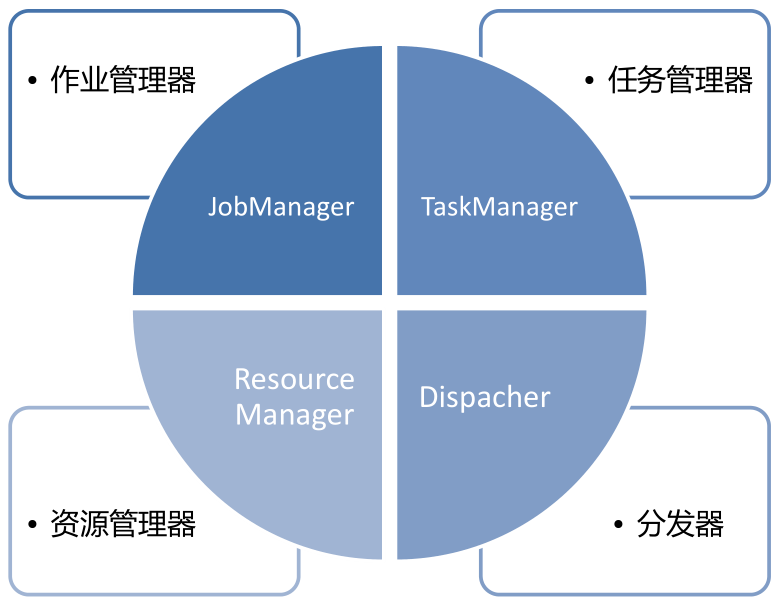
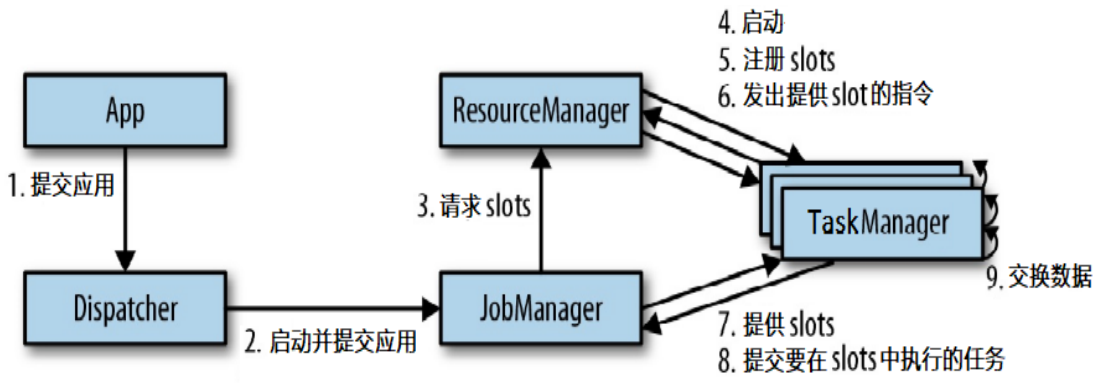
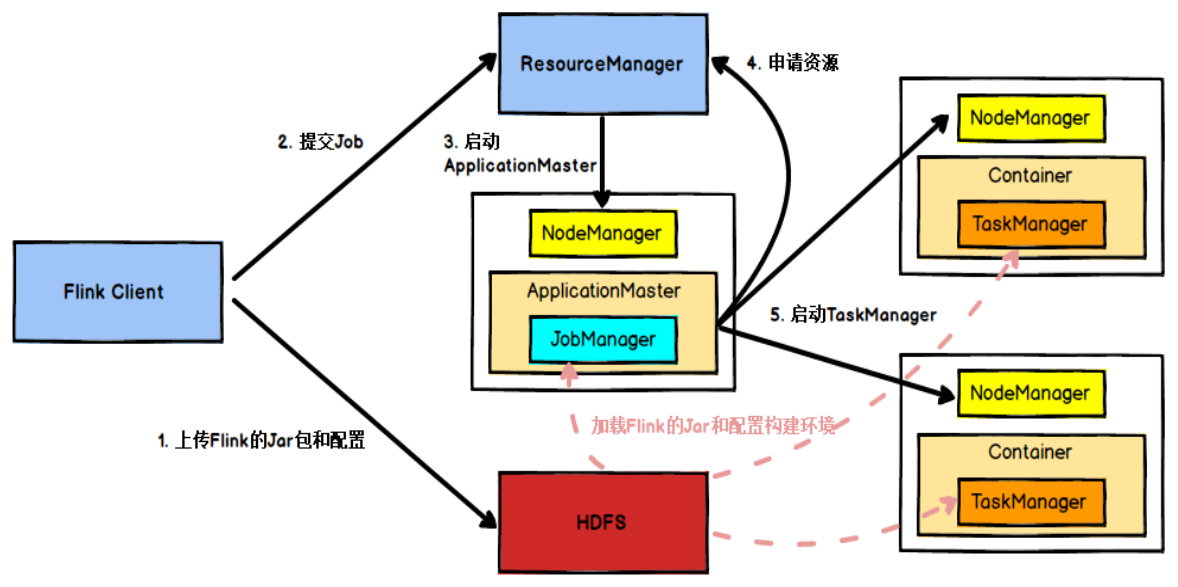 - Flink 任务提交后,Client 向 HDFS 上传 Flink 的 Jar 包和配置。
- 之后,Client 向 Yarn ResourceManager 提交任务,Yarn ResourceManager 分配 Container 资源并通知对应的 NodeManager 启动 ApplicationMaster.
- ApplicationMaster 启动后加载 Flink 的 Jar 包和配置构建环境,然后启动 JobManager,之后,**JobManager 向 Flink 自身的 ResourceManager 申请资源,Flink 自身的 ResourceManager 再向 Yarn 的 ResourceManager 申请资源 (因为是 Yarn 模式,所有资源归 Yarn 的 ResourceManager 管理),**申请到资源后,启动 TaskManager。
- Yarn ResourceManager 分配 Container 资源后 , 由 ApplicationMaster 通知资源所在节点的 NodeManager 启动 TaskManager。
- NodeManager 加载 Flink 的 Jar 包和配置构建环境并启动 TaskManager,TaskManager 启动后向 JobManager 发送心跳包,并等待 JobManager 向其分配任务。
- Flink 任务提交后,Client 向 HDFS 上传 Flink 的 Jar 包和配置。
- 之后,Client 向 Yarn ResourceManager 提交任务,Yarn ResourceManager 分配 Container 资源并通知对应的 NodeManager 启动 ApplicationMaster.
- ApplicationMaster 启动后加载 Flink 的 Jar 包和配置构建环境,然后启动 JobManager,之后,**JobManager 向 Flink 自身的 ResourceManager 申请资源,Flink 自身的 ResourceManager 再向 Yarn 的 ResourceManager 申请资源 (因为是 Yarn 模式,所有资源归 Yarn 的 ResourceManager 管理),**申请到资源后,启动 TaskManager。
- Yarn ResourceManager 分配 Container 资源后 , 由 ApplicationMaster 通知资源所在节点的 NodeManager 启动 TaskManager。
- NodeManager 加载 Flink 的 Jar 包和配置构建环境并启动 TaskManager,TaskManager 启动后向 JobManager 发送心跳包,并等待 JobManager 向其分配任务。